Ever since Joann’s went out of business I see people constantly asking where to buy fabric and notions now. I decided to share the sources I’ve used over the years. I have no affiliation with these places, I’m just giving my honest feedback as a customer. As a home sewer, sourcing materials is a constant challenge (especially if you are price sensitive like I am).
Fabric
Note that most of these places also carry various notions.
Fabric Mart
Fabric Mart has both a retail storefront as well as a robust online shop. I have not been to their retail store at this point.
I discovered Fabric Mart back in 2012. Fabric Mart is responsible for probably 80% of my stash. I’ve gotten some AWESOME deals from them. Things like double napped cotton flannel for $2.50 a yard, silks for under $10 a yard, etc. Fabric descriptions and photos tend to be very accurate, though sometimes I’ve found quirks like rib knit labeled as interlock. But overall they’re good about indicating weight, amount/type of stretch, and fiber content. I also appreciate how they have multiple photos and fairly detailed descriptions about weight and hand so you can get a better sense of drape and the scale of their print fabrics.
In recent years I’ve found their offerings and prices are generally not as good as they used to be. For example, it’s much harder to find 100% cotton sweatshirt fleece now. It tends to be more cotton/poly blends, for the price they used to sell their cotton sweatshirt fleece. In general I’m seeing a LOT more polyester. Their prices are still pretty good, but they don’t blow me away like they used to. The regular priced fabrics are often just as expensive or even more expensive than the more premium fabric stores. The key to shopping here is to have a general idea of what type and yardage of fabric you want and to keep monitoring the sales.
They used to have premium member deals where if you bought a single order over a certain amount (I think $150) you’d be granted premium member status and get access to special deals. They’ve since replaced that with a points system. You can redeem them for coupons which really help with covering the cost of shipping plus a bit more.
Selection
Fabric Mart is a jobber so it’s a wide, eclectic selection. There’s anything from $1 polyesters to $85 cashmere blend coatings. In addition to fabrics they have some interfacing, trims, buttons, zippers, etc. They also have the option of matching thread for whatever fabric you order. There are TONS of sales so make sure you sign up for their email list.
Shipping
Shipping is a flat rate of $10, though sometimes it’s reduced or waived entirely during a sale.
Fashion Fabrics Club
This place has had a reputation as “Fashion Fabrics Casino” for quite a long time. Prices are often very good but the quality can range from amazing to “what did I just buy?!” I find the descriptions vague and aren’t always accurate. Like I ordered a Sherpa fleece late last spring, and what arrived was so different from the description I had to double check my order. But the cotton/lycra jerseys I ordered were great quality! They do allow swatches.
Selection
They’re a jobber like Fabric Mart and similarly they have anything from super cheap polyester to high end wools and silks. However they have a decent selection of reorderable fabrics as well. I’ve been pleased with the quality of their reorderable cotton/lycra jerseys.
Shipping
Shipping is pretty reasonable. Orders over $99 ship free. I found shipping times are all over the place, and my order sometimes comes split in different shipments from different locations. Sometimes I’ve had to wait a couple of days and sometimes it’s been a couple of weeks before my order finally arrived.
Gorgeous Fabrics
Great for midrange and higher end fabrics. She has an outlet section where I’ve gotten some amazing deals. She regularly runs various sales throughout the year (usually during weekends). One thing I love and appreciate is she matches colors in the fabric to Pantone colors and thread colors, so you know exactly what shade of red it is for example (warm vs cool, brightness, etc).
Selection
Plenty of midrange and higher end fabrics. I think they’re entirely the result of regular trips to the NYC Garment District. I’m finding more polyester than I used to, but it tends to be the higher quality kind.
In addition to fabrics she also offers Mettler thread, various elastics and notions, lining, and interfacing. She also started offering wide format pattern printing, though I have not tried it yet.
Shipping
The shipping price often quotes pretty high but I’ve found that when it actually ships it gets reduced. Orders over $200 ship free.
Nature’s Fabrics
This is a great source for quality natural fiber knits. She has a ton of cotton and bamboo rib knit fabrics along with staples such as cotton jersey, cotton/lycra jersey, and bamboo/lycra jersey. I particularly like her cotton/spandex French terry. The sales are not as frequent as they were before tariffs but it’s pretty common for 15% or 20% when they do. I like how they offer a matching service and you can text real time for advice and photos. Fabric weight is usually indicated in GSM. Swatches are usually available for a nominal amount.
Selection
One of the best sources IMO for 100% cotton rib knits. Tons of cotton/lycra as well as bamboo jersey knits. Also lots of bamboo and cotton fleece fabrics along with some wool knits. I would say the selection is pretty consistent.
The PUL fabric selection is awesome. I think they started off specializing in diaper making supply so it makes sense they have such a wide selection of PUL for diaper covers.
She offers wholesale priced bolts of fabric, which are significantly cheaper than by the yard.
Shipping
Shipping is very fast and reasonable.
Apple Annie Fabrics
This is one of the few places I buy from that has a retail store and not just a website. I went to it a long time ago and hope to go again! I haven’t bought from here lately simply because her fabrics were more suitable when I was working in an office, not so much now that I’m at home taking care of my family all day.
Selection
Very similar to Gorgeous Fabrics and Sawyer Brook. You’re going to find good quality stuff here. She runs sales every so often, and that’s when I’ve made most of my purchases. Lots of batiks, linen, cottons, wools and silks, along with some polyesters and novelty fabrics. You will find some pretty amazing deals in the Clearance Corner of the website.
Shipping
Shipping was reasonable and on par what a smaller shop would be.
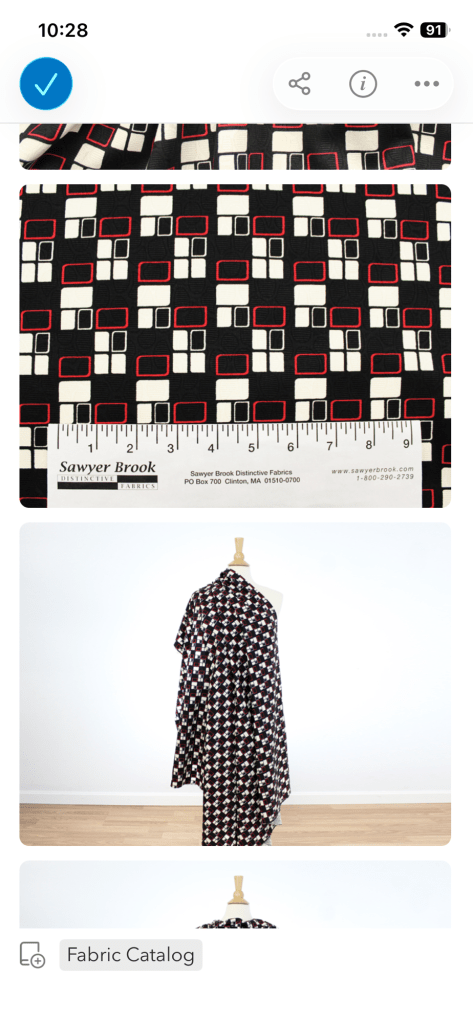
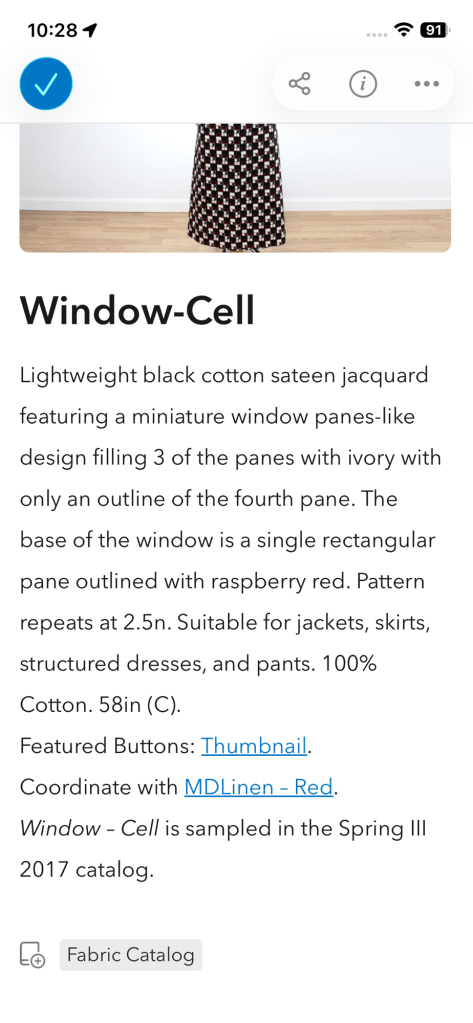
Sawyer Brook
Anytime I bought from Sawyer Brook I’ve never been disappointed. I would say they’re very similar to Apple Annie Fabrics in what they sell. I just haven’t bought from them recently because most of their fabrics aren’t what my current lifestyle demands.
Selection
I would say they’re on the same level as Gorgeous Fabrics. Mostly midrange to high end fabrics, though not quite as competitive pricing as Gorgeous Fabrics. Everything I’ve purchased from them has been really good quality.
They have a swatch club, and when I’ve ordered in the past I’ve gotten the most recent swatch newsletter included with my order.
I know before changing ownership Sawyer Brook used to carry interfacing and various other notions along with the most fantastic buttons, but I don’t see that on their website anymore. They also had a retail storefront but again, I don’t see any information about that anymore.
Shipping
Their shipping rates are ok. Not as insane as some of the outdoor fabric places, but they end up being a decent percentage of your order.
The Green Pepper
This is an awesome source for outdoor/outerwear fabrics. She recently purchased The Rain Shed so some of her recently inventory is a result of that acquisition.
Selection
She doesn’t have a huge inventory but you’re find Cordura, Ultrex, Supplex, etc in basic colors as well as some speciality notions for outerwear and gear making. I always check here first because the prices are often more reasonable than other sources, especially during a sale. Customer service is also very responsive.
The Green Pepper also has their own line of sewing patterns in both print and PDF formats.
Shipping
Shipping is fast and reasonable. The places that specialize in outdoor stuff often have absolutely insane shipping costs and I’m pleased to report that The Green Pepper does not.
I haven’t done a ton of orders through them, but the ones I’ve done I’ve been very pleased with the quality. Every so often they have good sales and that’s when I dive in.
Ripstop By the Roll
I ordered from this place late last year. This is a newer shop that specializes in outdoor and technical fabrics and materials. I oddly find their website difficult to navigate, so I use the search bar more often than not. They have a very active social media presence and do lots of videos and newsletters. I get the sense that they are trying to appeal to men and not so much women, which is unusual for a sewing materials website.
They don’t have a ton of ongoing sales, but I think they generally do one big one in the fall (which is when I placed my first order last year).
Selection
Lots and lots, if you’re looking for outdoor stuff. They have down if you’re looking to make a down coat or sleeping bag, different insulations, and all sorts of technical fabrics (Supplex, Cordura, etc). Lots of brand name stuff. All sorts of special notions as well. I find their prices are average. It helps to order during their sale.
They also offer custom cutting services and wholesale fabrics.
Shipping
Their shipping cost is about average. If you want you can request your fabric be shipped on a roll instead of cut and folded, though obviously you do pay more for this.
Rockywoods Fabrics
Another outdoor/technical fabric supplier. I ordered from them quite a while ago.
Selection
They have more than The Green Pepper but probably less than Ripstop by the Roll.
Shipping
Their shipping can be very high. I never went through with an order last year because for a $120 order the shipping was going to be something like $50, and I just couldn’t go through with it.
Notions
Wawak
This is like the Costco of the sewing world. They tend to sell in large quantities, though many things are available by the yard. They produce a catalog, and I recommend requesting it if you’re new to Wawak as its easier to navigate than their website. I found Wawak over ten years ago and was able to use them to replace most of my purchases at Joann’s.
Selection
TONS. This is where I buy nearly all my thread, and have for many years. They have a Gutermann real thread chart which is super convenient for matching thread at home. Gutermann Mara 100 is basically the Gutermann Sew-All thread that Joann’s used to sell. Gutermann Mara 120 and 150 are lighter weight. Mara 70 is a heavier weight thread suitable for topstitching and heavier fabrics, perfect for projects on the Juki TL series machines. Gutermann Mara 30 is a thick thread that’s best reserved for those with compound walking foot industrial machines.
For zippers there’s the YKK color card. There’s also a ton of interfacing for both garment construction and crafts/bag making, needles for both machines and hand sewing, and basic buttons for shirts and blazers. There’s also every width and type of elastic along with grommets, rivets, boning, etc.
In addition to sewing notions they also sell industrial presser feet, which is useful for those with the Juki TL series.
Shipping
Shipping is a very reasonable $5.95 if the order is under $99, and free if over $99. Orders under $35 are given less priority. This is why I usually try to wait until I have at least $35 in my cart before placing an order.
Bias Bespoke
NYC based tailoring supplier that’s like a more modest Wawak, though they tend to have more specialty items. They do offer local pickup as well as online ordering. My main interest in Bias Bespoke was to try to find a new supplier for interfacing ever since Fashion Sewing Supply disappeared. Bias Bespoke does offer good quality interfacings at reasonable prices and has a fusible interfacing sample sheet available. (For some reason they call it interlining.) I recommend taking your time to go through the website as there’s a lot of unusual items, and not all of it is easy to find.
Selection
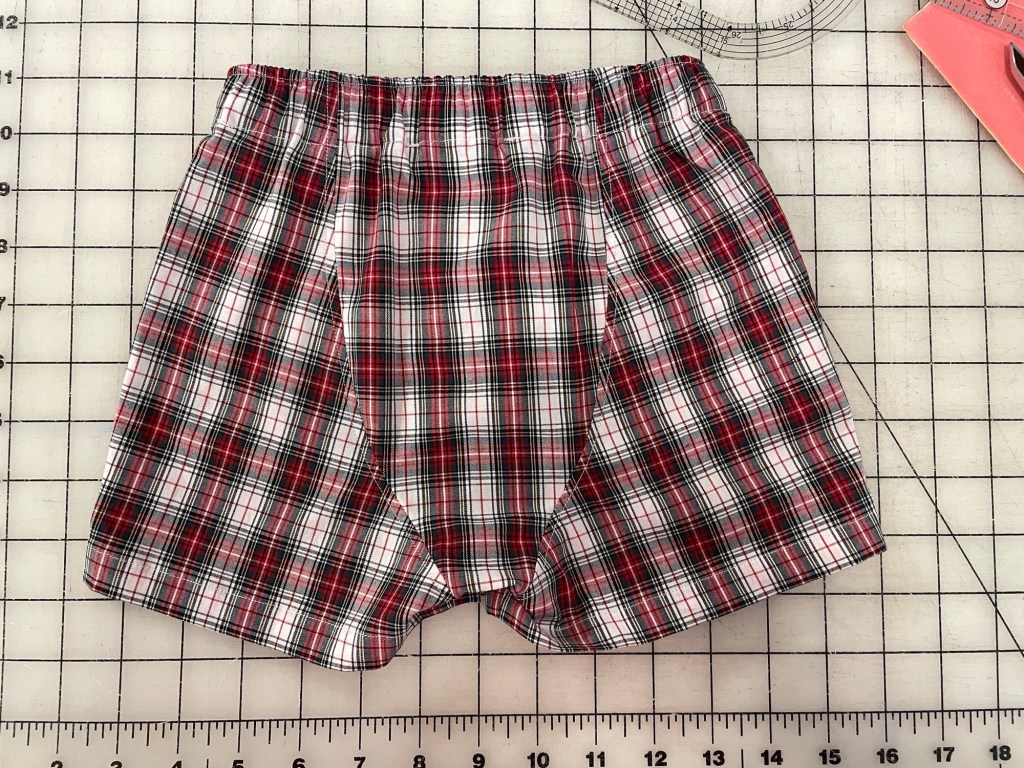
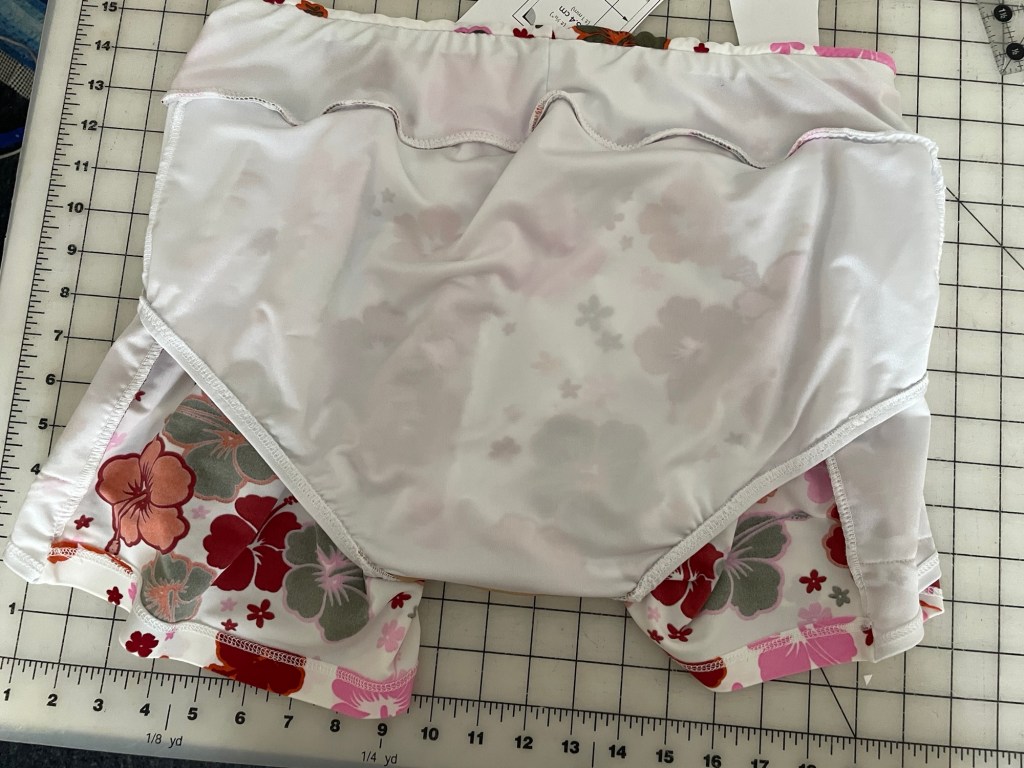
As I mentioned above, they have a good selection of interfacings. I recommend getting the sample packs. They also have great quality waistband elastic for men’s underwear as well as tons of buttons and all sorts of little haberdashery for tailoring and garment sewing.
Shipping
Their shipping was fast and reasonably priced.
Amazon
The retail giant we all love to hate! I tend to look here first when I need something quickly due to the free Prime shipping, and many of the items arrive next day.
Selection
Anything you can imagine. I’ve found quite a few shops with their own website also have an Amazon storefront with a more curated list of items. I found the Mandala Crafts store has decent quality elastic, though you do have to buy it in fairly large quantities. I’ve also gotten some nice buttons on Amazon as well as specialty things like the clear plastic ends for making drawstrings.
Shipping
All over the place. Many items are free overnight shipping with Prime, some are 2-3 day shipping, and some are free but take a while. A few charge shipping. I like the fact that its free and easy returns if it turns out to be disappointing or not what you’ve expected.
The Sewing Place
Selection
They have all sorts of nice little notions, but the main thing I order from them are the Design Plus stay tapes. These tapes are awesome for stabilizing shoulder seams, necklines, or holding pockets or double folded hems in place.
Shipping
I find it best to try to make the $50 minimum for free shipping.
Patterns
I have no patience for the current AI drafting trend in patterns (or AI in general), so I am very picky and tend to stick to just a few select tried and true pattern designers.
Jalie
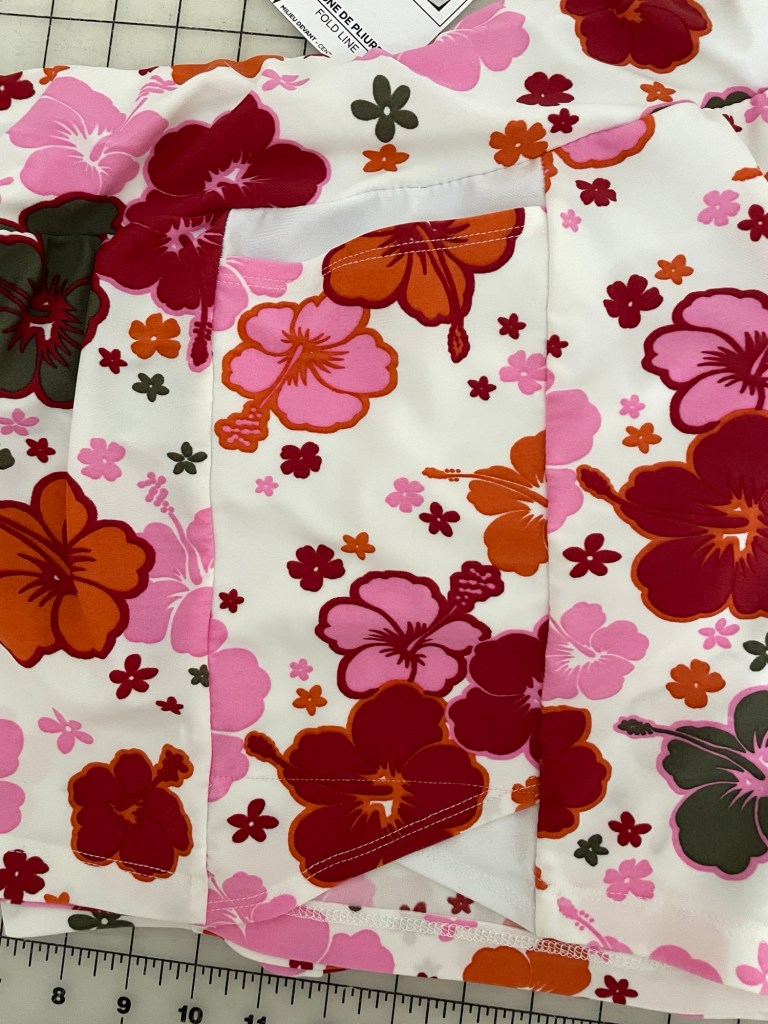
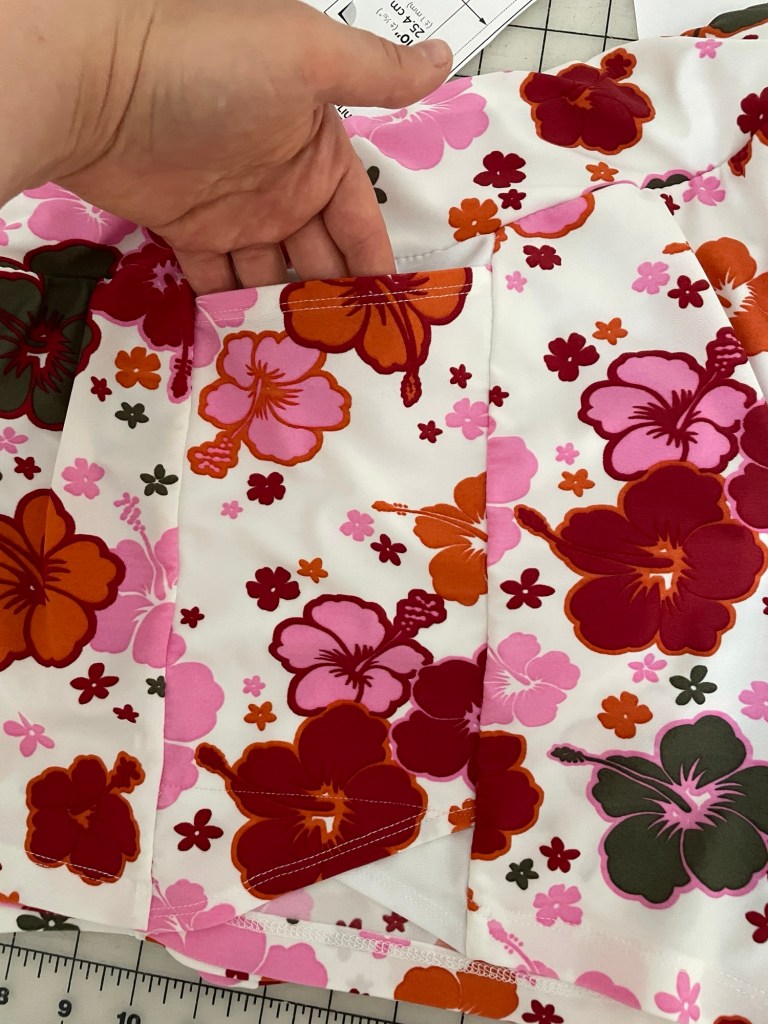
I sew with a LOT of Jalie patterns now. I am a married mother and sew for my toddler son and occasionally my husband as well as myself. Jalie patterns are great because they come in an enormous size range (generally 2T all the way to 2X and beyond), and the styles are often unisex so they’re suitable for my whole family. In my opinion they are the king of everyday basics. There’s everything from pants and tshirts and underwear to activewear and outerwear, along with a few bag and accessory patterns.
I have found that recent Jalie patterns have much better instructions than the older patterns. They also added a lot of video tutorials which make construction even easier. They’ve been around a long time (I think they started in the 1980s). One thing I really like is they are very specific about types of fabric. They won’t just say stretchy knits, they will say for example a knit with 50% stretch minimum in all four directions, lightweight woven fabrics, denim with 15% stretch, etc. It really helps with getting a reliable result. I’ve found that while I may be a different Jalie size in newer vs older patterns (the older ones tend to not have such a wide size range), the drafting is pretty consistent and I make the same alterations.
Jalie patterns are available as PDFs. Newer and very popular patterns are usually still available on heavyweight paper. There’s a discount if you buy both the PDF and paper pattern, so that’s what I usually end up getting. I try to wait until sales or at least until I get the $75 minimum for free shipping, because otherwise shipping to the US adds quite a bit.
Customer support is very good. I emailed them with some questions before and they got right back to me.
Burda Style
I’ve been subscribing to Burda since September 2006, with a short break for a few years between now and then. It is one of the more fashion forward pattern companies out there. The magazine used to have more complex styles, with children’s patterns and crafts as well as plus size designs in every issue, with the occasional menswear patterns. They had everything from basic knit pants and jeans to wedding dresses. (In fact my own wedding dress was from Burda Style.) Styles ranged from simple to expert level. When I first started subscribing the pattern sheets weren’t the complicated road maps they are now.
I still subscribe to Burda, but every year I have to think about it. Its just not the same quality product as before. They often resurrect old styles (calling them “Best Of”) and now that I finally have a child, they have completely gotten rid of the children’s size patterns that used to be in every issue. (Good thing I have a ton of back issues.) The price has also gotten significantly more expensive. When I started subscribing I think it was around $86 for 12 issues. Now it is $190 for 12 issues, with less styles than they used to have. I really enjoy looking through it every month, but I don’t sew from it nearly as much as I used to because of the limited size range (my bottom half is in the plus size range now and their plus size patterns are much more limited) and the fact that many of the styles don’t suit my age nor my lifestyle anymore.
Style Arc
An Australian pattern company that’s been around for around 15 years or so. Their strength was (and still is) a RTW fit along with being on the cutting edge of fashion. I used to sew a TON of Style Arc patterns, but not so much in recent years. For a while the patterns just weren’t as appealing to me (they seemed to be too shapeless and oversized), but I think a lot of that was also due to the trends at the time. They’ve really grown as a company, from shipping their hand drawn single size patterns directly from Australia to offering projector and PDFs as well as printed multisize patterns through Amazon as well as through their own website.
In recent years they have gotten MUCH better about pattern instructions/tutorials. They also started offering children’s patterns. They used to offer fabrics like the much-elusive viscose/nylon/lycra stretch bengaline, but now they’re doing just patterns.
I’ve found their customer support very responsive.
Ottobre
Ottobre is a Finnish pattern company. They produce styles that are often basic yet have unusual or thoughtful details. They’re great for cold weather styles. I’ve found the drafting consistent and in a wide size range (women’s 34-52). I really liked how Ottobre used average everyday people instead of professional models to model their designs.
Unfortunately I can’t really recommend them anymore, as they haven’t offered shipping to the United States for almost a year now, and their “vacation” appears to be permanent thing now (their last issue was published in 2024). If you’re in the United States your best best is hunting on Etsy for back issues.
I don’t recommend them if you aren’t an experienced sewer, as the instructions can be rather cryptic and a lot of the styles have details that require more advanced sewing skills.
The Green Pepper
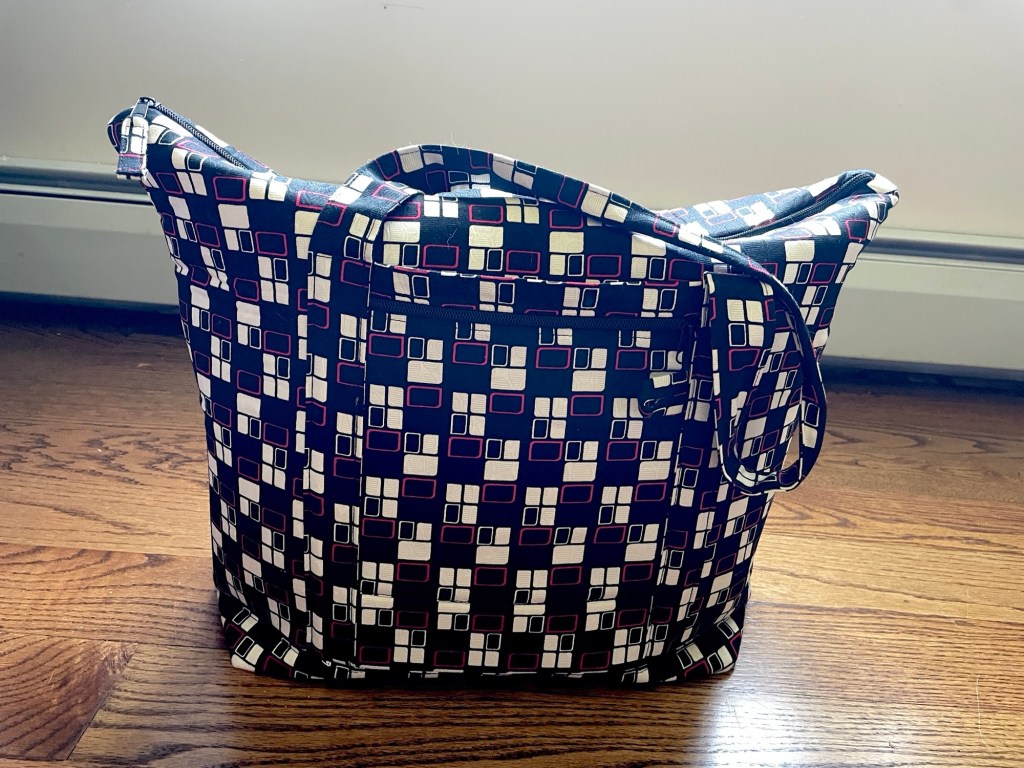
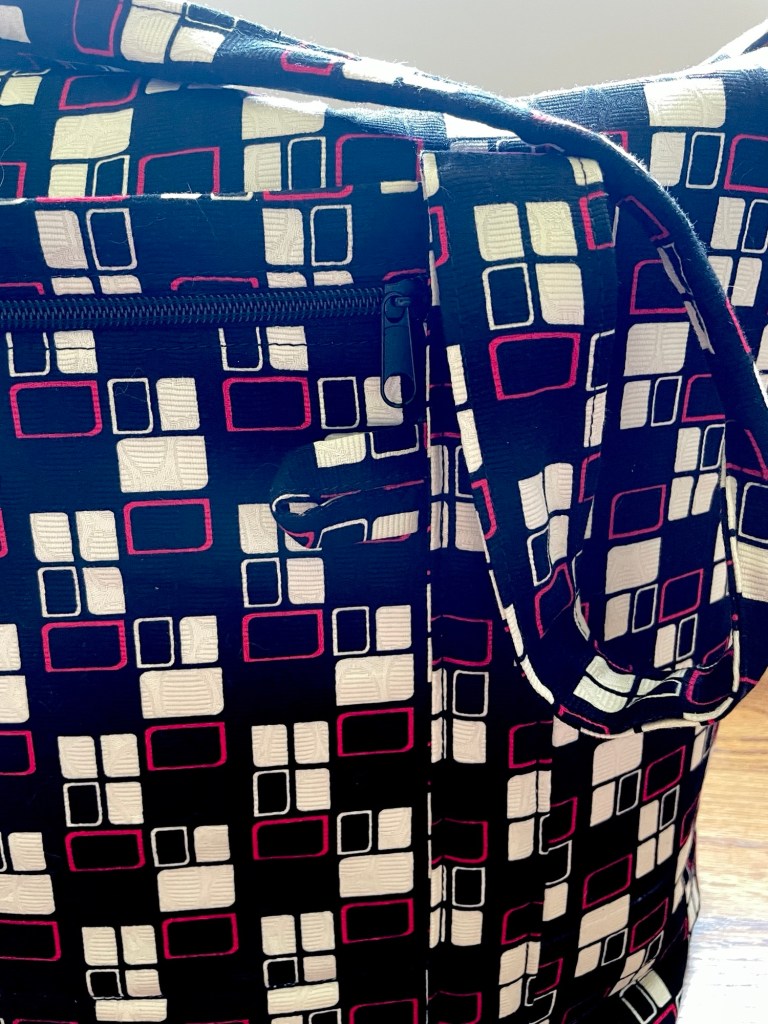
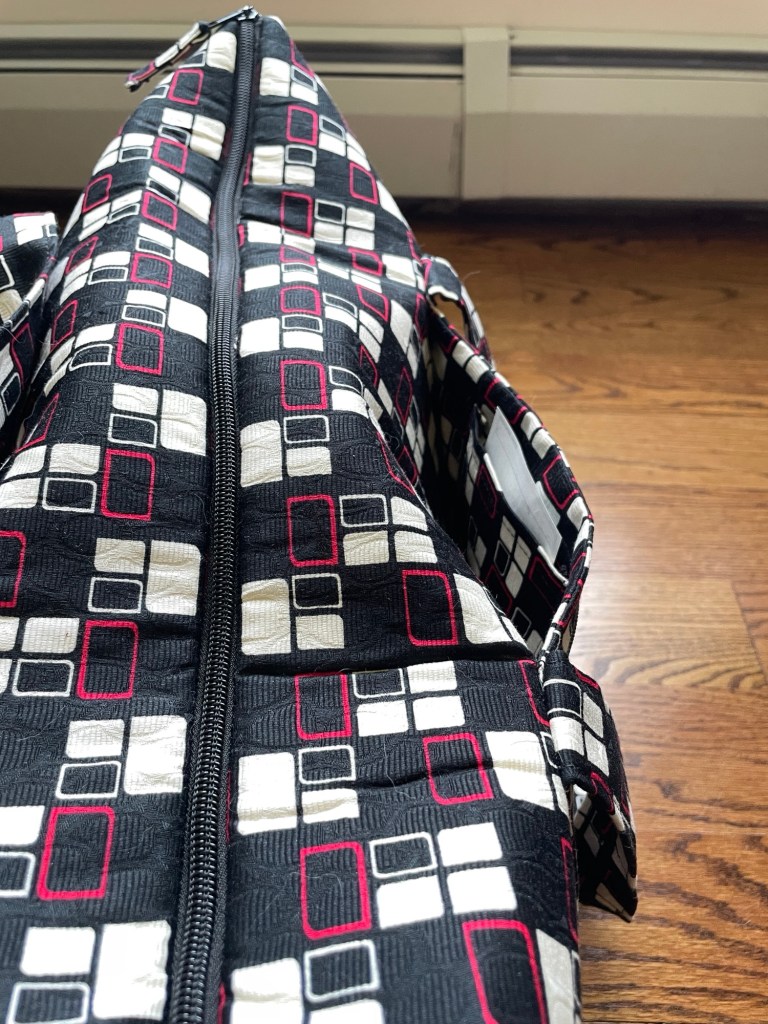
Lots of outerwear/activewear garments as well as bags/packs. They’re very reasonably priced and more and more are available as PDFs. They also have a great dog coat pattern, which I made with canvas and lined with fleece for my parents’ Great Dane years ago.
Sizes for most of the garments start from 4T, which is unfortunately still too large for my son.
Instructions are pretty good. I haven’t made a ton of these yet, but the ones I did make I didn’t have much trouble following.