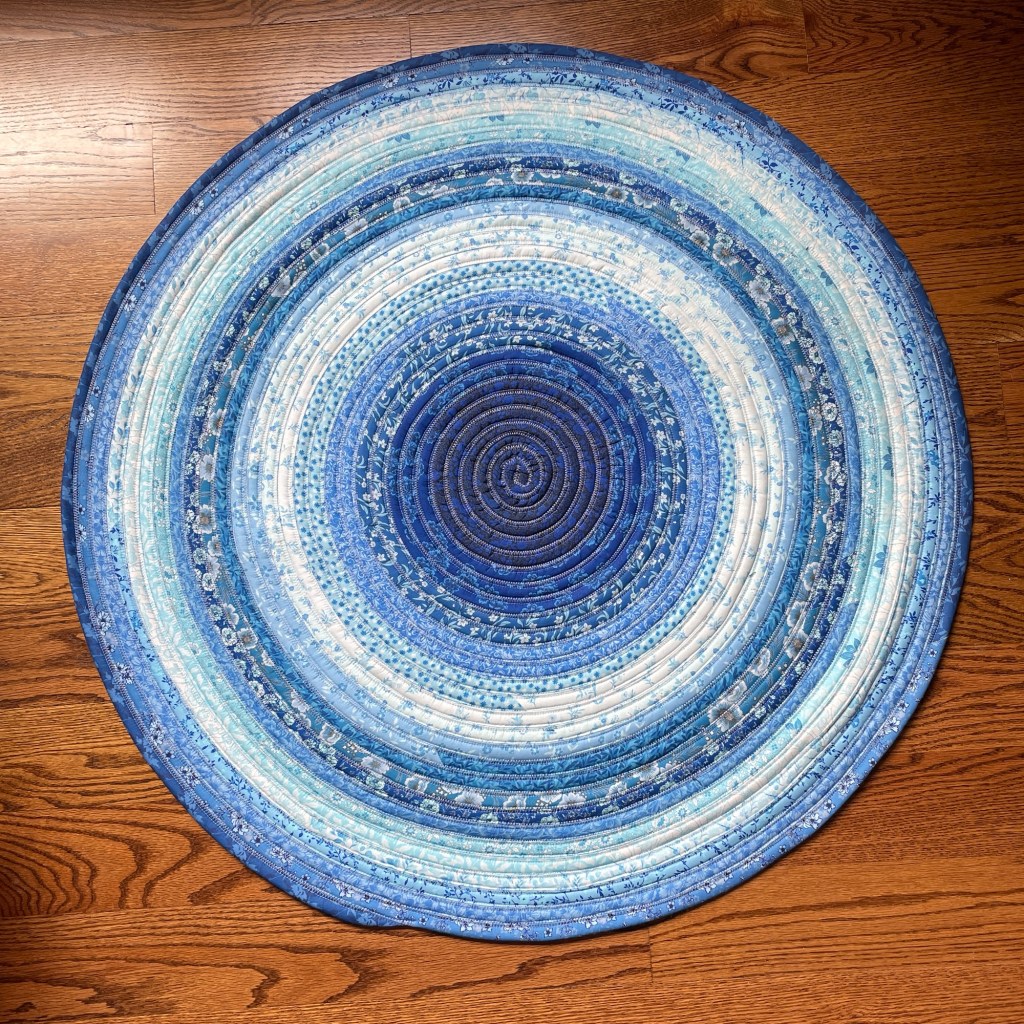
First Jelly Roll Rug

Something totally different for me. I happened to see videos of people making them on Facebook and decided to try it for myself. I wanted something to go under my recliner so that’s why I chose to make a circular one.

Materials

I used Craftido’s Timeless Blue jelly roll. One jelly roll made a circular quilt about 3 feet wide.

For the batting I used HexaHive 2 1/2” jelly roll batting. I used an entire roll and then some of a second roll.

The thread was Gutermann Mara 100, one of the big spools from Wawak. I can’t believe how much thread jelly roll rugs require! I changed my bobbin at least twice on my Juki when I was sewing the strips and batting together and 4-5 times on my Janome when sewing the rug.

Construction

I found this YouTube video very helpful for getting started. She gets to the point and moves along unlike so many others that just talk talk talk.

I constructed the strips on my Juki TL-2010Q with the help of the Clover fabric tube maker. I found the big piece of the fabric tube maker really helpful but struggled getting the edges even with the smaller one. I would consider not using the smaller section next time.

I sewed the strips together on my Janome 6500P using a 6mm width and 1.5mm length and 100/16 jeans needle. Many people use a walking foot but I found it wasn’t necessary. My machine had no issues feeding the fabric despite going at top speed sometimes.

By far the hardest part was getting the middle started. I had to try a few times and what worked was just standing there with my iron working it in a circle at the ironing board. It still looks a bit rough to my eye but I guess it’s a good first attempt. You can see how my stitching improved more as the project went on and I got the feel for what to do.

At a certain point I realized I really needed an extension table in order to continuing making the rug. I technically have an extension table for this machine but some of the legs broke on it years ago, and I have no idea what happened to the remaining ones after we bought our house a few years ago. I ended up propping up the table with a bunch of books and magazines on the larger end, and cut a couple of pieces from a sturdy cardboard tube for the section that wraps around the machine. It is not a long term solution for sure but it got me through this project.

There is a bit of curling around the outermost edges. I admit I was rushing the final few laps because I was almost done and my toddler needed to be fed lunch. I should have done this at my dining room table because the table I was working at in my sewing room isn’t super wide and in the final stages of the project it started hitting the wall. I also should have stopped and pressed more like I did in the beginning, and been a bit more aggressive about easing in the strip being sewn in to the rest of the rug like I was earlier on.

Conclusion

When I started on this project last night I was like what have I done?? It seemed like the sewing would never end, and my wrist is a bit sore from manipulating the fabric round and round into the circle. I also struggled a LOT getting the circle started. But on the other hand as time went on I almost felt like the constant sewing was rather soothing. I also like the practicality of being able to make whatever size, shape, and color rug I want in the future.
Jalie 3243: Pull-on Pants

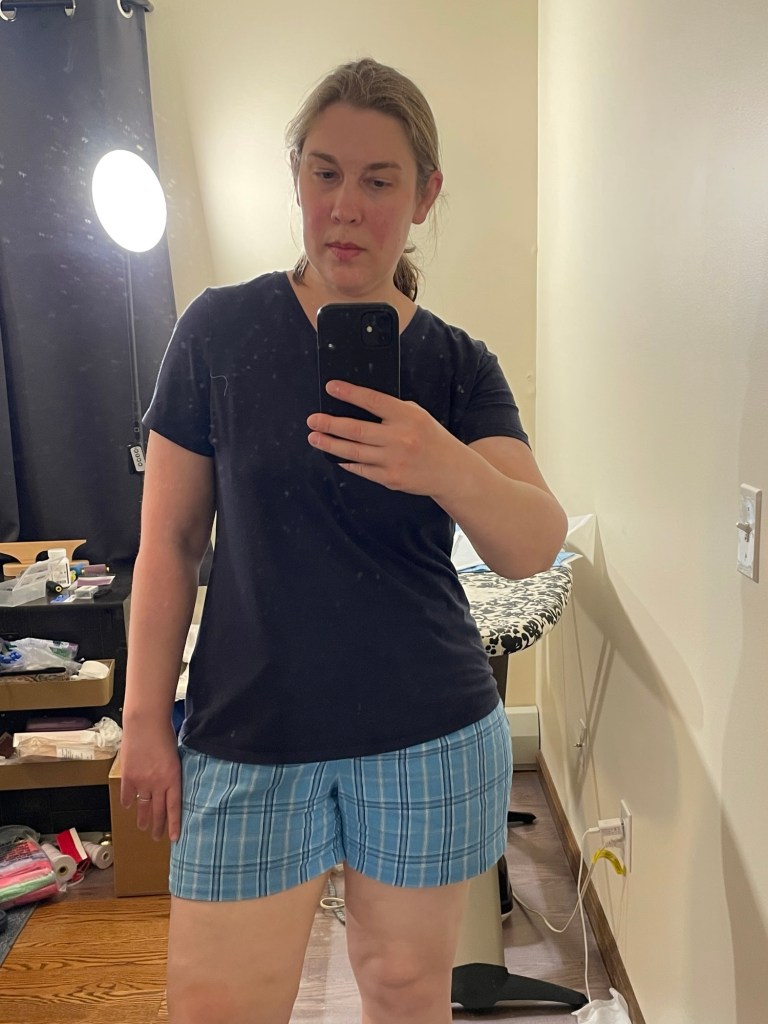
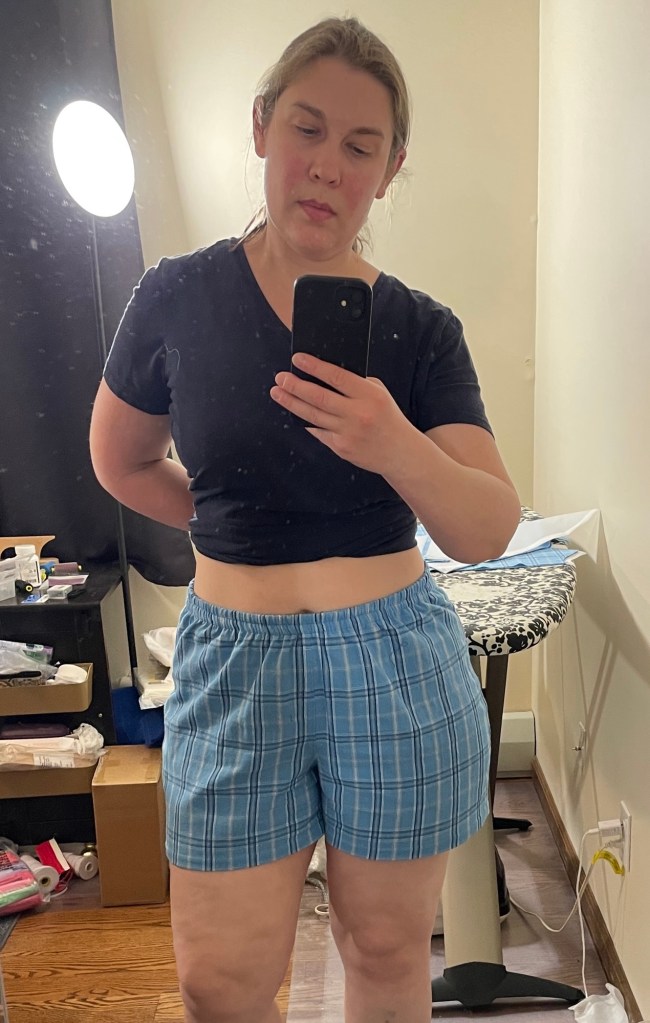
This was a very quick and easy Friday night project. I’ve been trying to get ahead of a summer wardrobe and needed some lightweight pajama shorts.

Pattern Background

Jalie 3243 pull-on pants and shorts have front patch hip pockets, an elastic waistband, and the option of having either the waistband facing showing on the front (nice if you want to do a contrasting color) or hidden inside. This pattern is drafted for wovens.

Sizes go from 2T all the way up to women’s size 22. As is often the case with Jalie, I chose this pattern because the wide size range and classic styling mean I can use it for my toddler son as he grows as well as for myself and my husband.

Materials

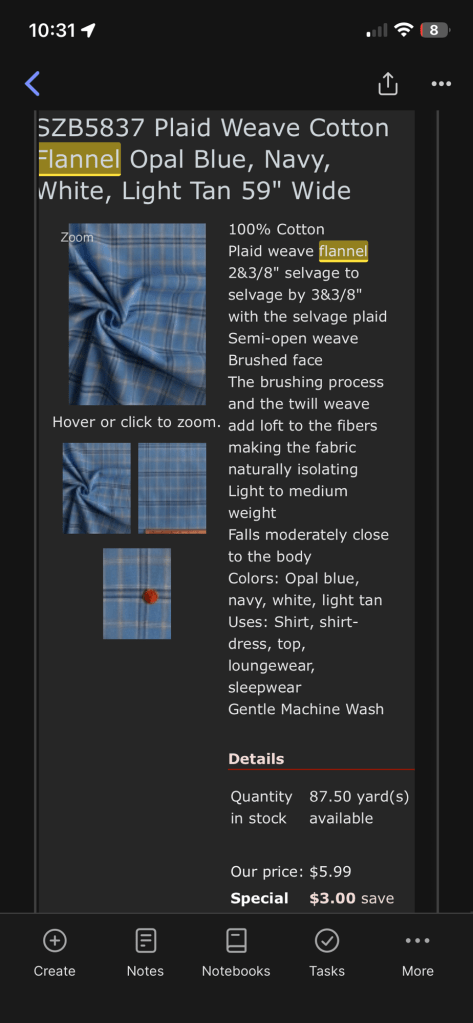
You can use both regular and stretch wovens. I used a lightweight plaid flannel I bought back in 2012 from Fabric Mart. It isn’t the best quality flannel but since I wanted these for summer pajama shorts the light weight and minimal nap worked in my favor. (And yes I really paid only $3 a yard! How I miss the times before rampant inflation and tariffs.)

Size and Alterations

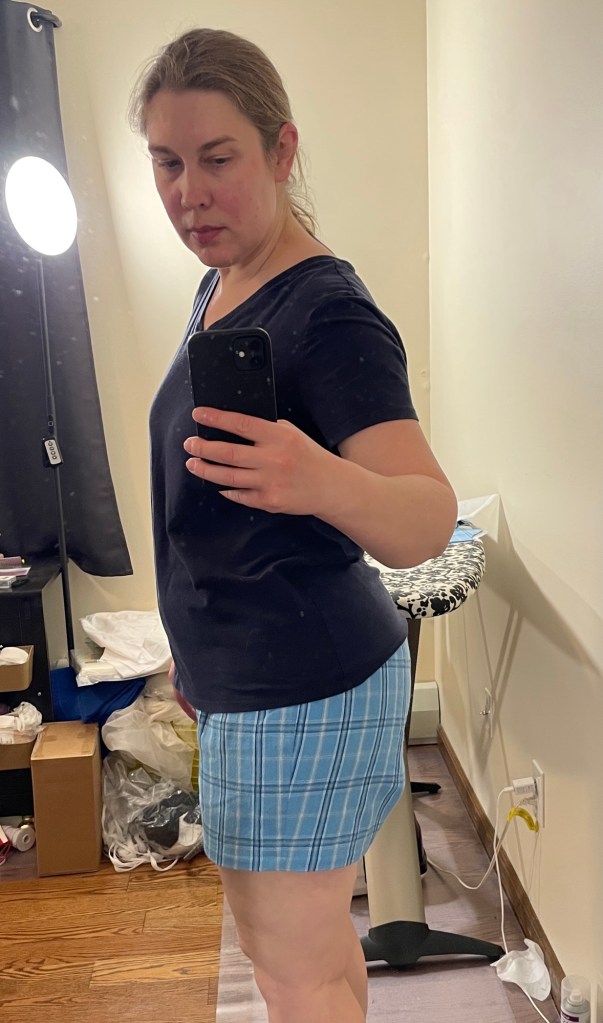
I cut a size CC based on my hip measurement. For alterations I added 2.5” to the center back seam height, tapering to nothing at the center front. I also added 1/4” width to the front inseam. I left the pockets off because these are for pajamas and I just didn’t want to deal with trying to pattern match that.

My first pair wasn’t uncomfortable but they just seemed too snug for my taste. Jalie does note on their website that if you want a looser fit in the hip you should go up a size or use a stretch fabrics.

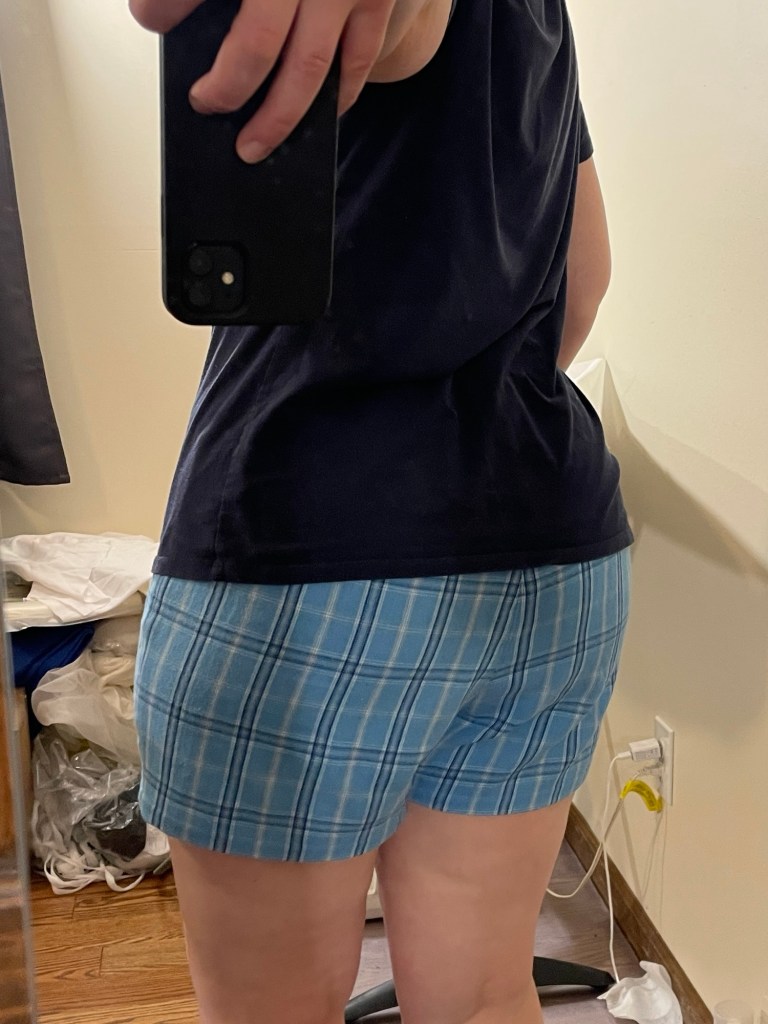
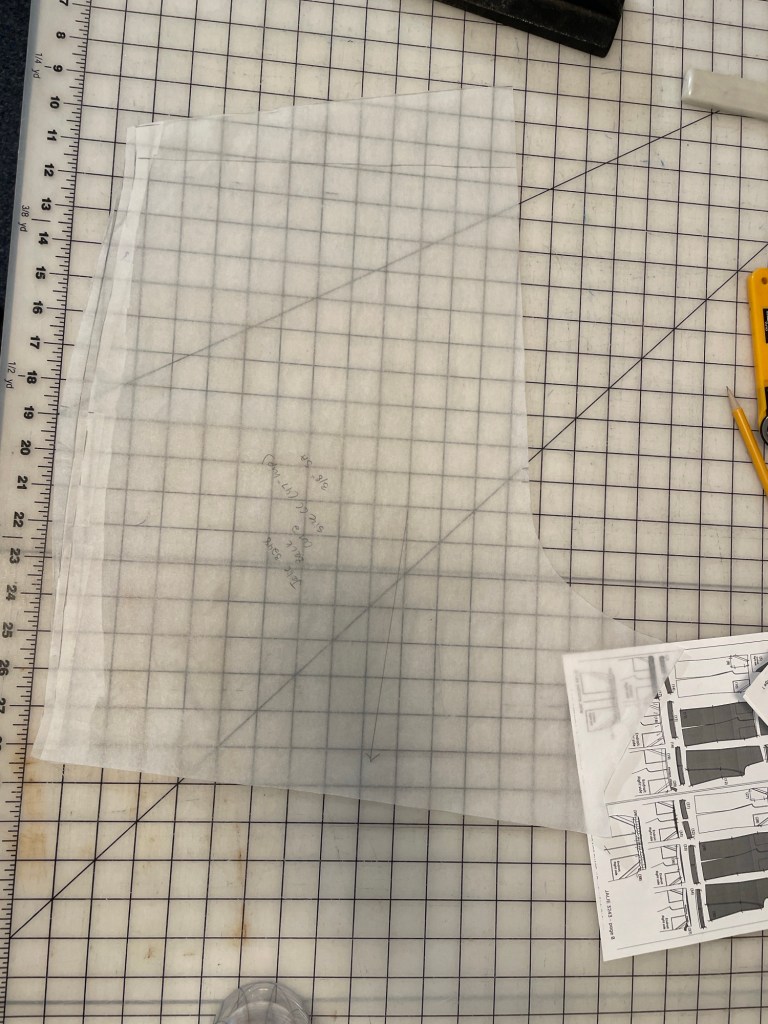
I also noticed they were too tight in the butt and the side seam wasn’t hanging straight. So for my second version I added 1/4” to all side seams, thus giving myself another 1” of ease, and added another 1/2” width to the back side seam at the hip. Here’s what the back piece looked like after I was done:

These alterations made my second pair much better.

Construction

These pants are very quick to make. I sewed them on my Juki TL-2010Q (always a pleasure to sew on for light to medium weight fabrics) and finished the inside seams on my serger. I did a couple things slightly different from the instructions though.

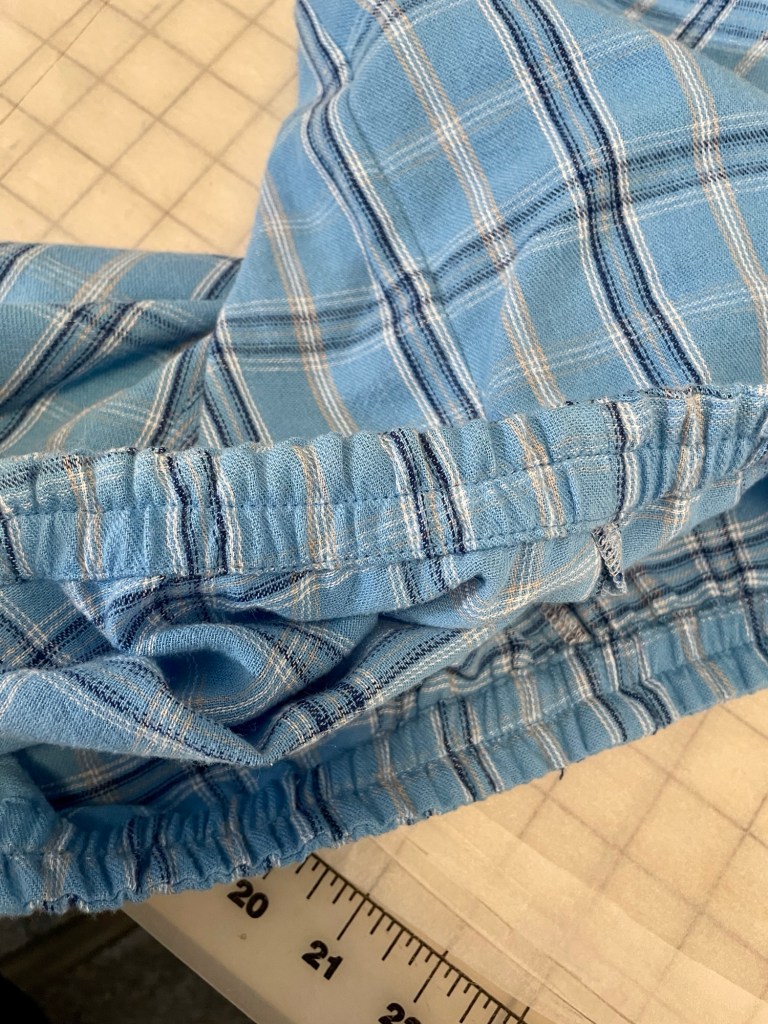
Rather than creating a casing and then pulling the waistband elastic through, I sewed the seam allowance of the waistband facing piece directly on top of the elastic, overlapping the edge of the seam allowance about 1/4” from the left edge of the elastic and using a 4mm length stitch so I wouldn’t overwork the elastic and stretch it out of shape. Then after I rolled the elastic to the inside of the shorts I stitched very close to the lower edge of the elastic. Once it was done the elastic was completely encased and then I topstitched in the middle. No need to make a casing and then pull the elastic through.

Of course it isn’t as adjustable after the fact so probably not good for kids clothes or your first version, but good for situations where you have confidence that you won’t need to alter it after the fact.

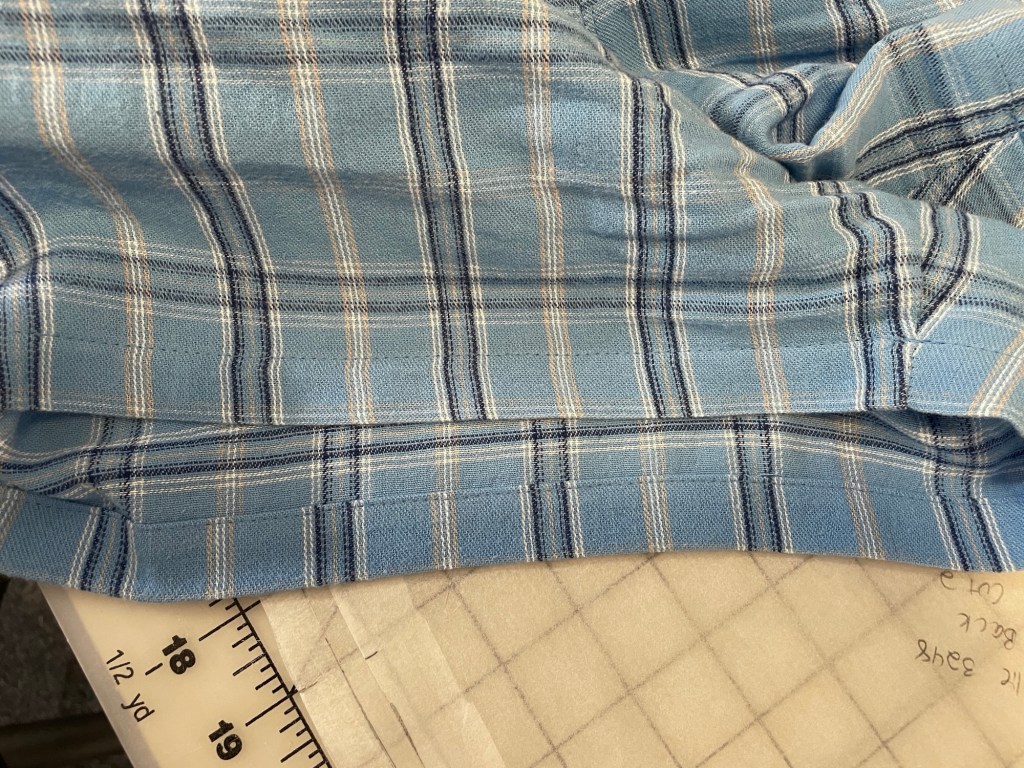
When I did the hem I first turned it up only 1/4”, then turned it up again another 3/4” and stitched very close to the edge. Very similar to how I did the waistband. This made for a very neat hem finish:

In the past I used to serge then fold to the inside and then topstitch over the serged edge, but I find myself preferring to try new things and do finishes like this lately. Helps distract from some recent sadness like my father’s health struggles and losing my beloved cat recently. (My dad actually improved enough that he was able to go home to my mom a couple of weeks ago, but I’m still doing a significant amount of caregiving duties. And while my cat had some health struggles the past six months, I wasn’t anticipating losing him quite so soon and miss him terribly.)

Conclusion

This is a really nice pull on pants pattern for all ages. The waistband facing eliminates having to measure and turn up a waistband casing, and the fit is actually quite tailored for this style of pants. I do recommend going up a size though if you use a non-stretch woven.

Jalie 2019 Supernova Tote

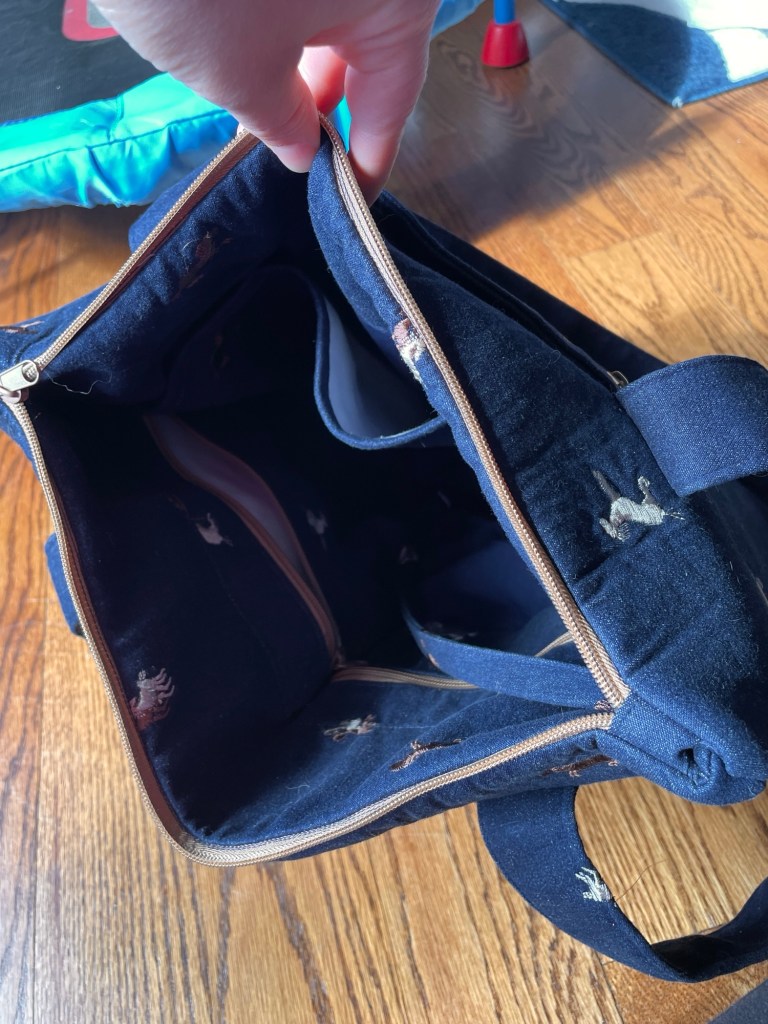
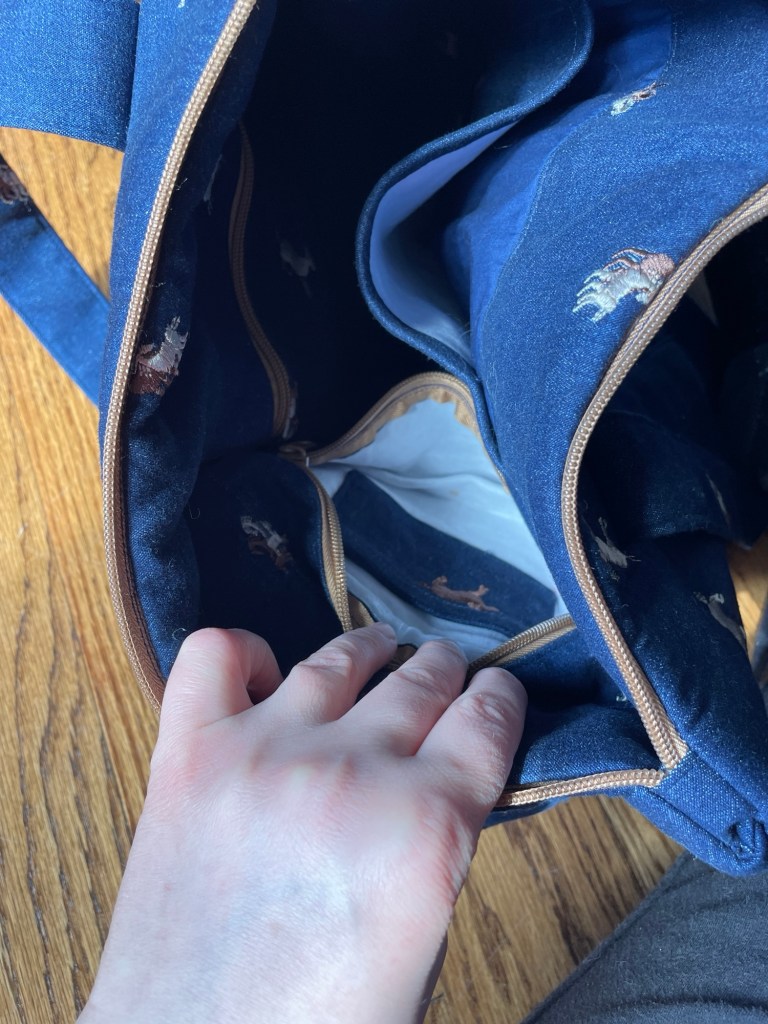
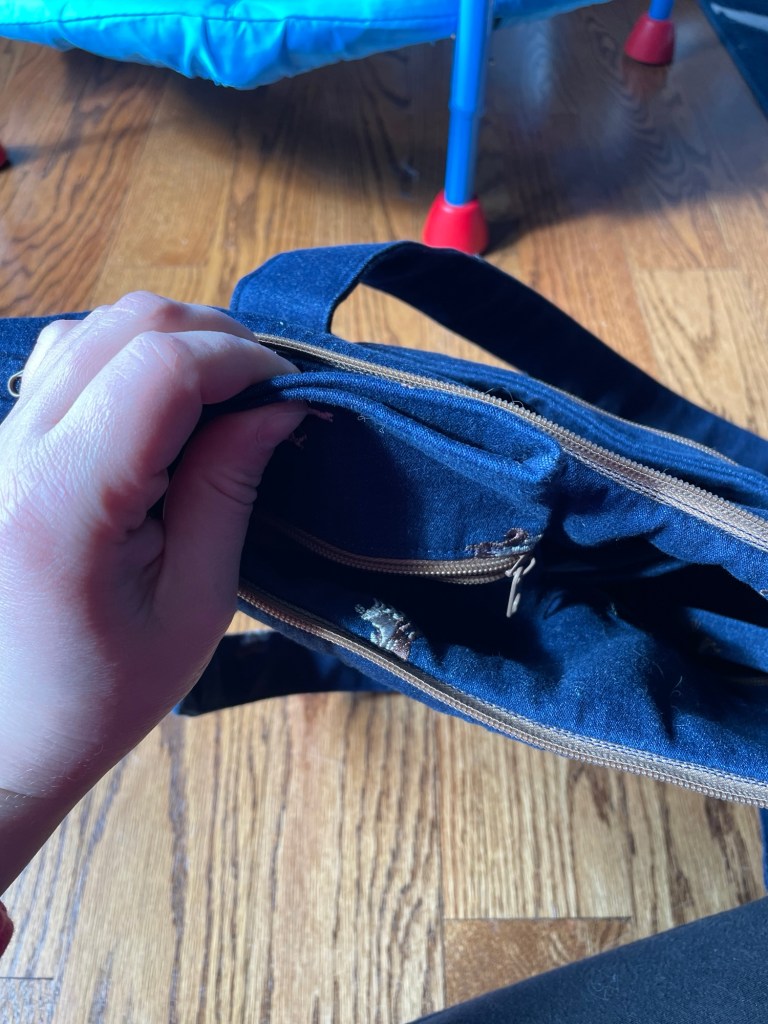
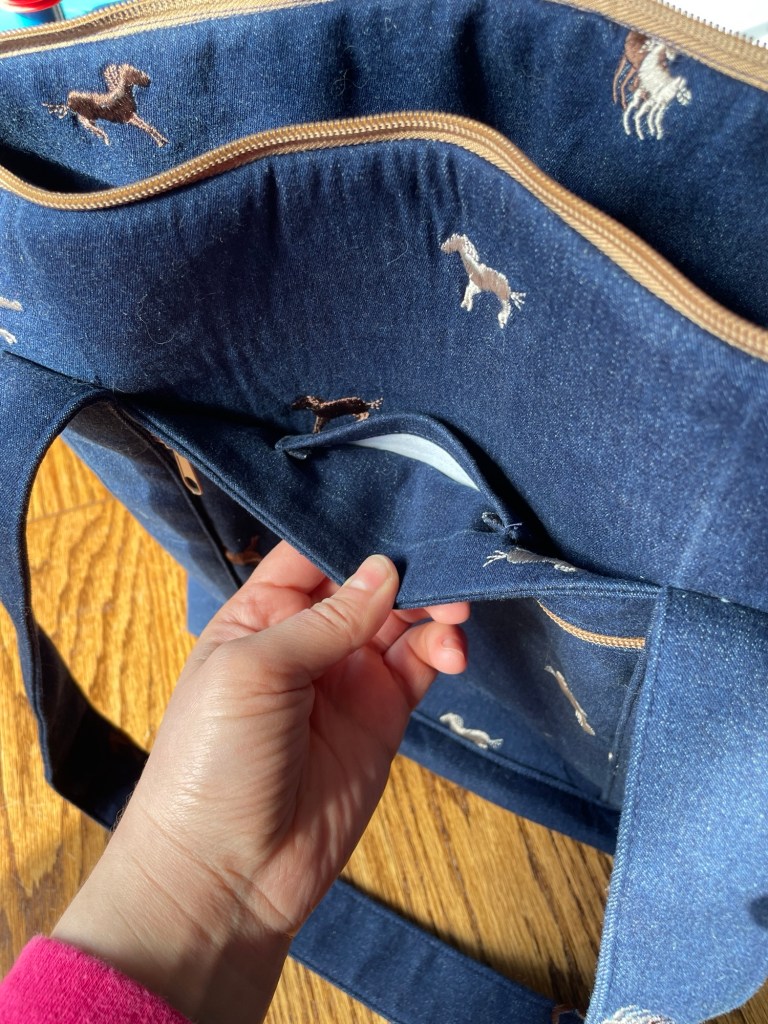
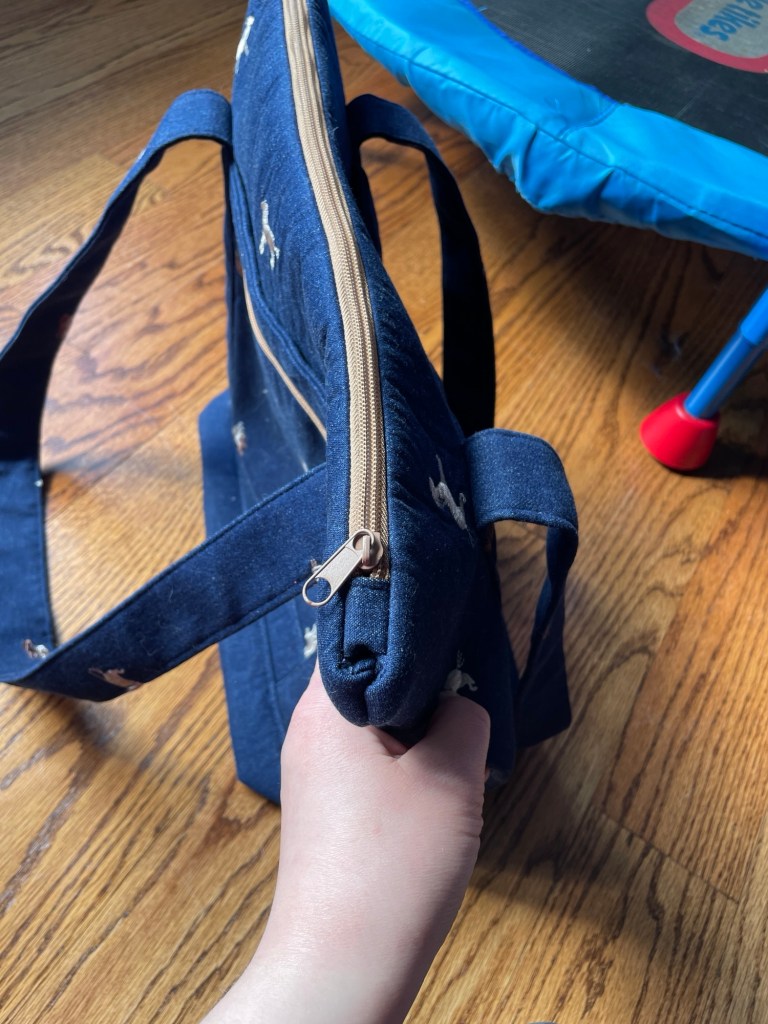
I made the small version.

Plenty of inside pockets
Hidden card pocket inside one of the interior zippered pouches
Two zippered interior pouches
Hidden pocket inside one of the exterior zippered pockets

Pattern Background

Jalie 2919 is a travel collection pattern. There’s two sizes of totes, bag organizers, and a passport/travel pouch. This is part of Jalie’s Galaxie collection, which are PDF only patterns for bags, kitchen accessories, etc. The fully lined totes have a zippered top and are well designed with lots of zippered pouches/pockets, some hidden pockets, a small outside loop, and a keychain leash.

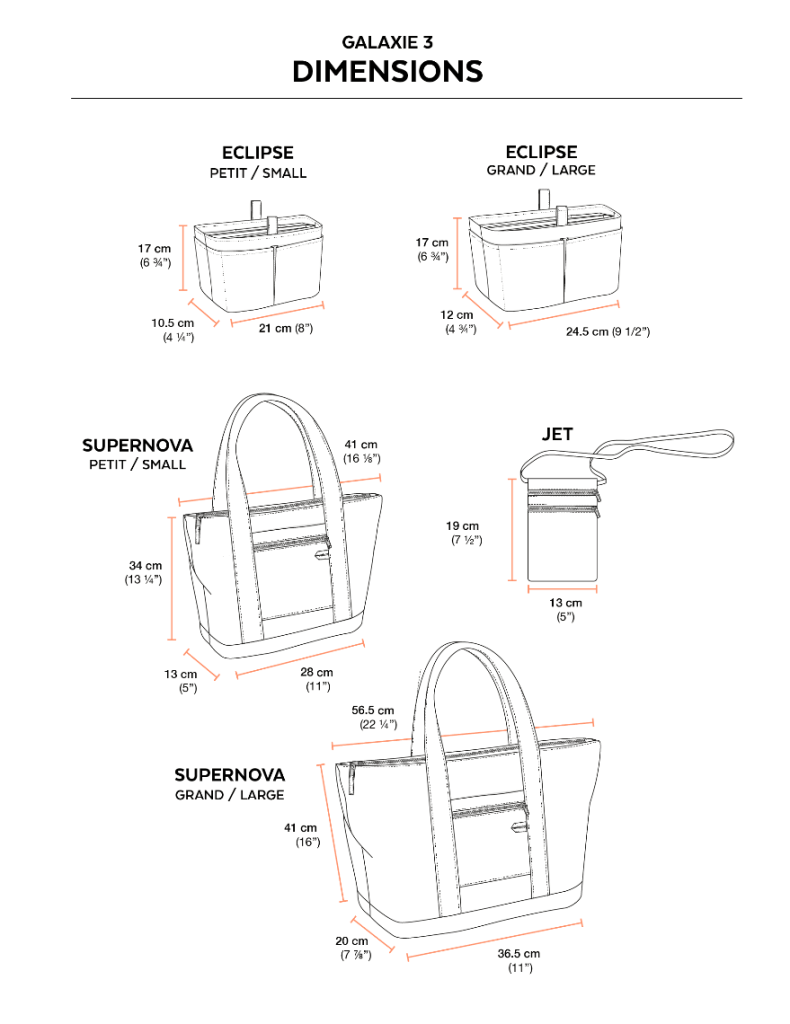
I didn’t see the dimensions listed on the Jalie website so I sent them an email and they replied back with this handy graphic. (Note that there’s an error for the large tote and the length should be 14.25”, not 11”.)

Materials

I wanted a bag with structure so I went way heavier on the interfacing than what is recommended by the pattern.

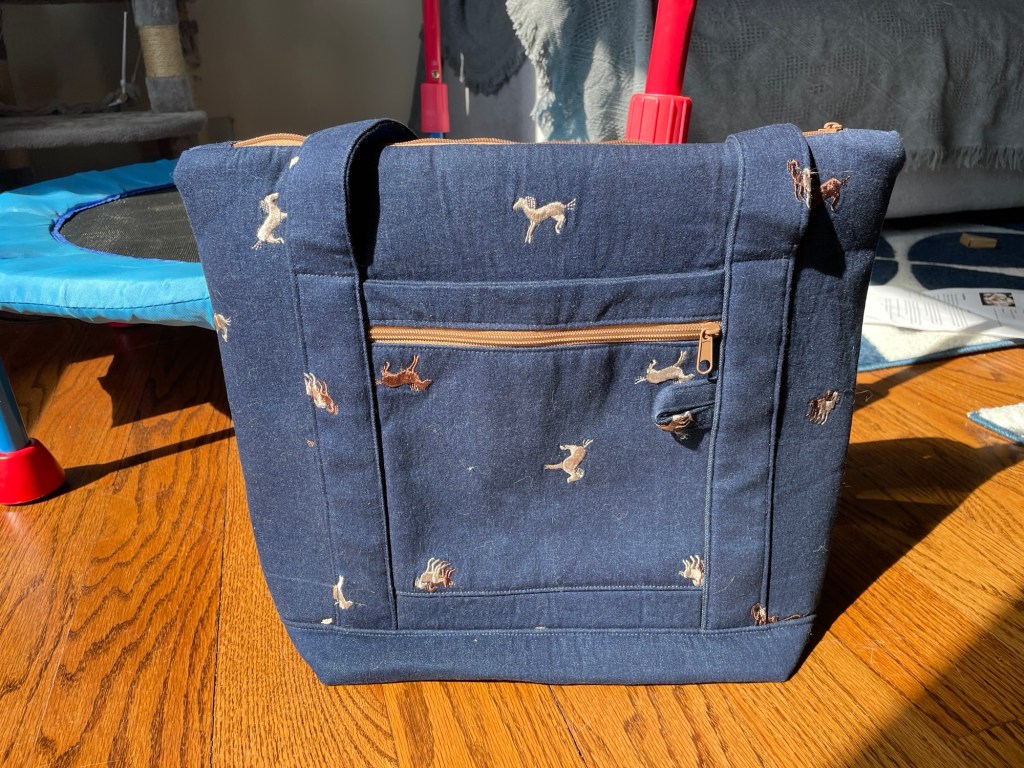
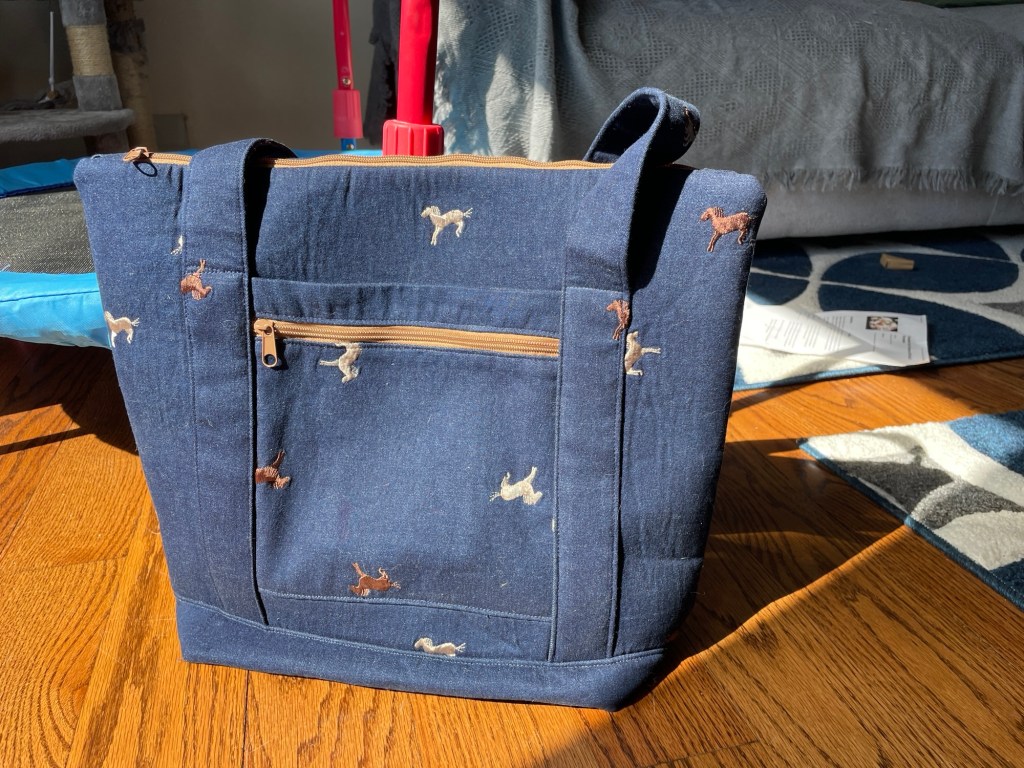
I used a midweight embroidered stretch denim I purchased almost 20 years ago from Joann’s. It was less than two yards and only 50” wide so I had barely enough fabric to cut out the small size tote. The fabric selvedge for the straps is hidden within the fold.

Since this fabric stretches and I wanted a lot of structure I interfaced everything but the bag sides and bottom with a lighter weight woven interfacing from WAWAK. For the sides and bottom I used single sided fusible Bosal In-R-Foam from WAWAK. This is my first time ever using a foam like this for bagmaking. If I could do it all over again I would have used a sew in and not fusible because it caused some puckering on this fabric.

I used a #5 nylon coil zipper from Amazon. This was my first time using one of those zipper by the roll kits. I struggled to get the zipper pull on the tape, but this video helped a lot. The keychain clip is also from Amazon.

The lining is a lightweight Pima Tex cotton shirting from Fabric Mart.

The bag was mostly sewn with Gutermann Mara 70 thread, with Gutermann Mara 100 used for finishing the lining.

Construction

I found the instructions pretty closely. I’m not experienced with bags and need the extra hand holding. I found them adequate. Better than earlier versions of Jalie patterns but not quite as good as recent releases. Jalie has made great improvements with their instructions in recent years!

I constructed everything but the seams of the lining on my compound walking foot industrial machine. It handled the heavily interfaced denim and foam with complete ease. I don’t use this machine a lot and haven’t swapped out the original clutch motor for the Kinedyne HM 750SL servo motor yet so I didn’t always have the best control. (Clutch motors are notoriously difficult to control, especially at lower speeds, and generally suck so much that I don’t think they even sell machines with them anymore.) I also keep this machine in my basement right now so my work lighting sucks. As a result some of my stitching isn’t as accurate as it would have been on the Juki TL-2010Q. But this machine is built like a tank and had zero hesitation sewing over tough areas, like where the strap is sewn over the zippered outside pocket with the loop (which works out to 10 layers of interfaced embroidered denim plus one layer of denim fused with foam). With my Juki TL-2010Q it might go, but you would notice some complaining from the motor. (This is why I don’t agree that the Juki TL series “sews through anything” because IMO they don’t, at least not in a way that doesn’t make me slightly concerned when listening to the strain on the motor.) I will say that while my Seiko STH8-BLD-3 had no problem, it was getting fatiguing on my arms and hands at the very end when I was trying to manage all the fabric while sewing the lining to the bag and doing the seaming at the bottom of the bag.

I did the lining seams on my Janome 6500 simply because I had a few leftover bobbins in thread that matched closely enough. (Something light and thin like this will pucker if sewn on my industrial.)

After turning out the bag (which resulted in having to do a repair to the lining because the hole to turn it out wasn’t large enough for the foam interfaced pieces) I noticed the upper corners by the zipper looked rather bulky and “homemade.” I’m sure this is entirely my fault for having such a thick layer of foam there but I’d like to figure out how to do a better job in the future with this section.

I sewed the bottom of both exterior pockets down rather than leaving one open because I wasn’t interested in having a luggage sleeve. I don’t really travel at this point in my life and knew there was a high likelihood I would forgot it was a sleeve and not a pocket and accidentally put something into it.

Conclusion

This is a fantastic bag pattern, and I ended up liking it more than I anticipated. You can get so many different looks depending on fabric choice and what sort of structure you choose. I didn’t realize how well designed the storage was until I was actually sewing it. I was surprised at how much room was in the smaller version. I think either version would make a great diaper bag for a baby shower gift (especially if you made a separate insulated baby bottle holder). As designed the smaller bag will easily hold three 1/2 liter water bottle in the organizer pockets. The only downside is that this takes a decent amount of fabric but you can economize by using a contrast fabric for the straps, bag bottom, and hidden/interior pockets, or by using webbing for the straps.

My version is not perfect but it was good practice and a nice way to expand my sewing skillset. My son loves putting matchbox cars, stuffed animals, etc into it and then carrying it around the house.

The Green Pepper 533: Rugged Tote and Portfolio

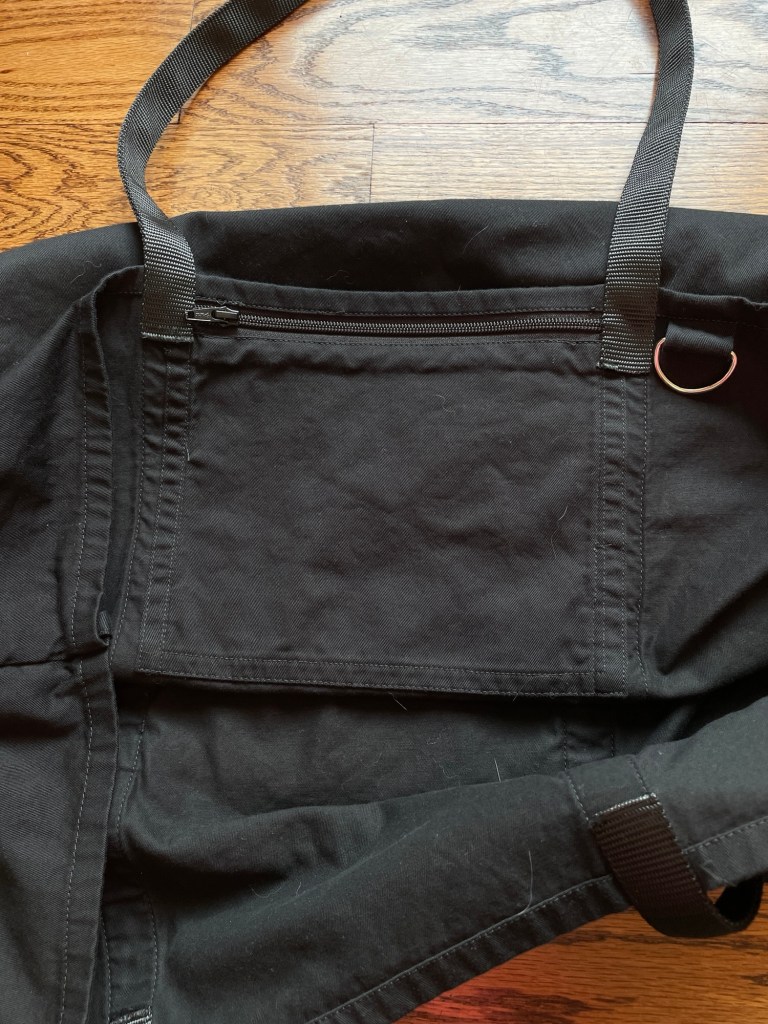
Inside pocket with D-ring
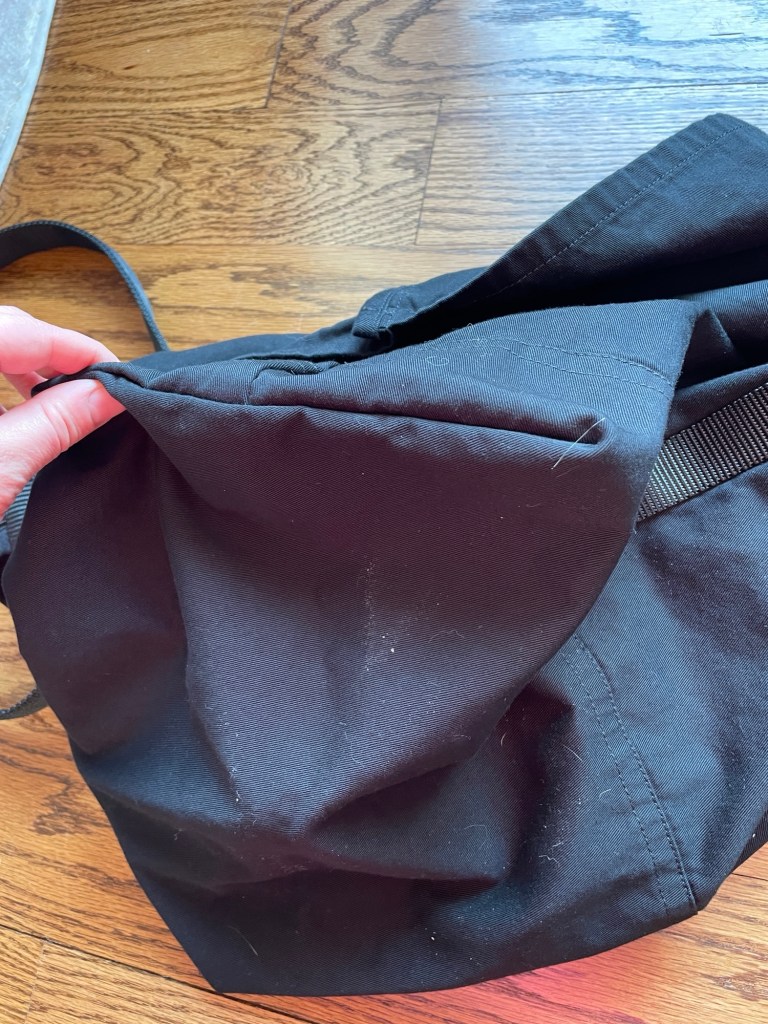
Outside constructed corner of tote
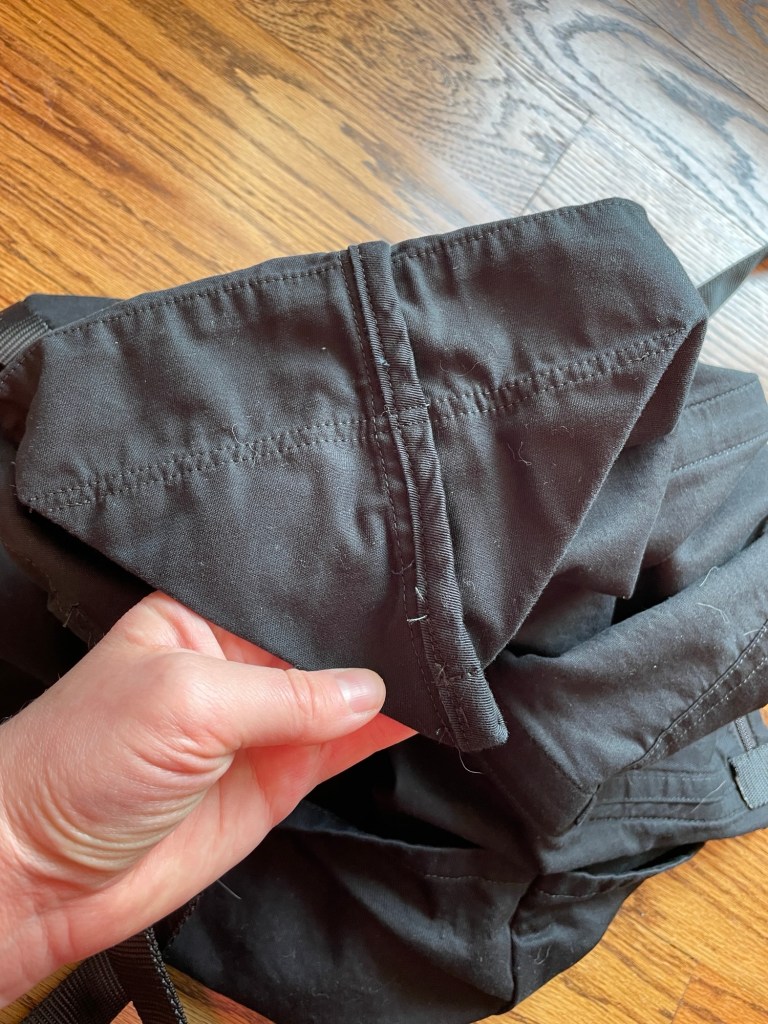
Inside constructed corner of tote
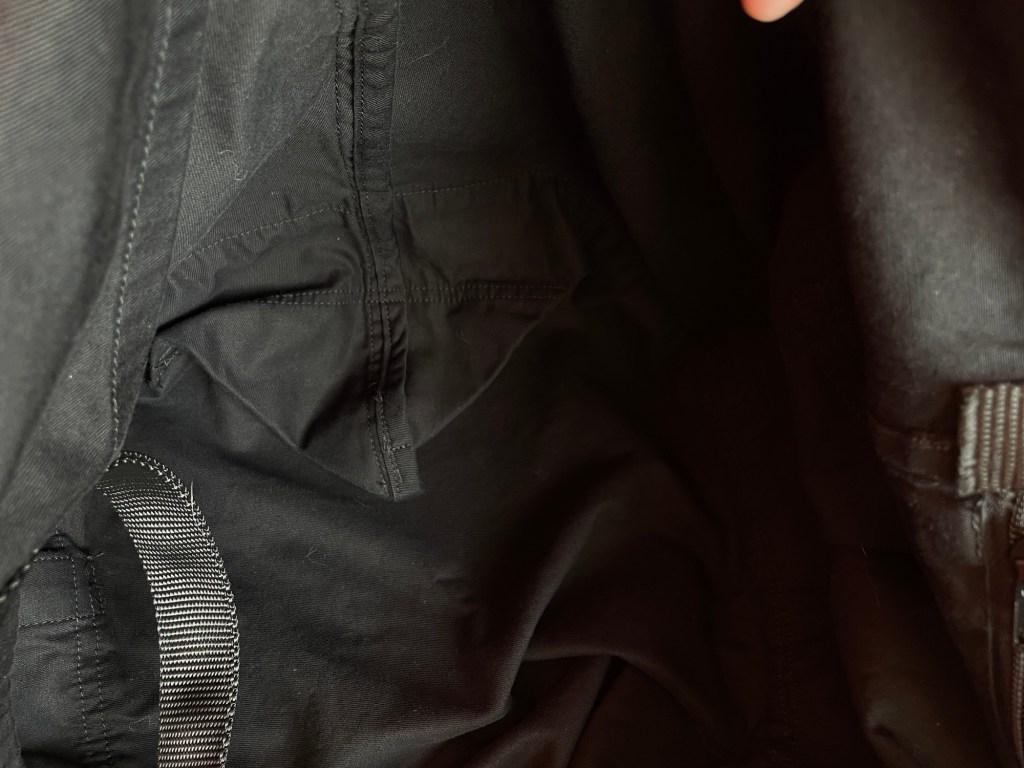
Tote corner tucked inside

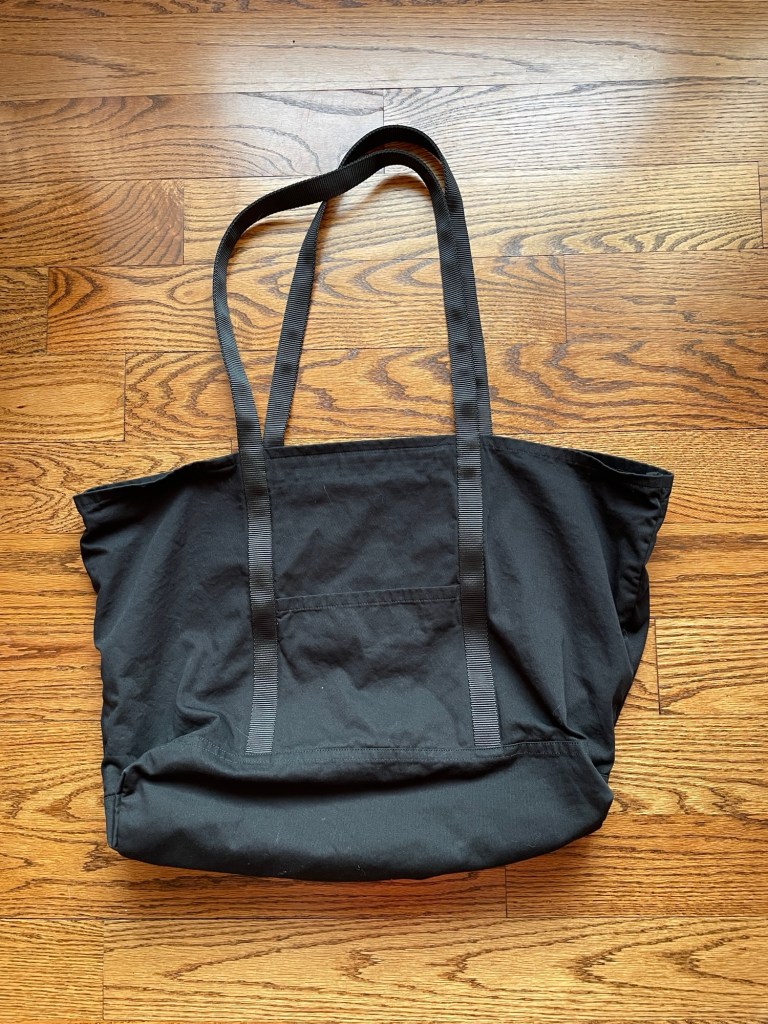
This was kind of a spur of the moment project for me. I wanted to do something a little different from garment sewing and decided to venture into bagmaking. My toddler has been maxing out his diaper bag lately between potty training but still using diapers, bigger clothes, snacks, etc. I’ve been keeping a backpack in the car with the lesser used stuff and a medium size LL Bean tote for his more frequently used stuff and have been wanting to consolidate into one bag because I also tend to keep some of my own stuff in his diaper bag. This pattern was attractive to me because it is simple and uses minimal speciality materials.

Background

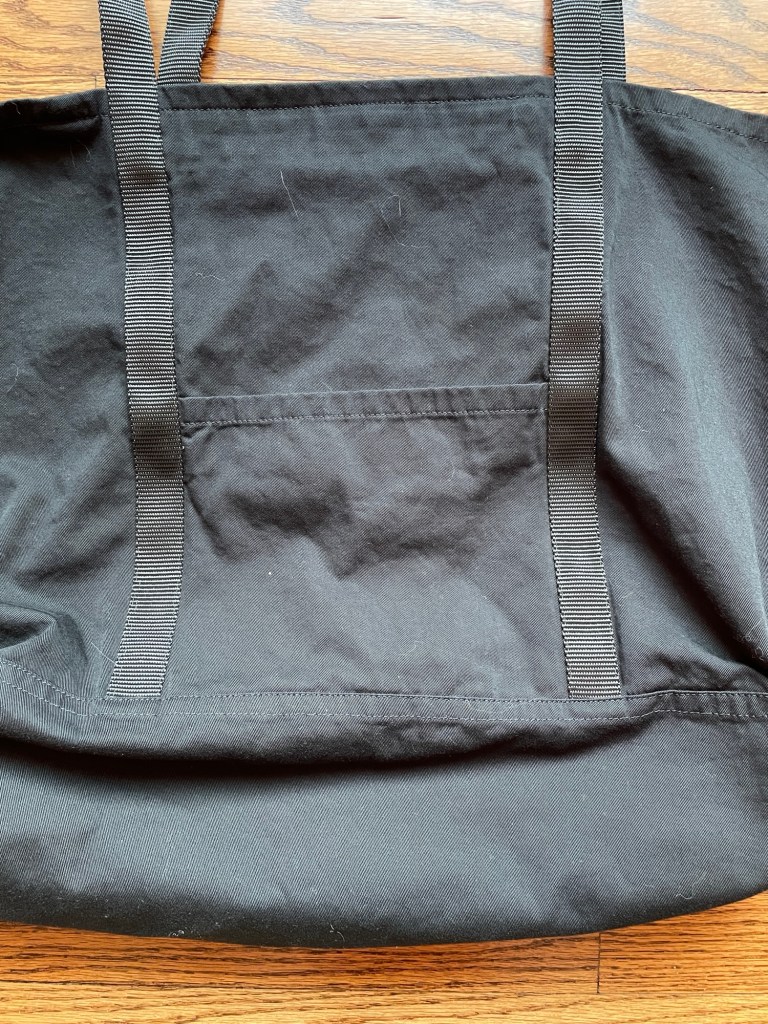
The Rugged Tote and Portfolio from The Green Pepper is an unlined tote bag with optional exterior pockets, a zipped interior pocket, and D-ring for keys. You can use either webbing or self fabric for the straps, which come in regular and long lengths. The bottom of the bag is actually a double layer of fabric, as a separate bag bottom is sewn onto the main body of the tote. If you made it out of 25 oz canvas it would be very similar to the LL Bean Boat and Tote.

The tote and portfolio styles use the same pattern pieces. The only difference is that you sew the corners of the bag into a triangle at the end to make the tote version.

There are four tote sizes, listed below as height x width x depth:

  • Small: 11.75” x 9.5” x 5”
  • Medium: 13.25” x 13” x 6”
  • Large: 15” x 16.5” x 7.5”
  • Extra-large: 16” x 19” x 8.5”

These roughly correspond to the size of the LL Bean Boat and Tote bags.

I made the extra large tote with the long straps and all of the optional pockets and D-ring.

Materials

Recommended fabrics are sturdy midweight to heavyweight fabrics like denim, canvas, and Cordura.

I used a midweight black 100% cotton twill I had in my stash for over ten years. For the straps I used nylon webbing. The zipper is a #5 nylon coil zipper from Wawak that was also in my stash. I used Gutermann Mara 70 thread for all construction.

The keyring was a 1.25” D-ring I’ve had in my stash forever from Bagmakers Supply.

Construction

I thought the included instructions were pretty good. I just was working very late at night and got confused about the zipper and how the ends of it were secured close until I went further along and realized that the inside strap actually covers it.

Jalie 2111: Men’s and Boy’s Classic Shirt

Pattern Background

Jalie 2111 is a classic men’s shirt pattern. It has a relaxed fit with a back box pleat, banded collar, and shaped hem. Both short and long sleeve pattern pieces included in the envelope. The cuffs have two buttons so you can wear them either tighter (like my son is in the photos) or looser, depending on your preference. The long sleeves have a shirt sleeve placket with a button. There’s also a chest pocket but I chose to leave that off this time.

Sizes go from 2T (22” chest) all the way to size XXL (47.25” chest). The wide size range, in addition to the timeless style, is what sold me on this pattern.

This is an older pattern, from 2001, so while it is no longer in print you can still buy it as a digital pattern. I ended up having it printed using the website PDFplotting.com. I used the higher quality paper available and found the service reasonably priced (if you do a bulk order like me) and quick to arrive. Highly recommend this service!

Alterations

I cut a size 3T. My son is on the verge of outgrowing European size 92 right now (2T) so I cut a size 3T just so he would have more time to wear it. I added a total of 2” around the hips because he still uses cloth diapers and needs the extra room.

Fabric and Notions

I used a 100% cotton shirting from Fabric Mart. The buttons were from WAWAK. I used a lightweight shirt crisp cotton interfacing from Fashion Sewing Supply for the collar band, collar, and cuffs.

Construction

I was happy I made time to work on this project, as it was my very first project using my new Juki TL-2010Q. This shirt was great for getting to try out my new presser feet as well as just get used to the feel of the machine. I was super happy with how the machine performed. I finally got used to using the machine threader and the feel of the presser foot (which has the auto thread cutter built in). And unlike my Janome 6500, the auto thread cutter works GREAT and doesn’t leave any ugly thread nests.

One of the nice things about this machine is that it can use regular industrial feet, which can be found for very cheap. For this project I used my new compensating foot set, topstitch guide set, and rolled hem foot set. I was particularly impressed by the performance of the rolled hem foot. It had no trouble at all going around the shaped hem and did a perfect job the first try. My Janome foot, by comparison, struggled to feed anything other than a perfectly straight edge.

I didn’t have the best of luck with the old Greist/Singer buttonholer for the buttonholes. For some reason the stitches kept skipping so rather than continue to fuss with it I just used my Janome 6500 and automatic buttonhole foot. For some reason I still had a bit of skipped stitches at the very start top of a few buttonholes, but a zigzag with the feed dogs dropped was able to save them.

The instructions included with the pattern are typical of the older Jalie patterns and not the best. In particular, the section for how to construct the front button band was rather confusing and I ended up redoing it before finally understanding what they meant. Another part of the instructions were wonky where the illustrations for the final steps are randomly thrown in the middle of the illustration for some middle steps. I might do a sew along and take a bunch of photos the next time I make this shirt.

Conclusion

My son loves how dapper he feels in his new shirt! He had no problem at all moving around in it to play outside today for 3.5 hours. It can be hard finding long sleeve button down shirt patterns for smaller sizes so I’m glad Jalie still offers this pattern.