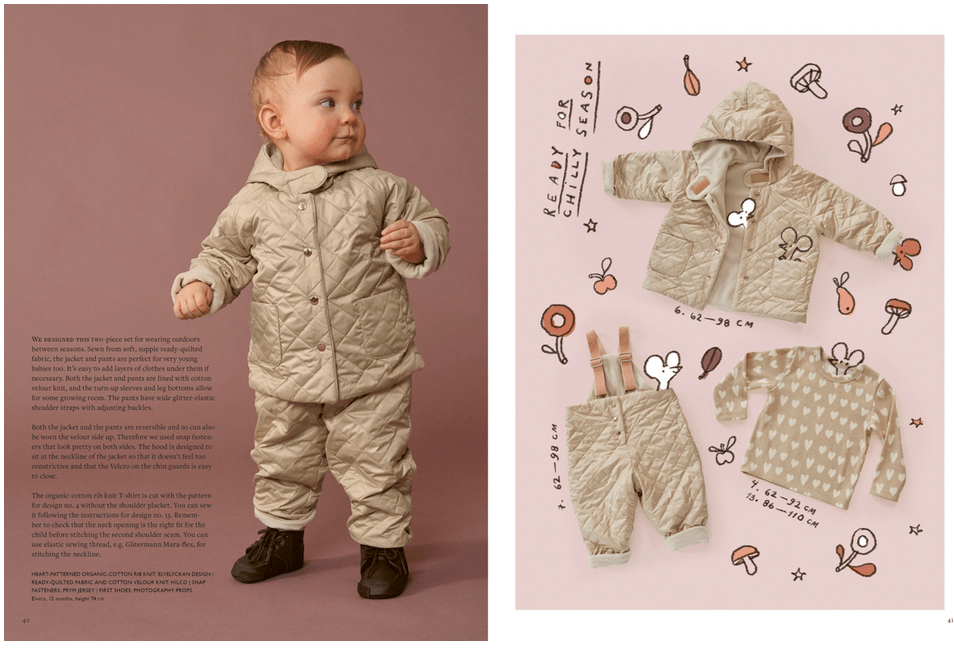
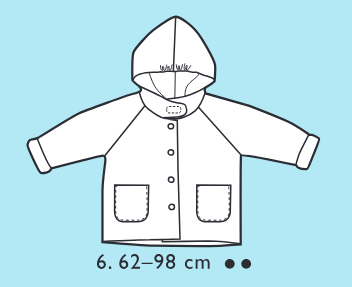
Ottobre 4/2023 #6 is a children’s winter coat pattern for European sizes 62-98 (basically infants through toddlers). It features rounded patch pockets, a hood with darts at the back and elastic at the middle front for additional shaping, and extra long raglan sleeves meant to be cuffed. This jacket is fully lined.
I made a size 80 for my son. I think he’s about 31″ long and 22-23 pounds so at this point (just a guess, he’s really hard to measure now).
Materials
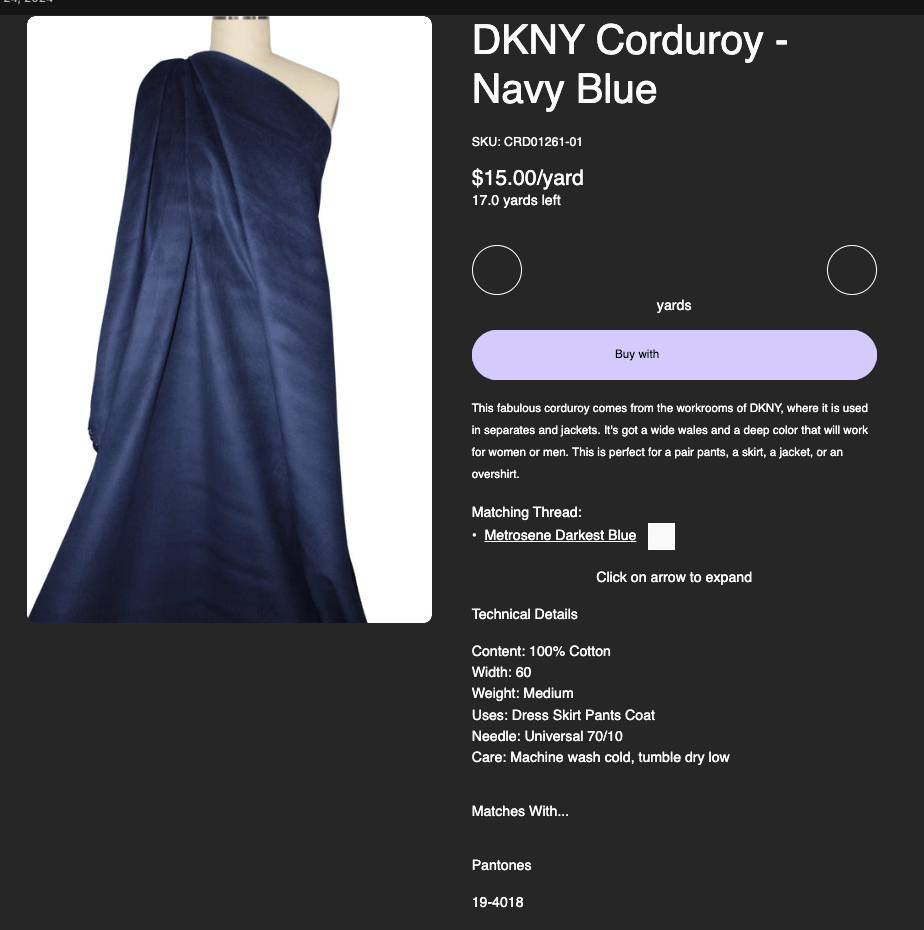
The pattern calls for ready-quilted fabric and fleece lining. I chose instead to use a wide wale deep navy medium weight corduroy from Gorgeous Fabrics.
Since this is meant to be a winter jacket I wanted more warmth, so I used 3M Thinsulate C150 from Vogue Fabrics for the interlining. I actually bought the Thinsulate a dozen years ago…just getting around to using it!
Instead of velcro for the hood and snaps for the front I chose to use wood buttons. It seemed to fit in more with the rustic corduroy and flannel fabrics.
Construction
The pockets are a single piece which is folded over, sewn, then turned out. This makes it very easy to get a nice rounded edge, plus it provides a self lining.
For the Thinsulate interlining I placed attached it directly to the lining, with the fleecy side facing the wrong side of the lining and the quilted side facing the wrong side of the corduroy. I never worked with Thinsulate before so it was a new experience for me. I didn’t need to baste it to the lining as the flannel provided plenty of “grip.” I did trim it down to 1/8″ seam allowances after sewing a seam. This stuff is pretty fragile with heat, so pressing the seams needed to be done lightly and carefully. (I accidentally melted a section of it.) It does have some loft but is lightweight and easy to sew through. I had no problem making the buttonholes, though I did use a buttonhole stabilizer plate simply due to wanting to eliminate error with the bulky fabric.
Ottobre instructions are quite minimal (basically the same as Burda’s used to be) so you should have some experience with sewing a coat before you attempt this pattern. The nice thing again about baby clothes is since they take so little fabric it isn’t a big deal if you need to recut and start over again! I haven’t sewed a lined jacket/coat in forever so I needed to think a bit about how to bag the lining, but I managed just fine. There’s no front facing so that makes things simpler.
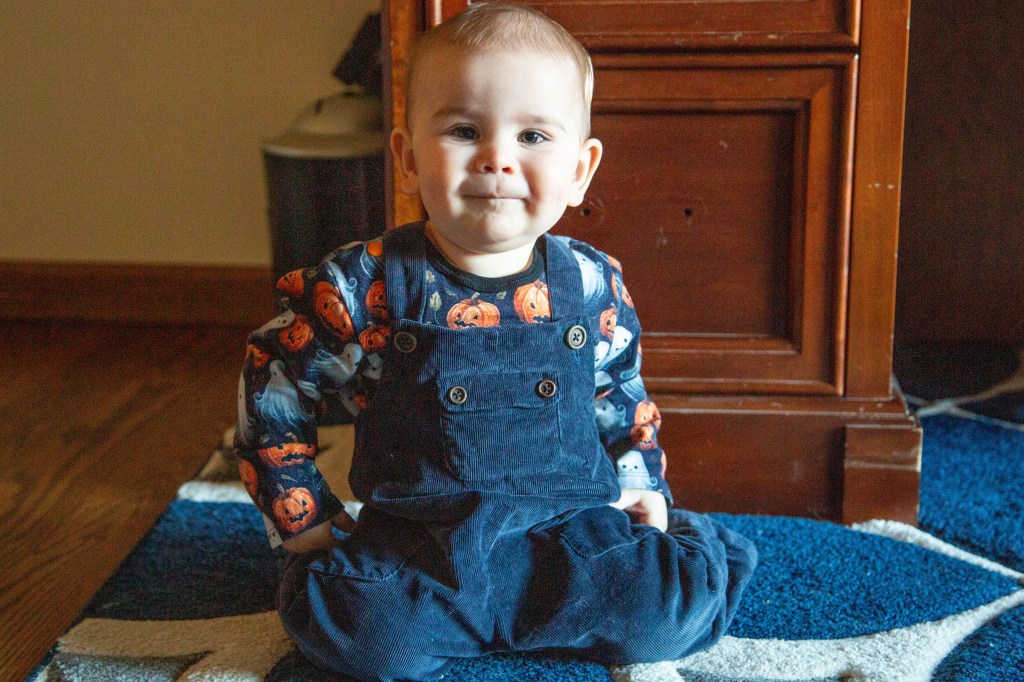
As noted in the title, both of these pieces are from the Ottobre pattern magazine (single issues are available from the Ottobre website). Both are available in sizes 62-92 (approximately newborn through toddler).
The shirt is drafted for knits with about 20% stretch (your average single knit jersey). There’s a couple of snaps at the shoulder.
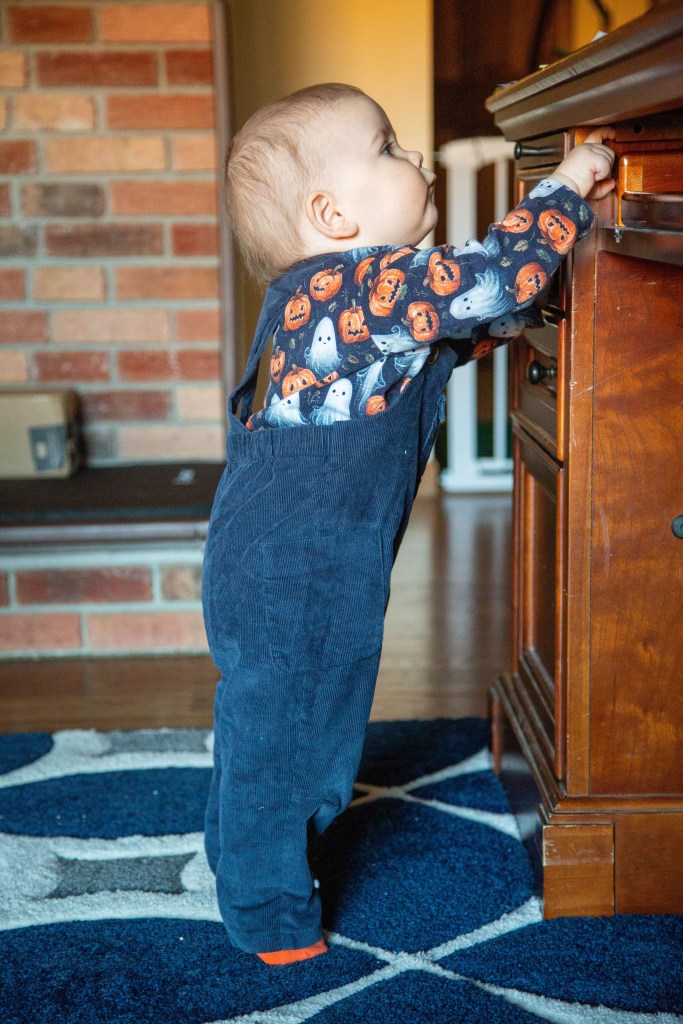
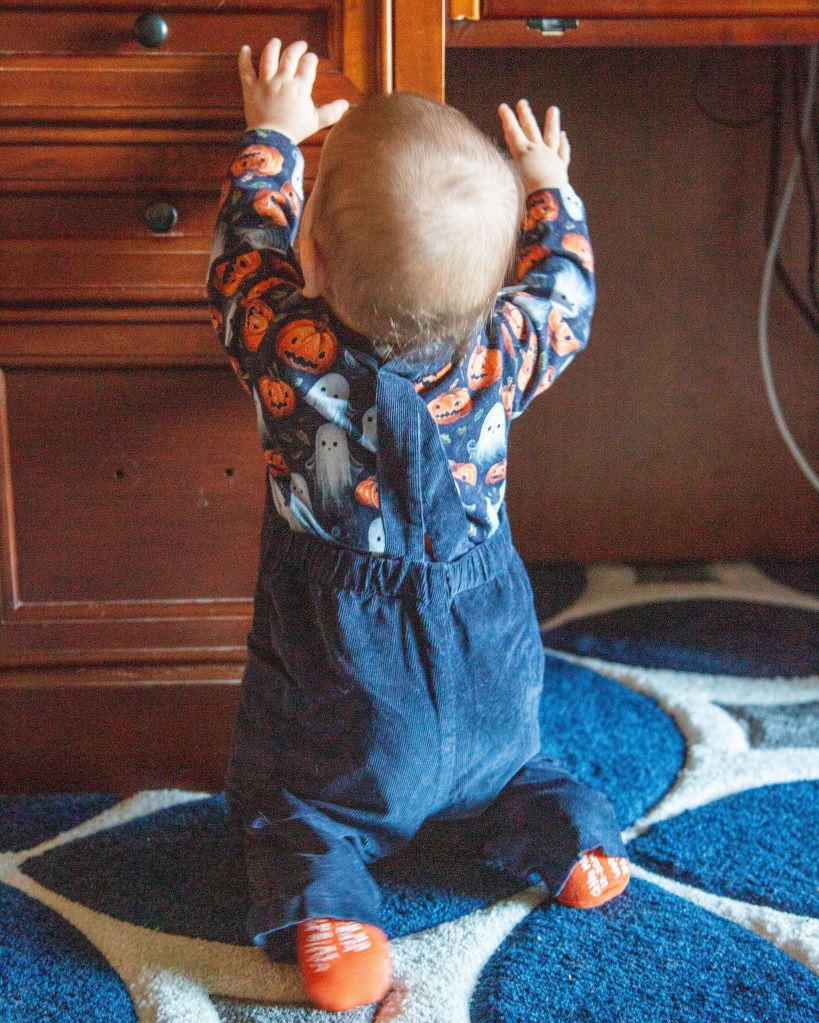
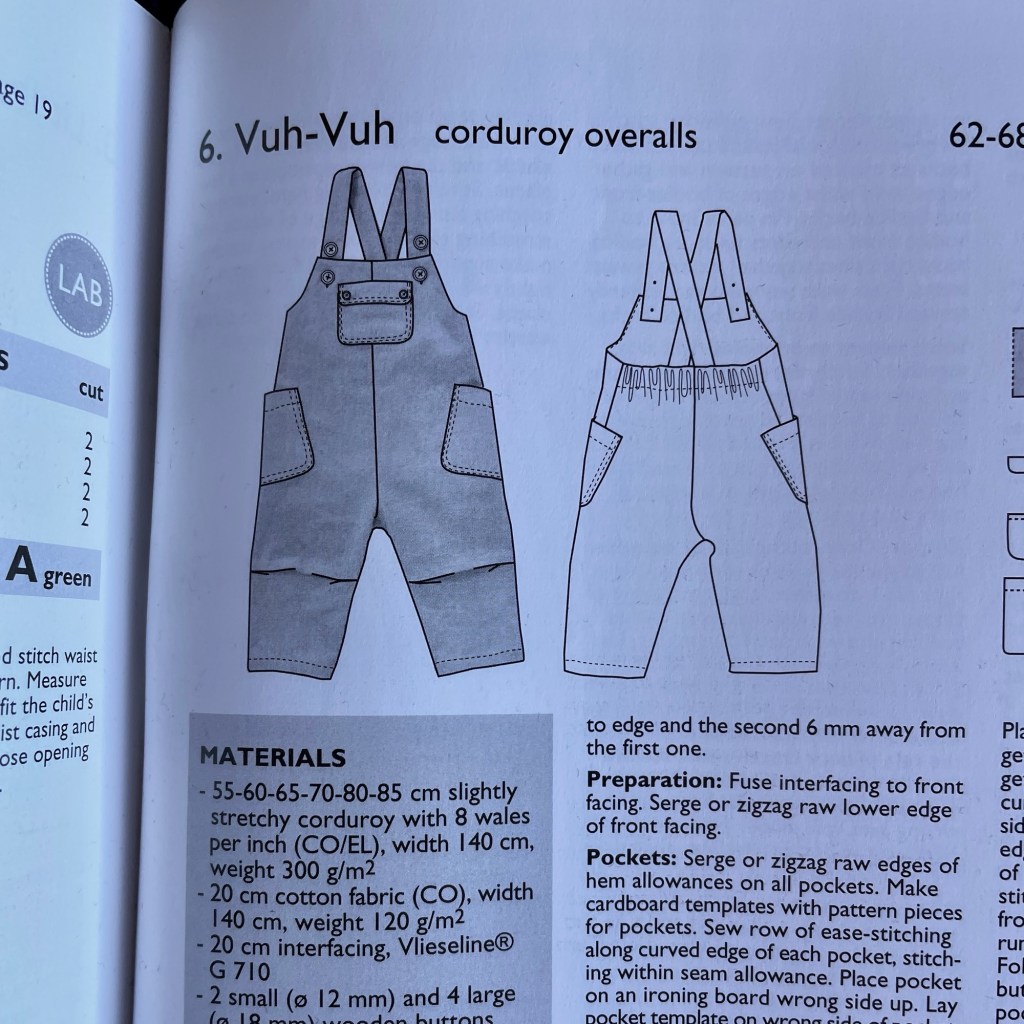
The overalls are drafted for woven fabrics. There’s two offset pockets (one at each hip) and one pocket at the chest with a non-working buttoned flap. The straps cross at the back and have two buttons on each strap for better sizing as your child grows. There’s also tucks at the knees to help facilitate room for crawling (which I really appreciate for him right now!) and elastic at the back waist to help keep things snug.
Materials
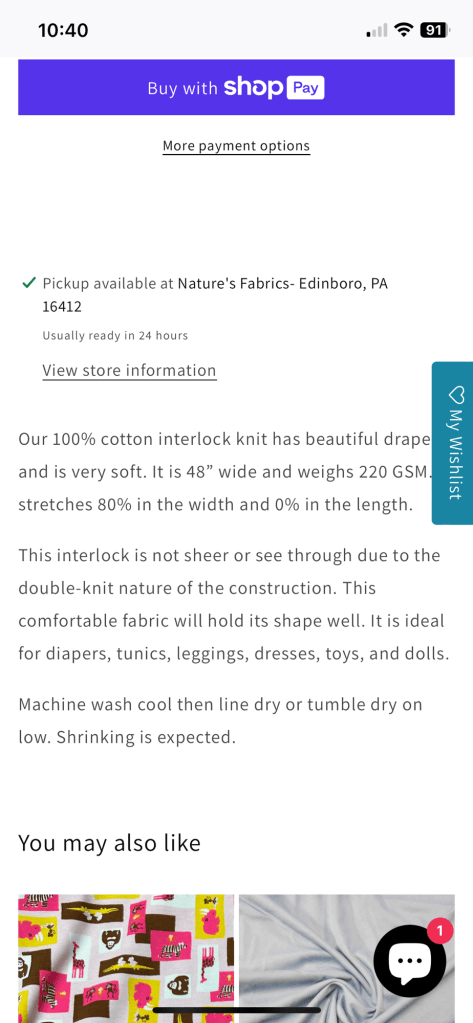
For the shirt I used a cotton/lycra jersey from Nature’s Fabrics for the main fabric, and a cotton ribbed knit for the neckline binding. The snaps are KAM plastic snaps. I interfaced the section where the snaps are secured with Pro-Sheer Elegance from Fashion Sewing Supply.
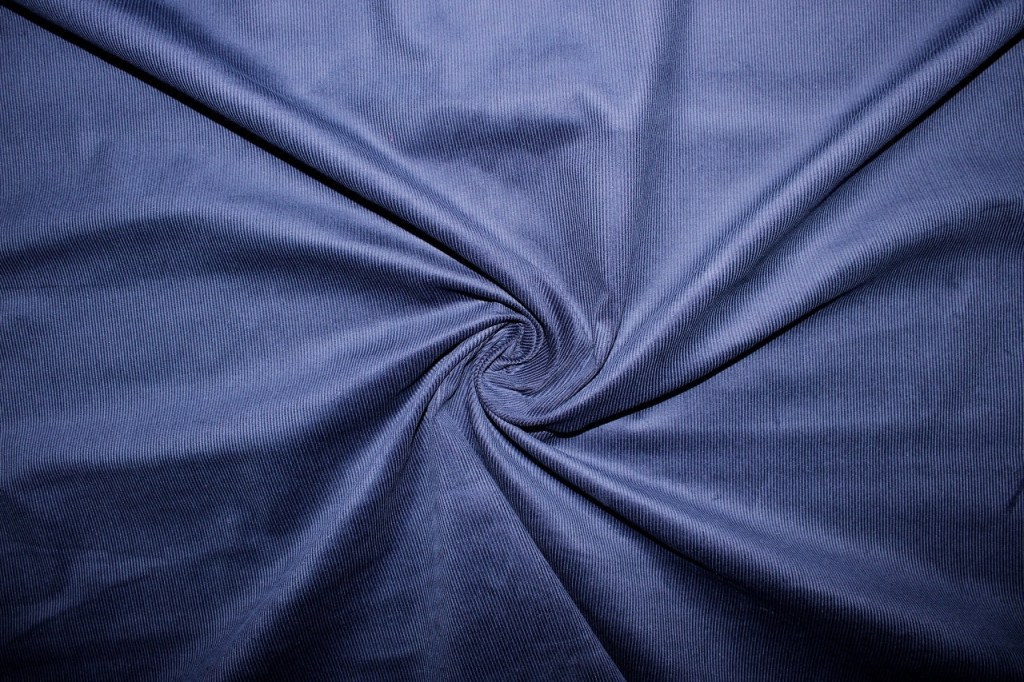
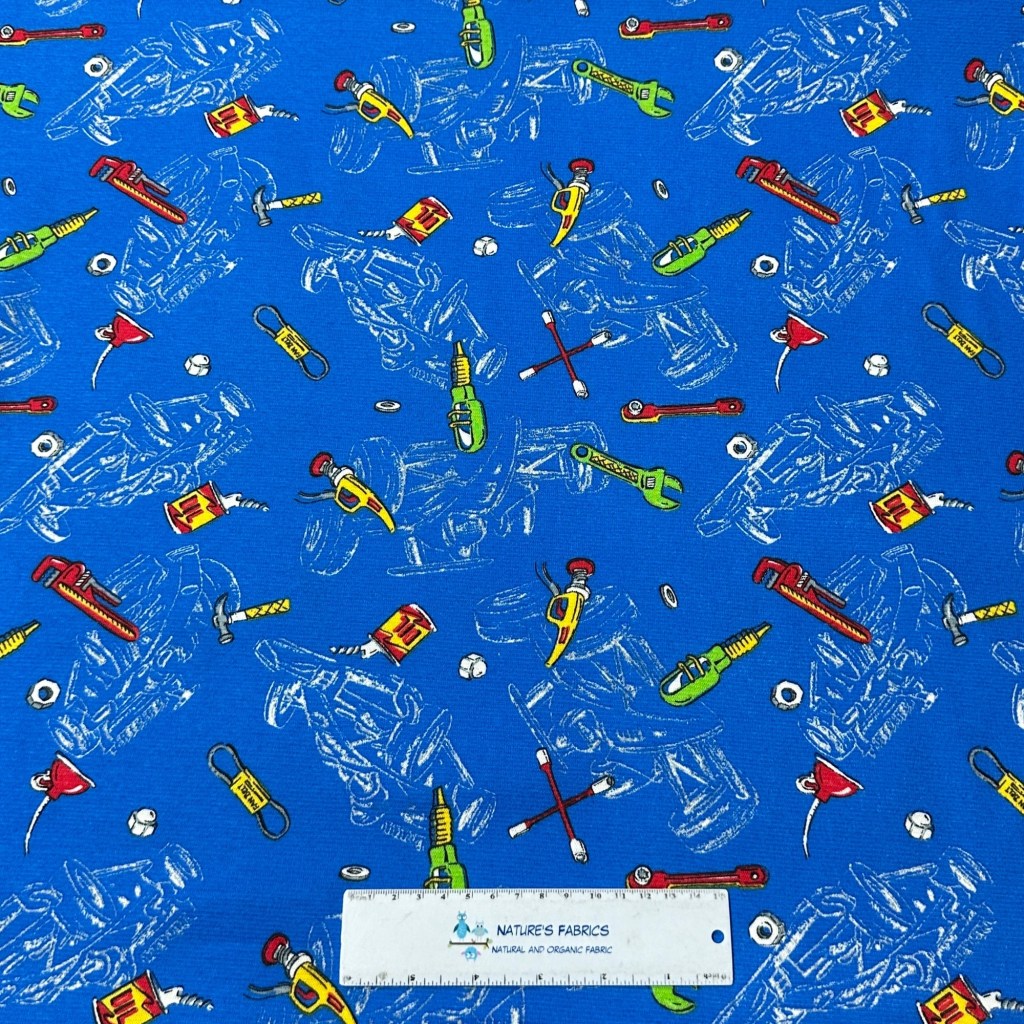
For the overalls I used a navy stretch corduroy from Gorgeous Fabrics.
The buttons are wood buttons from Amazon. I also interfaced with Pro-Sheer Elegance from Fashion Sewing Supply.
Construction and Fit
I made these about six weeks ago and chose a size 80, as I was paranoid it wouldn’t still fit for Halloween. Well, as with the Green Bean baby set I should have instead gone with an altered 74. It ended up too big. I usually cuff both the sleeves and pants legs. In the photos they look particularly loose because he’s got a disposable diaper on today instead of a cloth one, so there’s far less bulk in the seat area.
The shirt went together easily enough. My issue was when setting in the snaps I had to try several times before I got them to secure properly. Ottobre has you set one of the snaps along the binding but it was just too bulky and I kept having to redo that one particular snap. I had also never used plastic snaps so there was also a slight learning curve.
The overalls weren’t difficult, just time consuming with all the pocket curves and various details. I ripped out my topstitching a few times because I was unhappy with it, so that took some time. Once they were completed I had issues with the straps not staying in place, so I crossed and topstitched them in the back. I need to move the stitching as I just guessed about where to place it, and it ended up being too high. But I do recommend stitching the back straps in place for more security.
Conclusion
This set gets him a LOT of attention when we are out and about in public! Some people have remarked on how it is slightly unusual for American baby clothes.
I am not thrilled with the snaps at the shoulder and would probably use an envelope style top for shirts in the future. It was just too fussy setting the snaps with all the bulk of the ribbing.
I love the overalls! They are cozy and so sturdy when he crawls in the ground outside, and give a more formal appearance than knit pants. The tucks at the knees give him plenty of room to bend his knees when he’s crawling. A well designed pattern! I am thinking of making another pair for him in the near future.
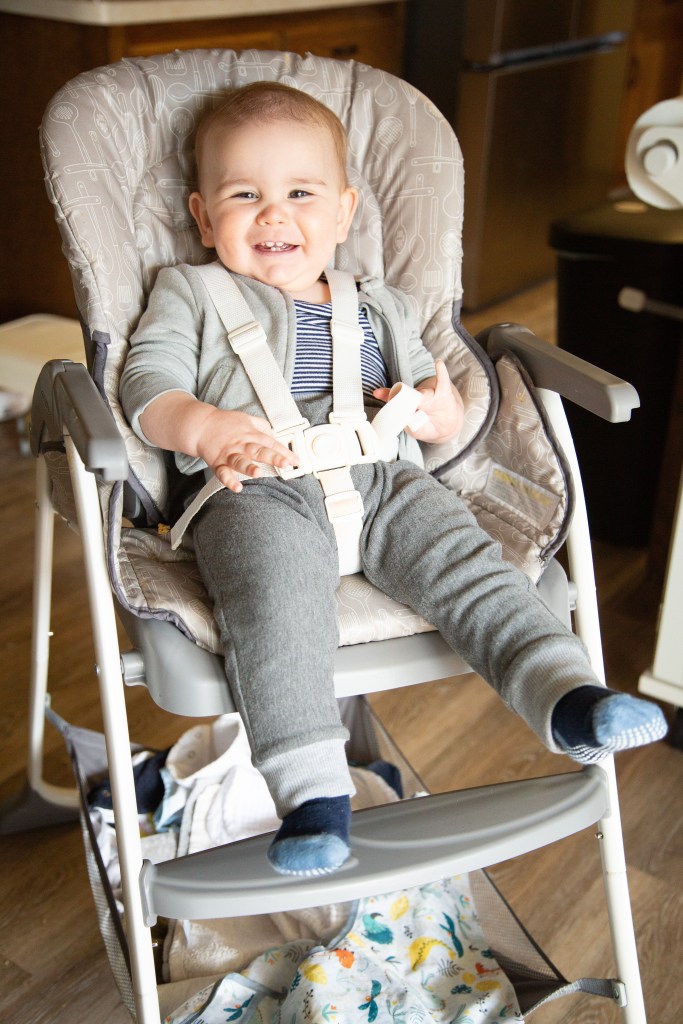
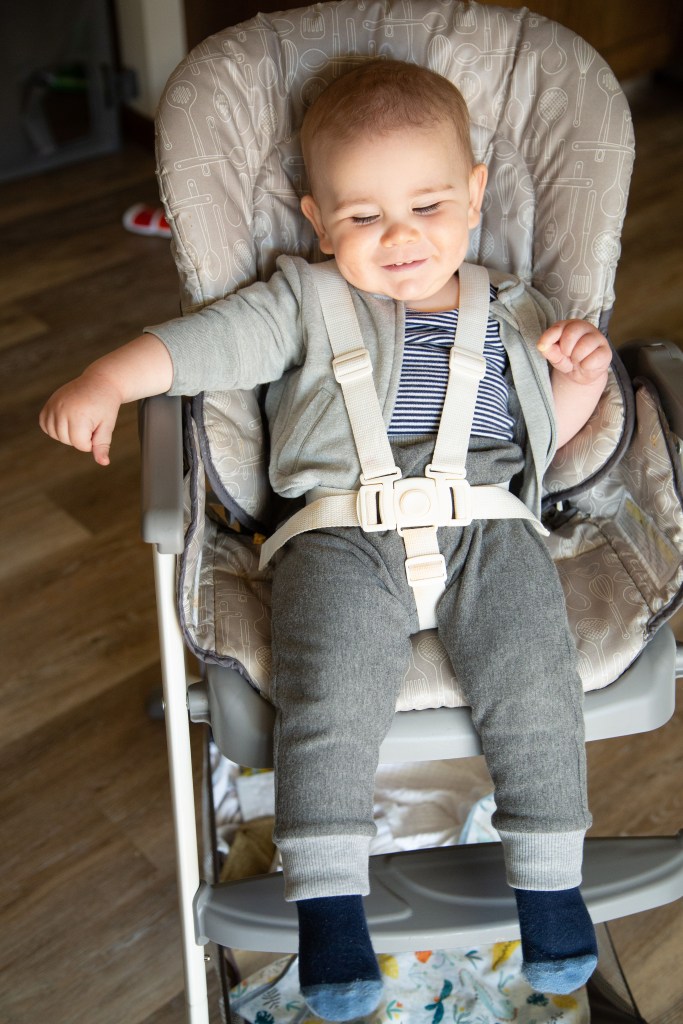
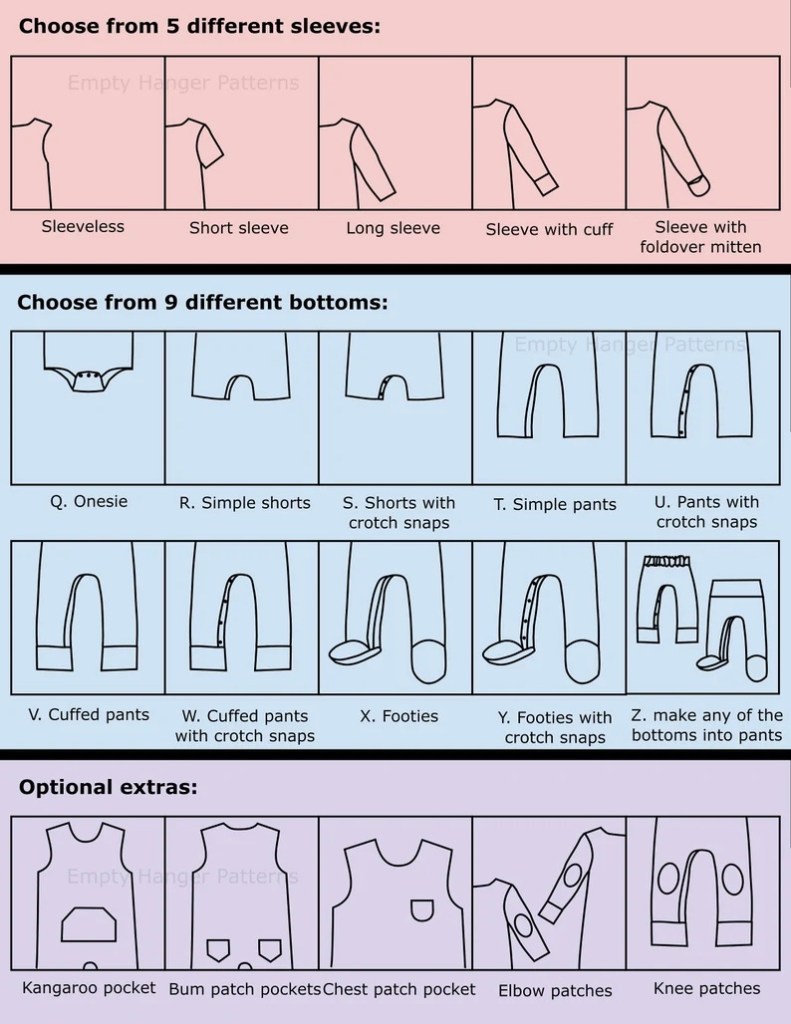
The pajamas, which are the A envelope style top with long sleeves and the snap footie Y bottom.
A top, Y bottom
I’ve done my best to get photos of the pants, which are view V…it is not easy with someone who is trying to grab my camera and always moving…hence resorting to a post-lunch photo in the highchair.
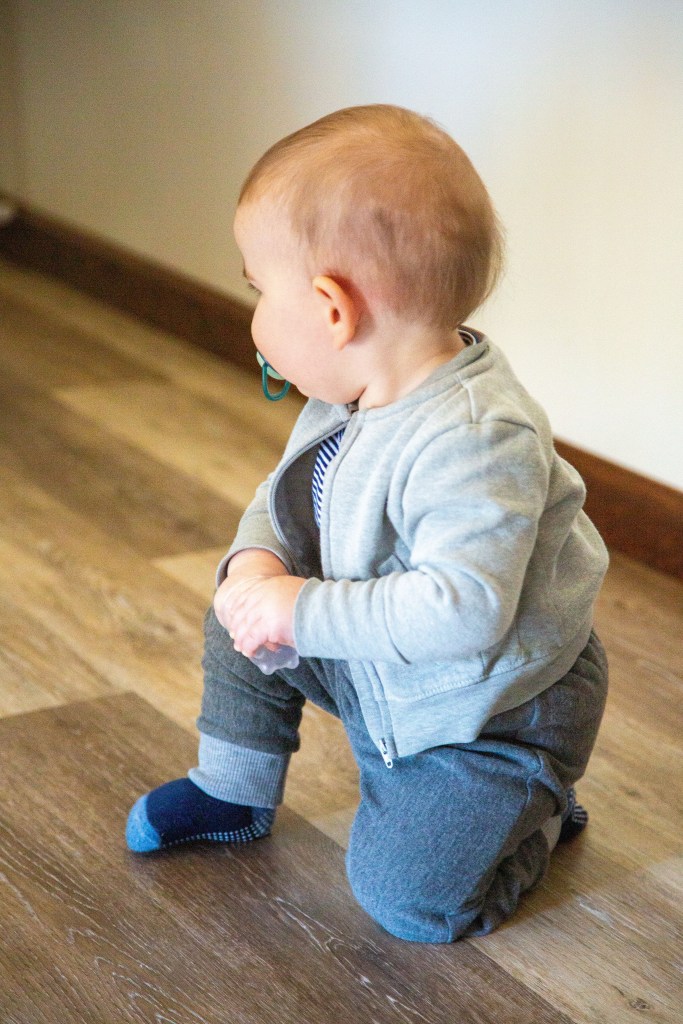
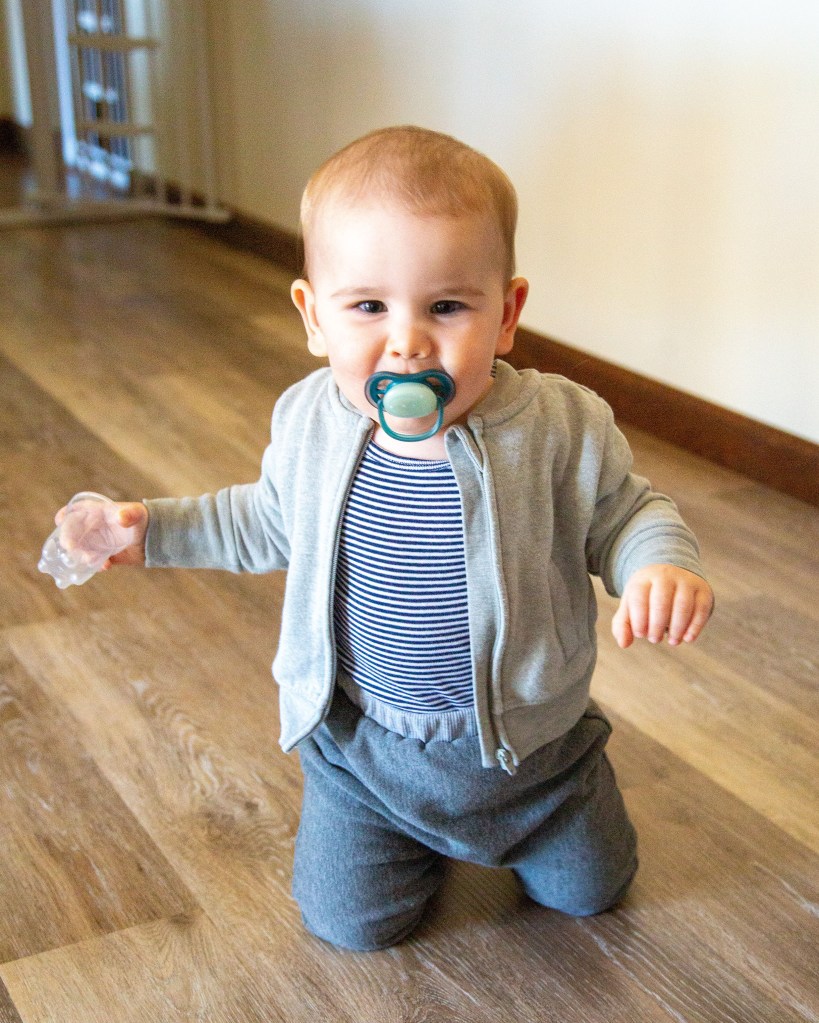
Some action shots:
Pattern Background
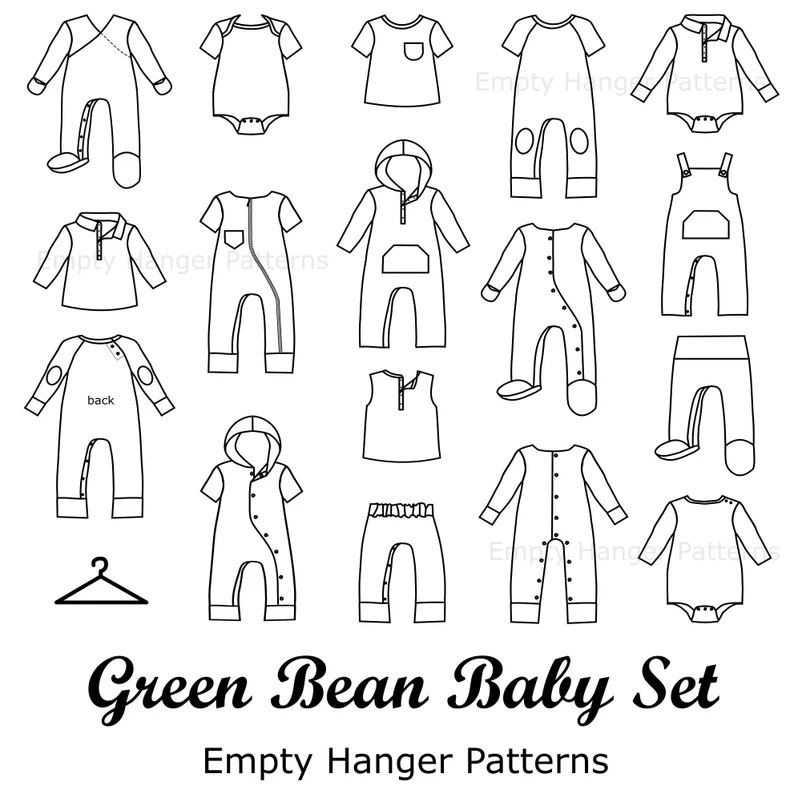
The Green Bean Baby Set by Empty Hanger Patterns is sold on Etsy. It is a PDF sewing pattern that includes a basic onesie with cutting lines and instructions for all sorts of variations. Rather than nesting the sizes like most pattern companies, they have you print by size and nest the basic variations. Extra pattern pieces for things like cuffs, a hood, etc are printed off as necessary. Make sure you read the instructions as all the information you need on which pages to print is found there.
The pattern is marketed as the only baby clothes pattern you will ever need, and I feel that’s pretty accurate! It includes European sizes 50-98 (20”-38.5”) which roughly covers newborn through toddlerhood. I would say that at less than $10 this is by far the most cost effective pattern out there. It does cover your needs for basic knit fabric baby items, but if you want to do anything with wovens you will have to look elsewhere.
Size
This was tricky!
My son is 14 months now and on the smaller side. He has a sturdy but wiry build and wears mostly wears Carters RTW baby clothing (which I believe tends to be slimmer cut). Right now he wears 12 months, but while it fits in the width it is getting too short in the length. I mostly use knit pants on him because he wears cloth diapers and woven baby pants ten to be cut for much slimmer disposable diapers.
Per the pattern he was right between size 74 and 80. Since it’s always better to go bigger rather than smaller I chose size 80 for the first round. I made him footie pajamas with snaps at the legs. It was HUGE on him. Have to set it aside for later!
For the next round I decided to print off size 74. I compared the pattern to some current clothing he has and it seemed to be a much better fit for now.
Materials
For the pajamas I used a cotton interlock, with a cotton baby rib knit for the contrast (cuffs, neck, and one of the snap closure facings since I was short on the main fabric). Both were from Nature’s Fabrics.
I interfaced the leg band with Pro-Sheer Elegance from Fashion Sewing Supply. (Unfortunately she’s hit a difficult time in her personal life and my order placed over a month ago never shipped. It seems up in the air as to whether she’s going to continue the business or not.) I used these snaps from Amazon. They seemed to work ok, though I would have preferred to use the ones from Snap Source (another great sewing notion provider that’s no longer in business).
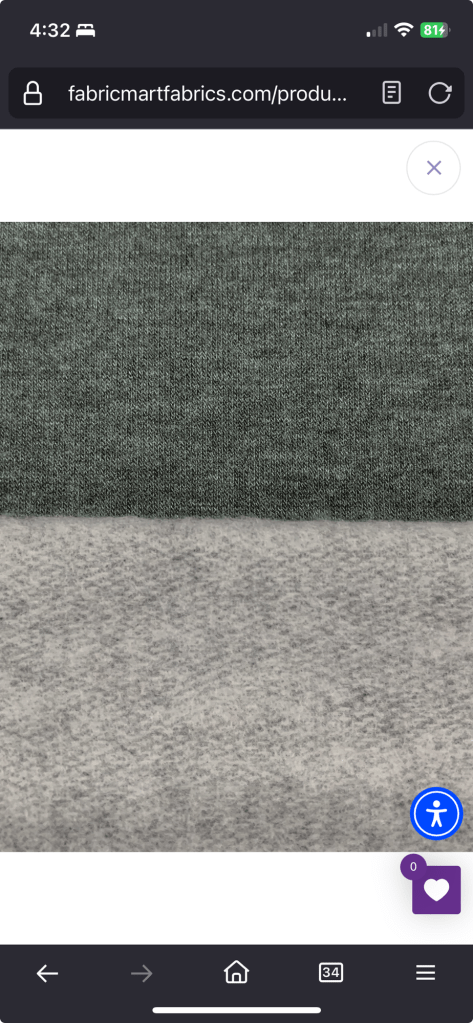
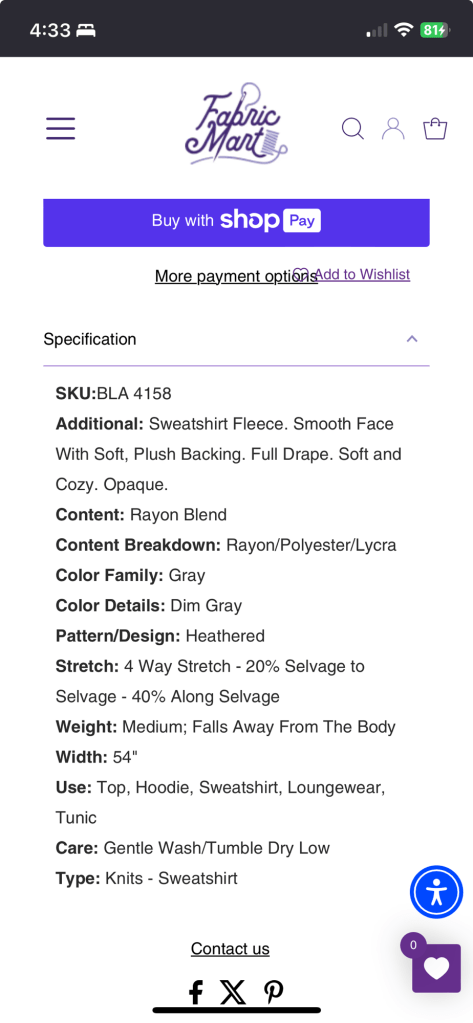
For the pants I used a recently purchased rayon/polyester sweatshirt fleece from Fabric Mart for the main fabric, and a cotton rib knit for the waistband and cuffs. I believe the rib knit is from Fabric Mart as well, but I purchased it so long ago I don’t really know! The rayon/poly sweatshirt fleece is SO soft and cozy and washed really well, so I ended up buying a bunch more for various future projects. It is hard to find inexpensive winter pants for babies, especially if they aren’t 100% polyester fleece.
The stretch was similar to stretch bengaline in that the stretch was greater lengthwise vs width, so I cut it with the grain perpendicular rather than parallel to the selvage.
Alterations
I didn’t make any alterations to the size 80 pajamas as I wanted to get a better sense of the fit before doing anything. As I mentioned before they ended up way too big.
For my size 74 pants, the sizing was much better. I will say that they were comparable to the 18 month Carters pants in length even though technically size 74 is closer to 12 months rather than 18 months. I did find the rise was too low, and lengthened it 1”. I also found the waistband was IMO way too wide for baby clothing – they assume the elastic width will be about 2”. I don’t have a lot of experience with baby clothing, but this seems so wide on such a tiny body. 1” wide elastic seems way more common. So I ended up removing 1” from the waistband and adding another 1” back to the rise. By the time I was done the rise for the pants pattern pieces was 2” higher than what the pattern was originally drafted for. I also added another 3/8” of height at the center back as I found that with the cloth diapers the back waistband of pants tends to dip downward on my son.
I had a really hard time measuring my son with any sort of accuracy (he wiggles SO MUCH now and tends to wake up if I try to measure him while he sleeps) but this pattern seems a bit longer in the legs than the RTW I’ve used. I will say that in my son’s case the cloth diaper throws off fit as the bulk tends to take up a lot of the rise in pants/pajamas. However when I was comparing pattern pieces it seemed like the leg length for size 74 was comparable to the length of the 18 months Carter pants, not the 12 months.
One issue I’ve consistently had with RTW baby clothes is in addition to the rise being too short, the waist is too big. While the pants mostly fit everywhere else. So the pants tend to sag and get pulled down while crawling. By making my own I could snug in the elastic, and patch in another piece if it is too small in the future.
Construction
This sewing pattern includes 3/8” seam allowances. IMO it doesn’t make sense for knits as a lot of us are going to be sewing this on a serger. With the pajamas I had already cut them out before I noticed the 3/8” seam allowances, so spent a lot of time trimming (and probably losing some accuracy along the way). For the pants I trimmed the allowances down to 1/4” before cutting, and it was overall a much quicker and pleasant sewing experience.
The instructions are great! There’s illustrations for every step, and even my severely sleep deprived brain could follow along effortlessly. (He has yet to sleep through the night. The entire first year was spent waking up every 2-3 hours. Best we ever got was a single six hour stretch.) I did find it a bit confusing at first when it came to pattern assembly as I’m used to sizes rather than the style variations being nested, but after thinking about it it finally clicked for me. One thing I really enjoyed was there was no trimming or overlapping, you just butt the paper edges together and tape.
Since the pants are cut from the sleeper/pj pattern block they don’t have a front or back crotch curve seam. Instead there’s a gusset at the back crotch seam to give more room and shape.
Conclusion
I would 100% recommend this pattern for basic baby clothes. I prefer Ottobre for wovens and more unique styles, but for your basic baby and toddler wardrobe this pattern works great. Once you figure out the alterations your baby needs you have a solid pattern block to work with as they grow. The instructions are easy to follow and the fact that it offers so many styles and sizes for less than $10 makes it an affordable choice as well.