Style Arc Delta Cargo Pants

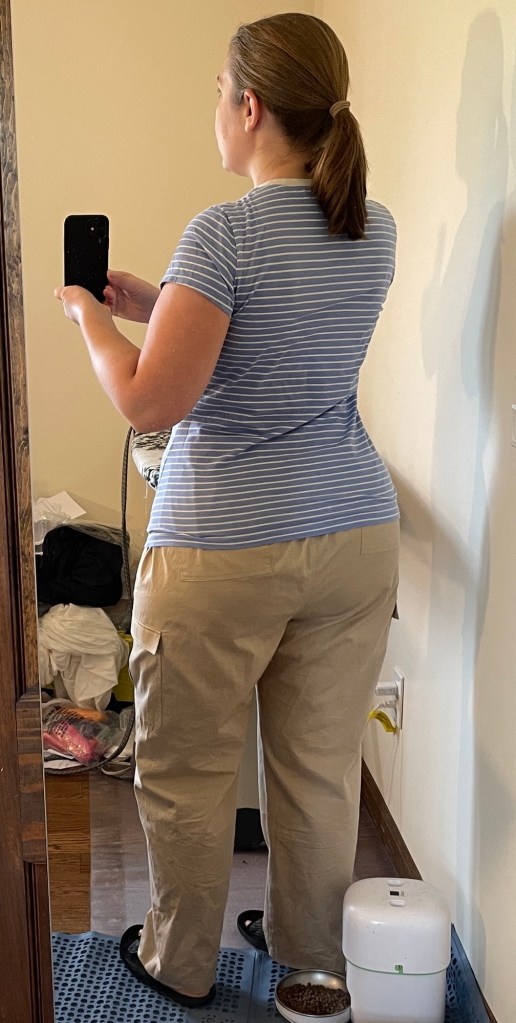
I made these pants with the intention of them being lightweight outdoor work pants. I help out a lot with yard work at my parents’ house now and weed whacking is a perilous task with shorts. So I wanted something full length that would be lightweight, breathable, and comfortable to wear in the heat. The Delta provide plenty of range of motion despite the non stretch fabric so I’m pretty happy with them.
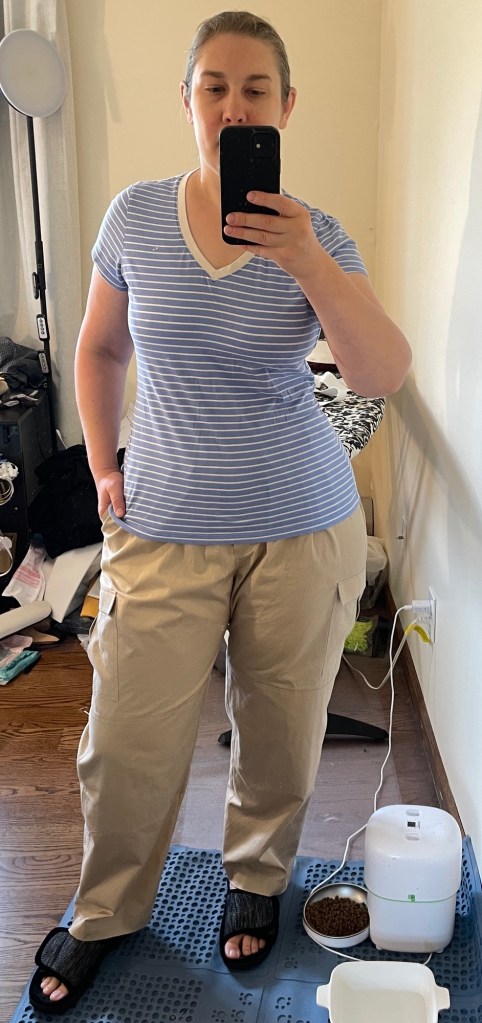
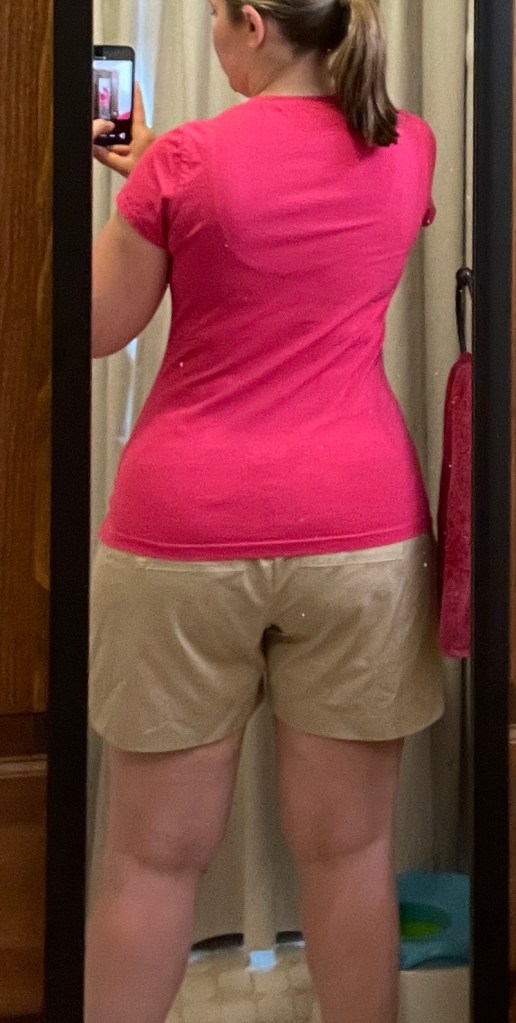
Shown with one of the several Jalie Tina t-shirts I’ve made recently.
Faux front fly with elasticized waist
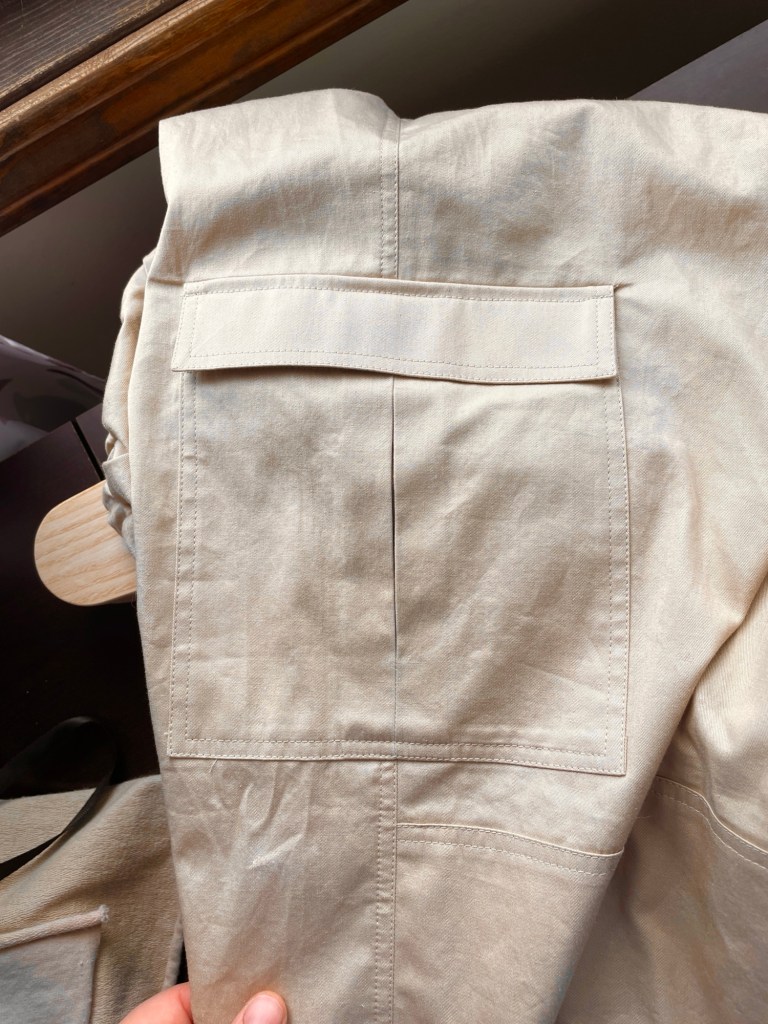
Side cargo pocket with flap
My knee patch
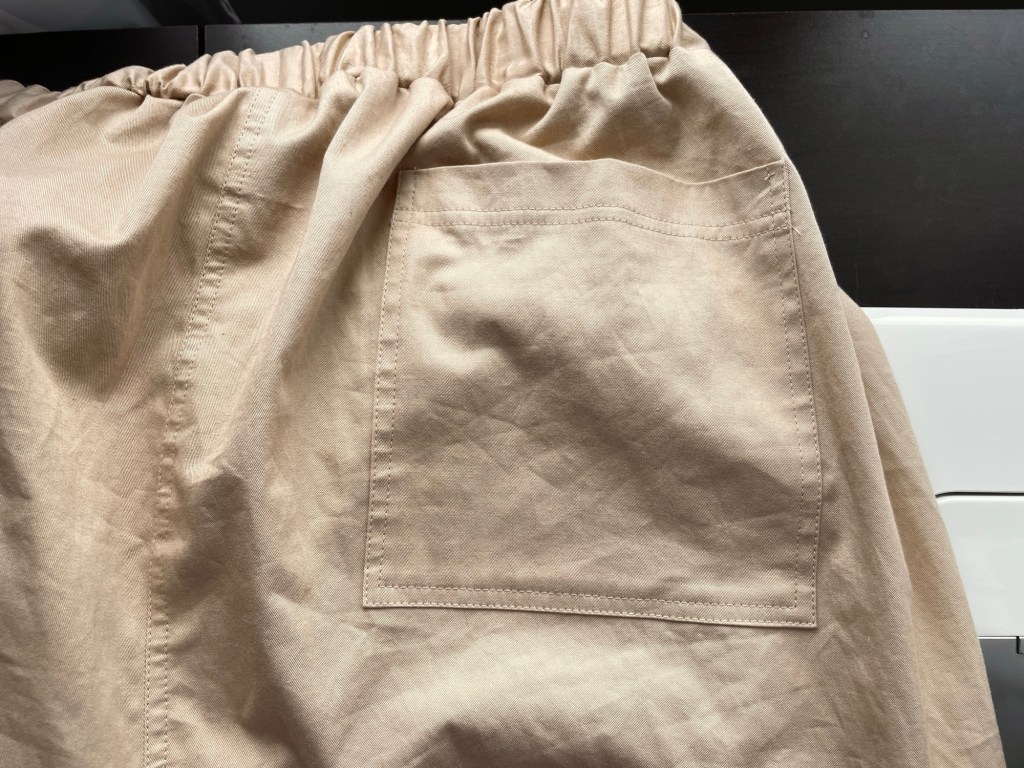
Back patch pocket
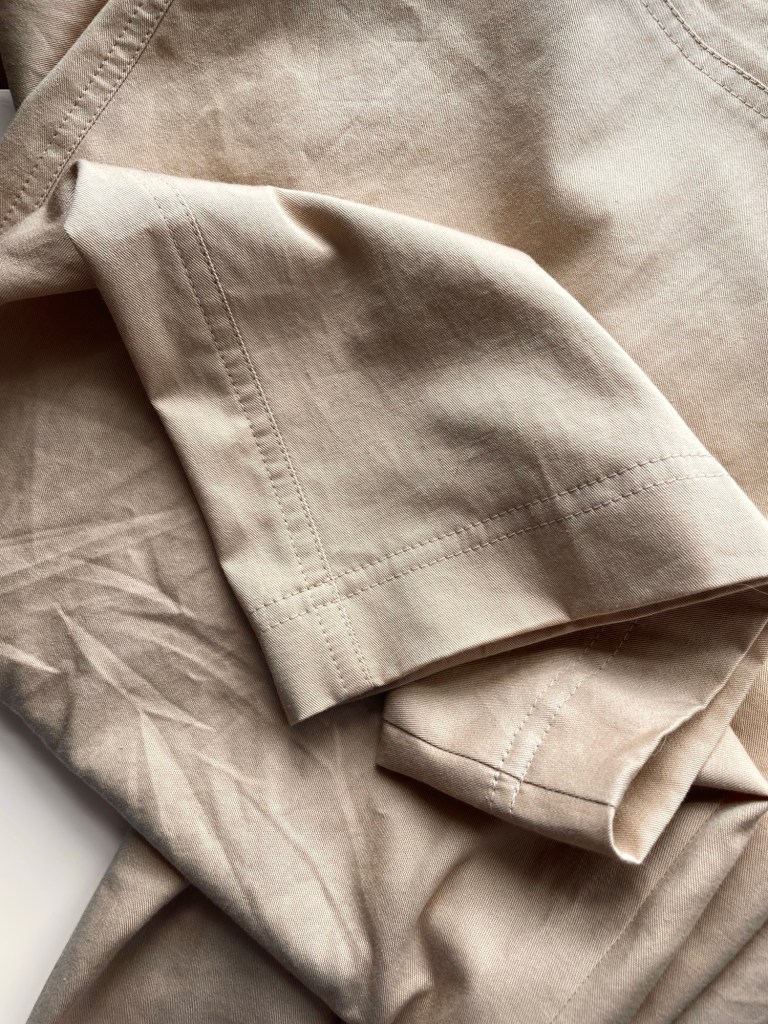
Pants hem. Lots of double row topstitching throughout these pants.

Pattern Background

The Style Arc Delta is a relaxed fit cargo pants pattern. There’s back patch pockets, faux front fly, and slash side pockets along with side cargo pockets with flaps. The elasticized waist is cut to be just slightly larger than the body hip measurement, which allows you to get them on while eliminating bulk at the waist as much as possible.

As you can see from the back leg piece, the leg is slightly tapered at the hem rather than being a true wide leg from knee to hem. I actually prefer this as it makes for a more controlled silhouette, and you don’t have to worry about your hem dragging the ground or getting soaked when it rains.

Size and Alterations

I made a size 20, with the following alterations:

  • Lengthened the legs 1”
  • Added 2.5” height to the back crotch curve, tapering to 1” at the side seam and then to nothing at the center front
  • My finished measurement for the waist elastic ended up being 34.25”, which is between size 16 and 18.
  • Since I made these to be summer outdoor work pants and the fabric is fairly thing for pants fabric, I added another layer of fabric to the knee area for more durability.

Fabric and Materials

I used the same 100% cotton Robert Kaufman fineline twill fabric from Fabric Mart that I used for my Jalie Denyse shorts.

Note: even though Style Arc only gives the yardage estimate for 58” fabric, I was able to use 44” wide fabric. My size 20 with a few length alterations and doubled up knee fabric took 3.25 yards.

For the waistband elastic I used some 1.5” non-roll Stretch-Rite elastic I had in my stash. It comes in a small retail package so I must have gotten it from Joann’s at some point.

The thread is Gutermann Mara 100 from Wawak.

The interfacing for the pocket flaps is Pellon Shape-Flex from Wawak.

Construction

I constructed these entirely on my Jukie TL-2010Q. The standard foot on it is fantastic for a project like this with the double row of topstitching because you can use the very inner edge of the foot as a guide for the first row of stitching so it is 1/16” away from the edge, and then switch to using the scant 1/4” outside as a guide against the first row of stitching. Eyeballing it works great, no need to switch out for guide feet.

When I did the waistband I wasn’t sure what my finished elastic measurement would need to be since this non-roll elastic is stiffer than my usual knit elastic. To better manage this I used the same method as my Jalie shorts where you sew the center back seam for the waistband but leave a 1” opening inside, then use that to thread the elastic through and trial it before trimming and sewing it. Then I hand stitched the opening closed.

Comparison to the Jalie Denyse

These two patterns seem similar, with similar finished measurements, but the drafting is actually quite different. I would say that in general the Delta is a trouser style draft and the Denyse is more of a slacks style draft. An explanation of trouser vs slack vs jeans crotch curves can be found in this old Pattern Review post. Just for reference, the Jalie Denyse is size CC and the Style Arc Delta is a size 20. These are the corresponding sizes for a 48.5” hip.

Overall the Style Arc Delta has a much higher rise than the Denyse: about 1.5” in the back and 2.5” in the front. The back crotch curve of the Delta is also straighter, with a more scooped out back crotch curve. The Denyse is definitely more angled, with a shallower crotch curve. In the photo below I’ve overlaid the Denyse on top of the Delta. They are actually really similar measurements from hip to center back seam, but the Denyse has it shifted more towards the side so the back crotch curve ends more angled.

Here’s a comparison with the Delta on the left and the Denyse on the right.

Now for the front crotch curve comparison.

The Denyse rise is 2.5” lower in the front than the Delta.
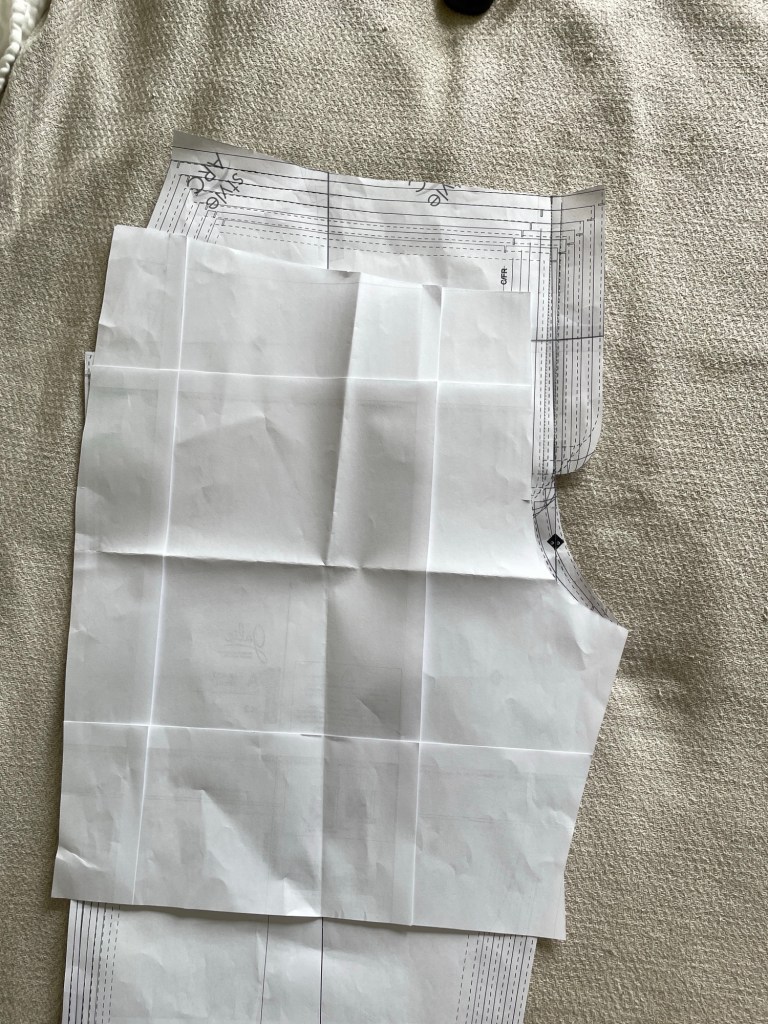
Unfortunately the Delta crotch curve paper got a little crumpled but you can see how the Delta is much shallower and taller compared to the shorter, more scooped out curve of the Demyse.
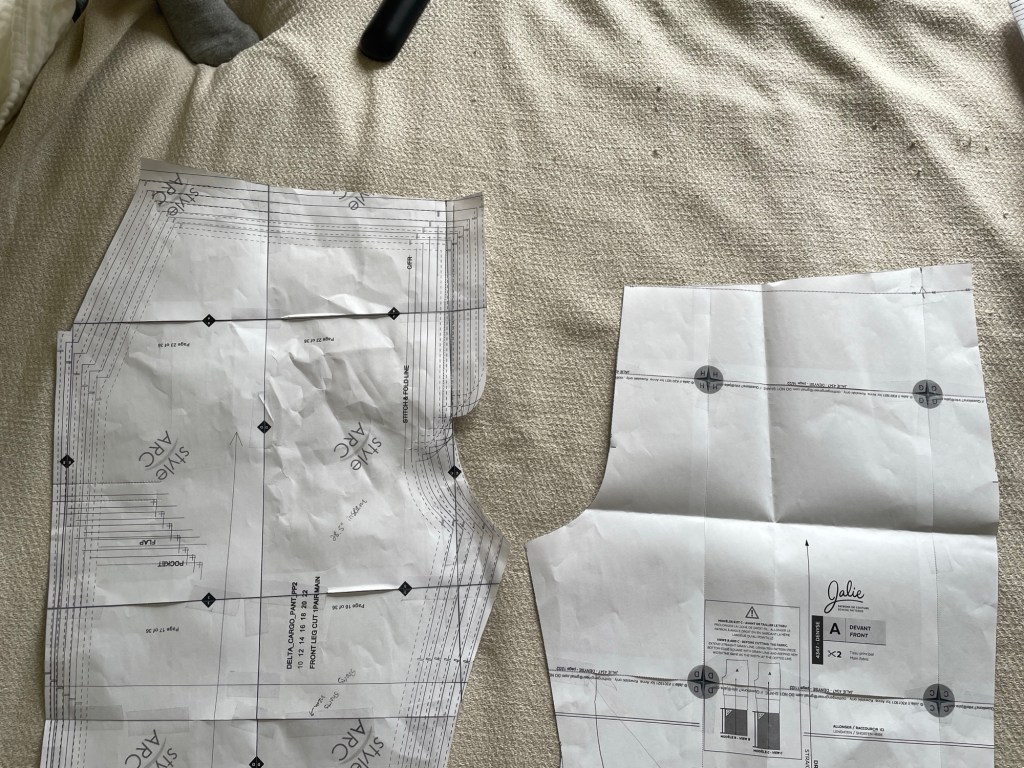
Here they are overlaid, with the Denyse on top of the Delta. (Note that the Jalie Denyse has inseam pockets and the Delta has front slash pockets, so that’s why the top of the Delta is a lot smaller than the Denyse.) As with the back piece the distribution of the pants is so the fabric is shifted to the side seam, so you get the same amount of width across the hip despite it appearing smaller in the photo below.

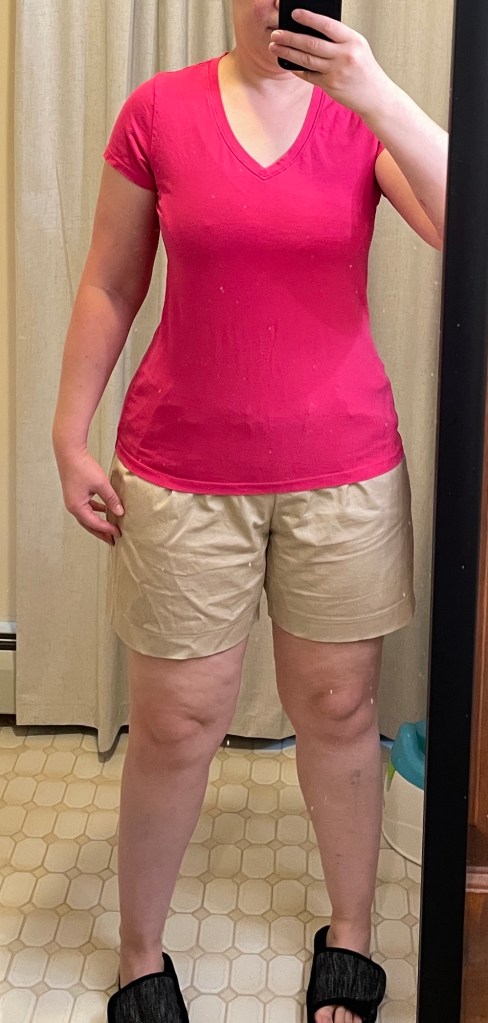
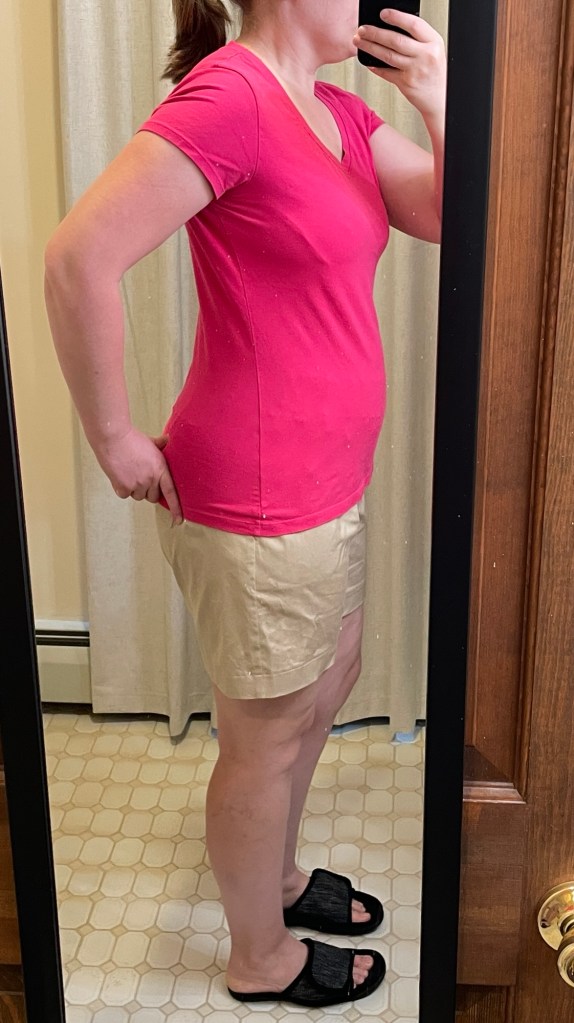
Now heres the front view of the Denyse and Delta respectively. Keep in mind they’re the exact same fabric.

Jalie Denyse
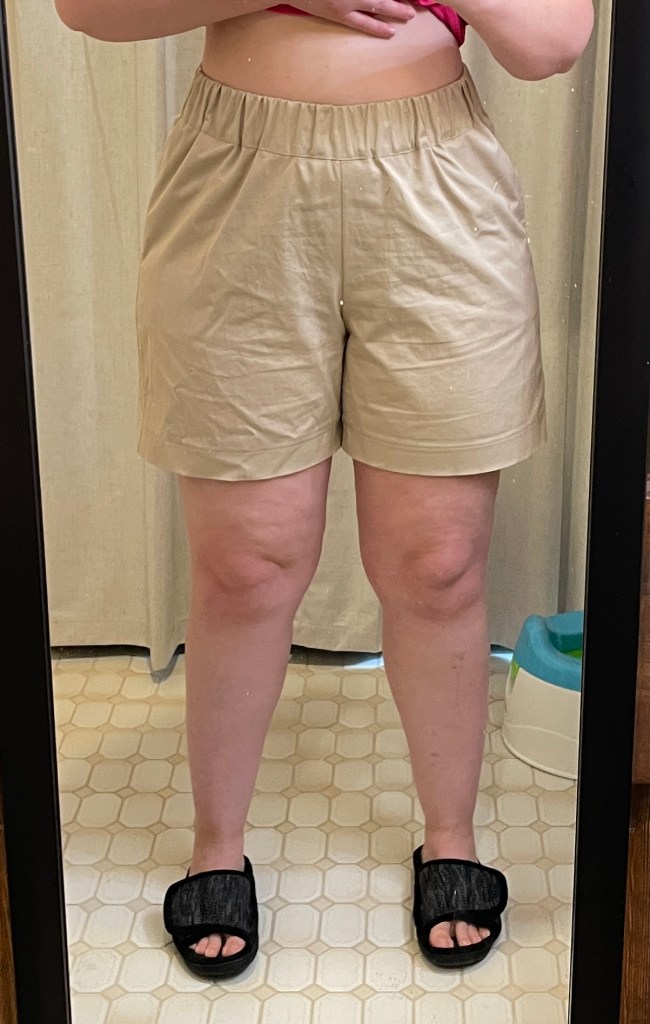
Style Arc Delta

So despite appearing to have similar style and ease, the drafts for these patterns are actually quite different. The Jalie Denyse feels and looks a bit slimmer than the Delta. To me neither one is better or worse. It depends on your body type and what look you are going for. For me, the Delta flows over my hips better. You can see how there’s no diagonal lines from the elastic to the my hips. But it also has a bit more excess fabric around the center front, which does correspond more to a trouser style crotch curve/fit. With the Denyse I definitely have more under butt wrinkles than the Delta, but again this corresponds to the Denyse having more of a slacks draft. (This is why you need to think carefully about the intended draft of a pants pattern before trying to remove every single wrinkle under your butt.)

In general I would say that Jalie is drafted more for straight hips and Style Arc is more for curvier hips. You can even see this in their size chart where the Jalie waist measurement is two centimeters (about 3/4”) larger and the hip one centimeter (3/8”) smaller than the same size would be for Style Arc. That doesn’t necessarily mean you should avoid one or the other, just be aware of it and alter accordingly.
Jalie 4347 Denyse Shorts

Pattern Description

The Jalie Denyse is a pull-on wide leg pants pattern for non-stretch woven fabrics. It comes in shorts, cropped, and full leg lengths. (Note that for cropped and full length you need to extend the length yourself. Jalie has a table of measurements for guidance on how much to extend it.) There’s back patch pockets and front inseam pockets. The elastic waist is cut slightly narrower than the hip, which helps reduce bulk at the waist.

My shirt is the Jalie Tina.

Fabric and Materials

I used a lightweight Robert Kaufman cotton twill from Fabric Mart. Unfortunately I don’t appear to have taken a screenshot when I purchased it, but it is lightweight and could almost be used for a heavier weight shirt.

I am not entirely sure where I got the 2” elastic. It may be an old Fashion Sewing Supply purchase. If not Fashion Sewing Supply then Wawak or Mandala Crafts on Amazon.

Alterations

I started with a size CC, which is slightly larger than my current hip measurement. My fabric has zero stretch/give and I’ve had some weight gain lately (the relentless demands of caring for my young and wild son and elderly stroke victim father this year is taking its toll on me) so I felt like it was better to just size up.

I added a total of 2.5” to the center back height, tapering to nothing at the center front. Technically I could have probably gotten away with just 1.5″, but I prefer my back waist to be higher than the front because I want to be fully covered when sitting or bending over.

Since my waist is smaller than my hip size I used the size Z elastic measurement.

Construction

These went together pretty quickly. I was able to get them cut and sewn and finished in about 3-3.5 hours.

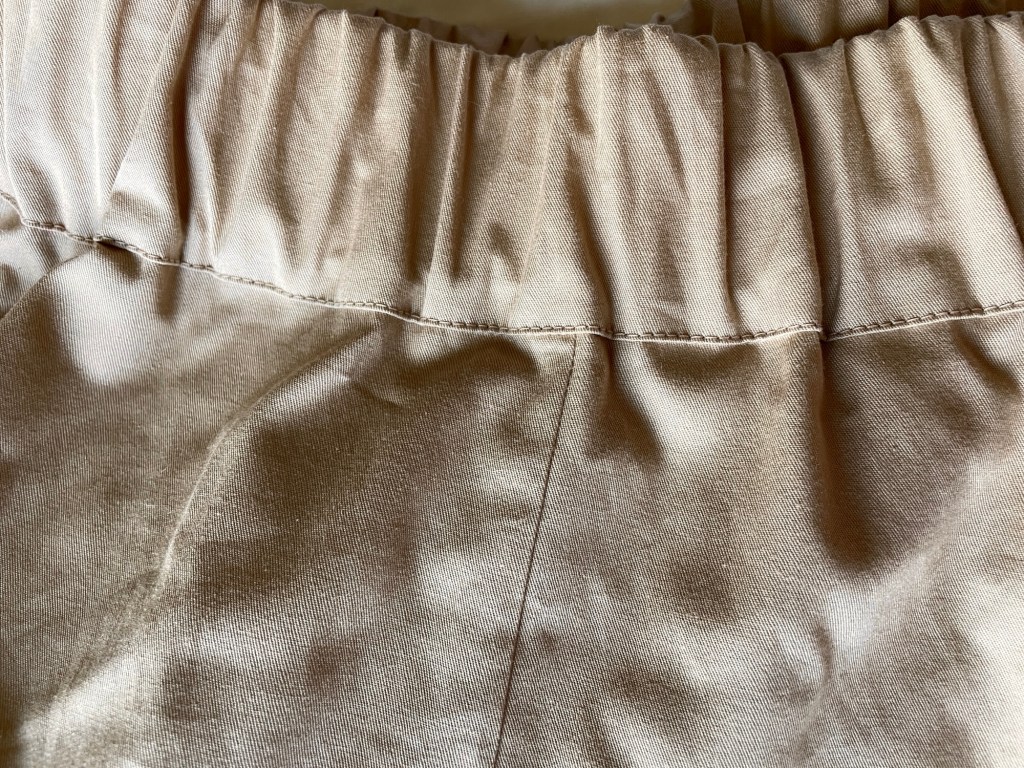
I liked the construction for the waist. You see one side seam normally, but leave a one inch opening when sewing the front and back waistbands together at the other side seam. Fold and press the seam allowance for the lower edge in place. Then attach the waistband to then pants with the right side of the waistband facing the wrong side of the pants. Then you press, flip it over, and sew that edge you folded over earlier to the right side of the pants. It gives a very neat finish from the right side while fully containing the wrong side.

Inside of waistband
Outside of waistband

Conclusion

I find these shorts much more comfortable for my pear shaped figure than the Jalie 3243. My fabric has no give to it and I didn’t feel uncomfortable at all in them during the day, not even when I was squatting and sitting on the ground outside today assembling my son’s new sandbox. The wide elastic waistband is very comfortable to wear, and the 6″ inseam length of my size CC makes me feel comfortable with the amount of coverage provided. (For this reason I think it would make a really good woven shorts pattern for little kids as well as adults.) The only thing is that due to the elasticized waist combined with my “bubble butt” and narrower waist, particularly in the back, the back pockets tend to gape. This isn’t a dealbreaker for me because my shirt covers it, but something I thought I should mention as a caution to anyone with a shape like me that is considering making these.

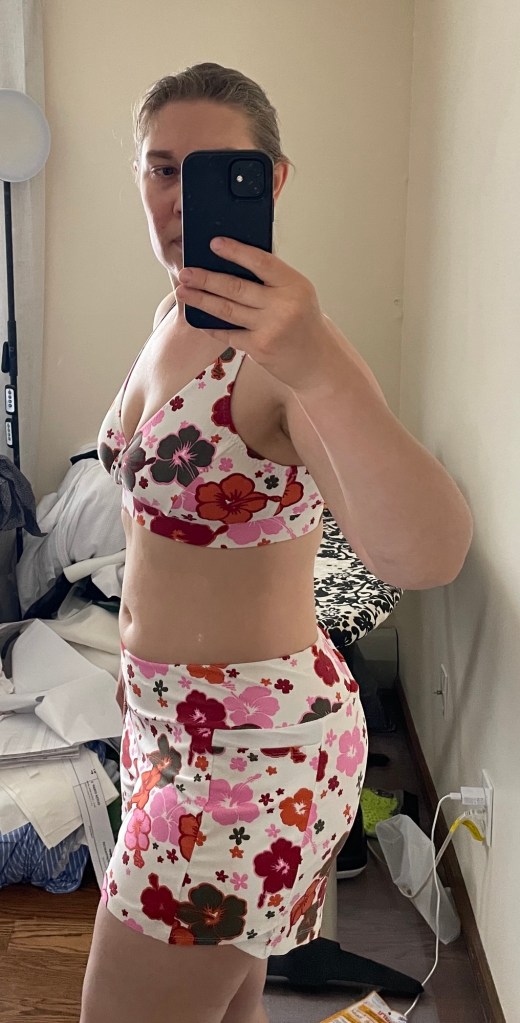
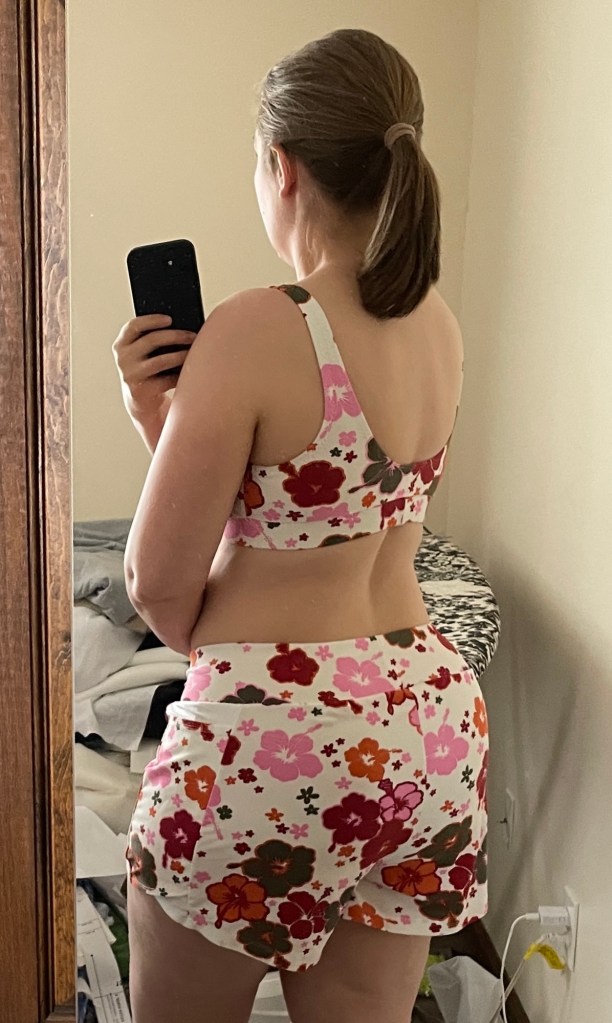
A Jalie Bikini: 3351 Swim Shorts and 4136 Crossover Top

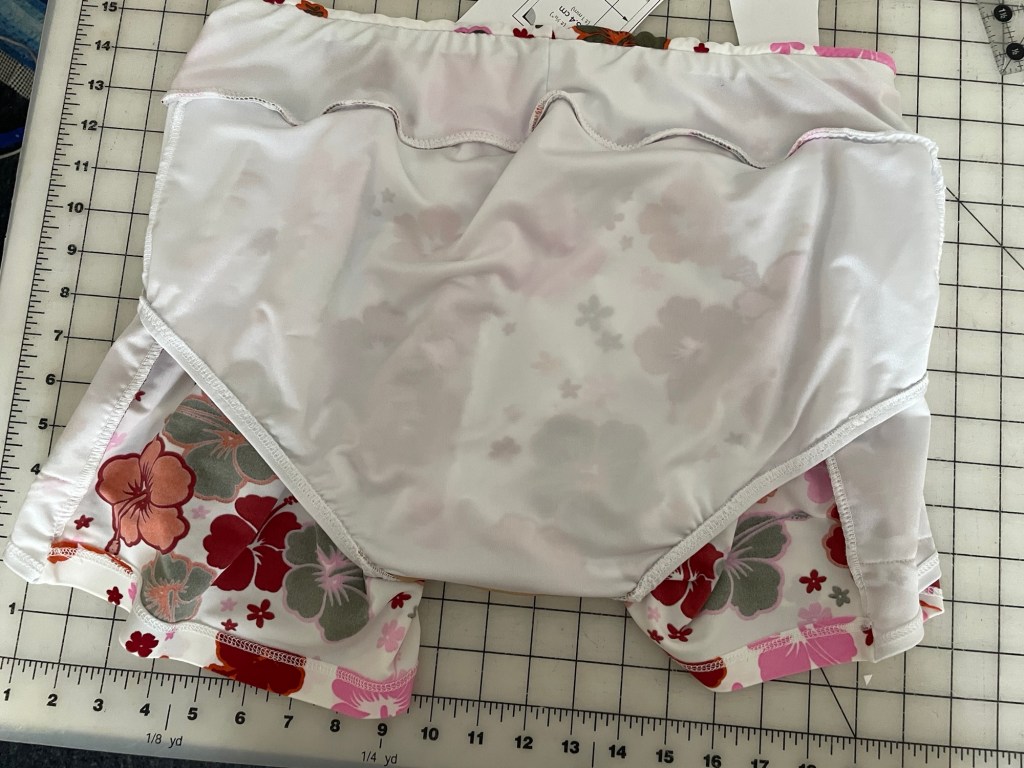
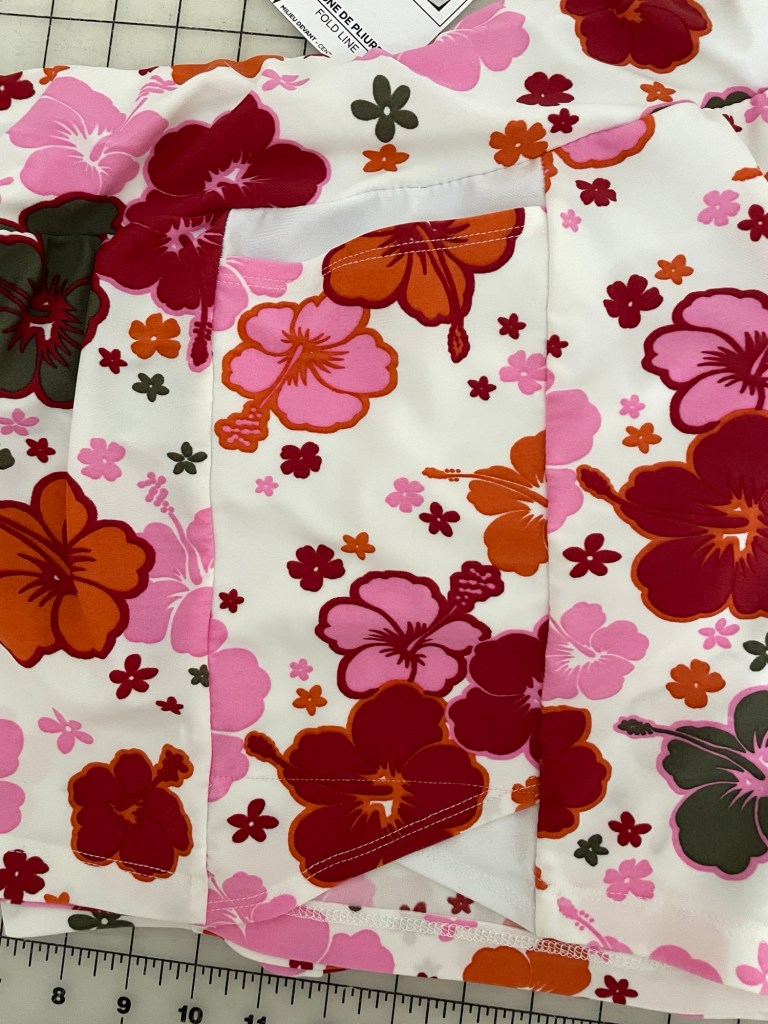
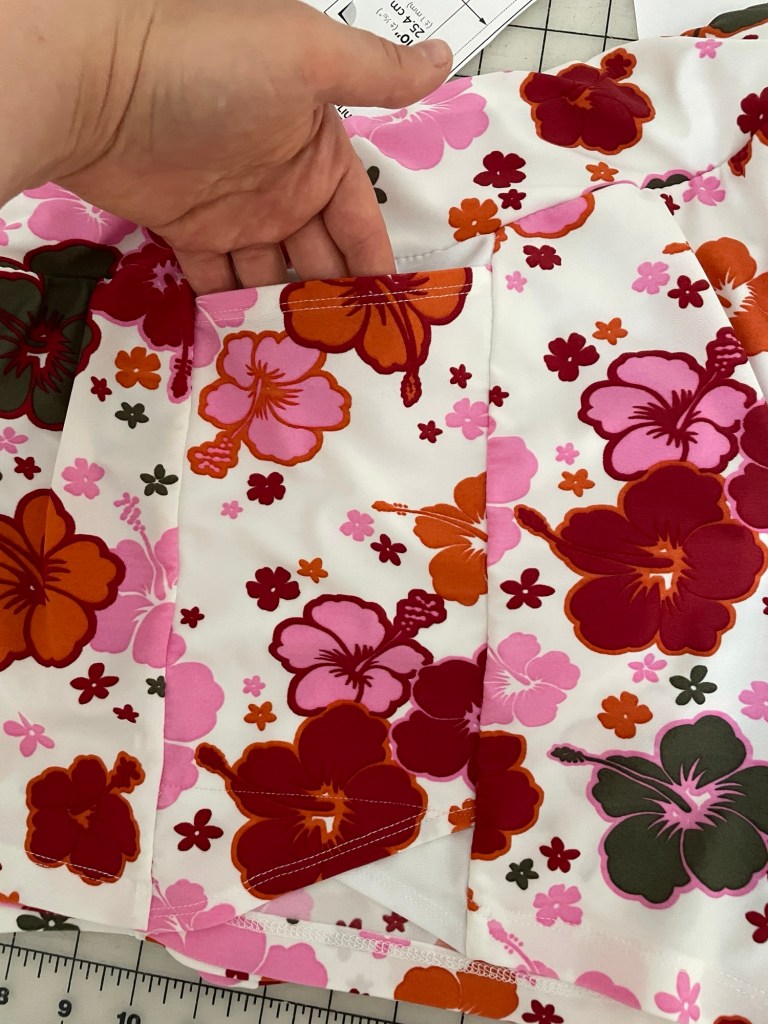
Side pocket of shorts

Pattern Background

Jalie 3351

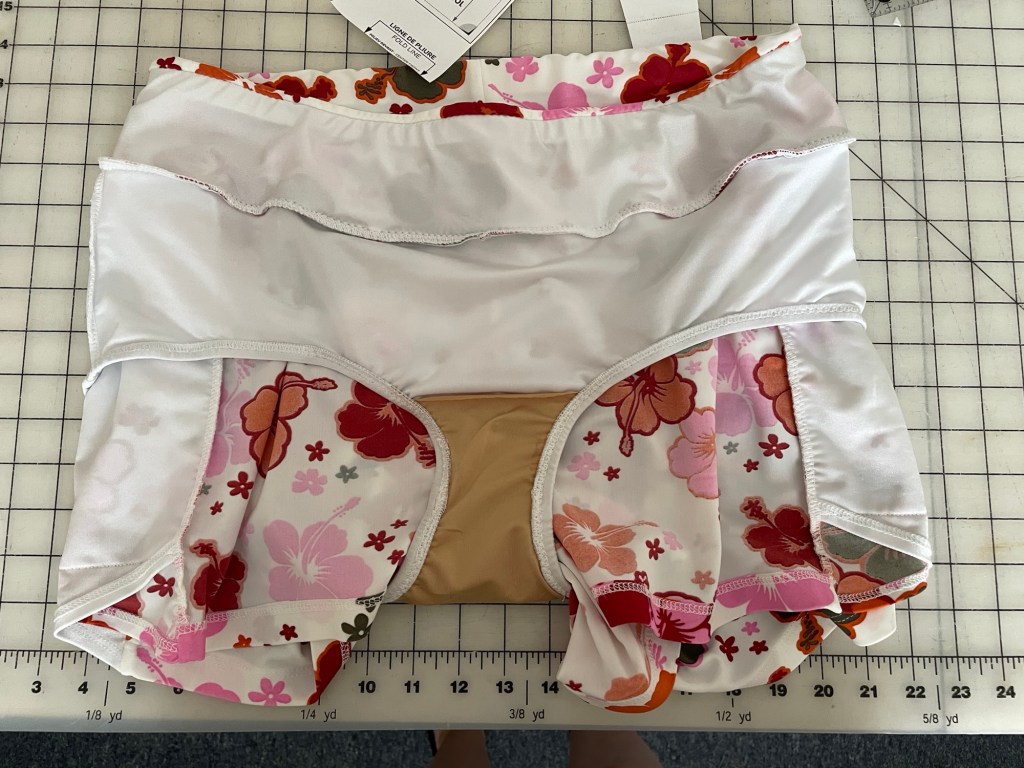
This pattern can be used for either running or swim shorts. It has a wide waistband, side panel pockets, and built in briefs.

Per Jalie, the waistband hits around the navel for kids, a few inches below the navel for teen and smaller adult sizes, and got up around the navel again for the larger adult sizes.

The size range goes from F (2T) all the way to FF (women’s size 22/ euro 52).

This pattern is out of print now so it is only available as a PDF.

Jalie 4136

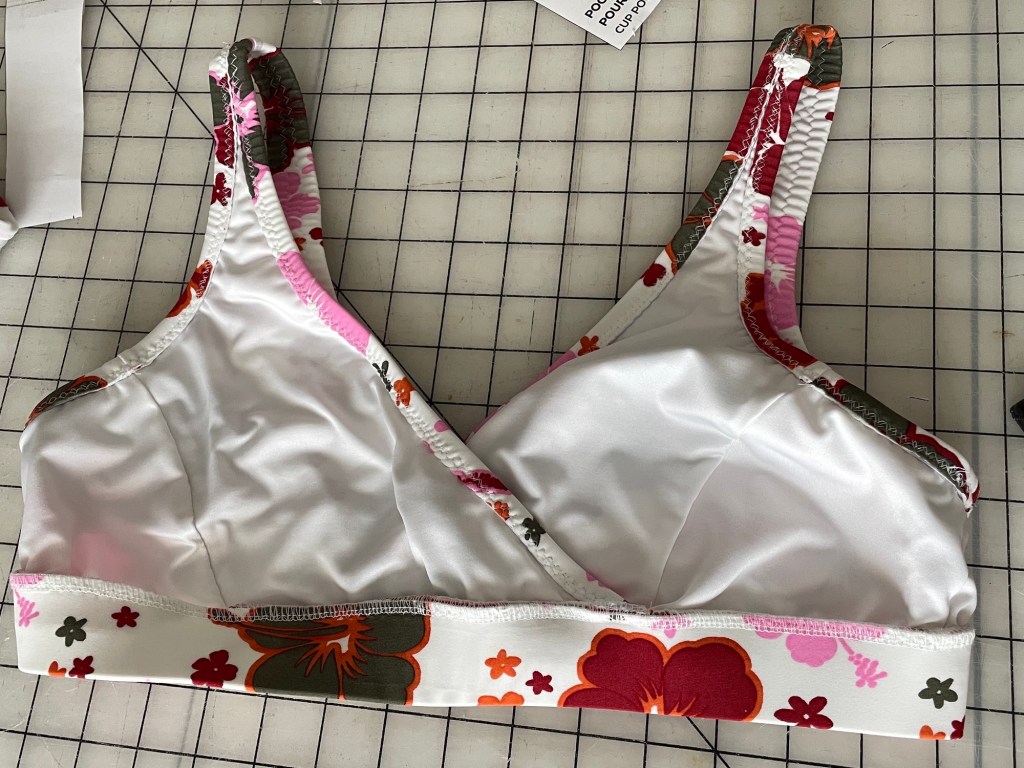
This fully lined bikini pattern has both a scoop neck and crossover versions for the top. The bikini bottoms include both a lower rise version and higher waisted versions, one of which has a self fabric tie detail.

Size range goes from 2T to 2X. Like with a lot of the newer Jalie pattern releases there’s also a PDF only version that goes from 2T to 5X, and a plus size version for 1X-5X.

Fit and Alterations

Jalie 3351 Shorts

Per my hip measurement I made a size CC. The ease was perfect.

I added 2.5” of height to the center back seam, tapering to nothing at the center front. I also added 3/8” width to the front inseam for my fuller thighs. When I was adding the elastic I sized down a couple of sizes per the elastic cutting length chart. They feel snug and secure without digging in.

After making a test version I lowered the rise 1”. They sat at the navel and just seemed too big and matronly when worn with a bikini top. They would have been fine if worn with a rashguard top or tshirt.

Jalie 4136 Bikini Top

I made a size Y. I sized down to a W for the band. I compared my underbust measurement to the size chart and W was the closest matching measurement, so that’s what I cut.

Fabric and Materials

I used a Lycra purchase from the Elingeria sometime back in 2012 (yes it has been sitting in my stash all this time). I didn’t have quite enough (these were scraps from another project from long ago) so I cut the side panel, waistband facing, and brief from a white swimwear fabric I found on Amazon. I should have read the description better because it’s kind of shimmery and I prefer matte fabrics for swimwear, but so little of it peeks out that it doesn’t really matter.

The lining for the crotch was a swimwear lining recently purchased on sale from Emma One Sock.

The 3/8” braided elastic was from the Amazon seller Mandala Crafts.

For the bikini top I used a swimwear lining fabric from Payless Fabrics on Amazon.

Construction

Jalie 3351 Shorts

The instructions are excellent and I had no issues. I really like how the waistband is constructed. The facing is cut shorter than the outside waistband, which causes the seam where the elastic, outer waistband, and waistband facing meet to be folded entirely to the inside. This completely eliminates bulk at the upper edge of the waistband, and if you’re using a different fabric for the waistband facing it won’t show through at all.

I will say that my life was made significantly easier when turning up those hems for the pockets and hems by using Design One fusible stay tape. This tape is exactly 3/8” wide so if you apply it directly along the edge you get a nice guide for folding the hem before removing the paper. I just doubled it up to make it 3/4” wide for the front and back shorts hem. It not only made turning up the hem far easier on this slippery synthetic fabric, but also made cover stitching way easier. The final result still maintained its stretch. 10/10 recommend!

Jalie 4136 Bikini Top

Like with the shorts, the instructions were excellent. I particularly liked the band construction. You zigzag the elastic to one edge, fold the other edge of the fabric up around the elastic snugly, zigzag again, trim, and then sew it directly to the rest of the top. Very neat and completely eliminates the elastic rolling inside during wear or laundering.

Conclusion

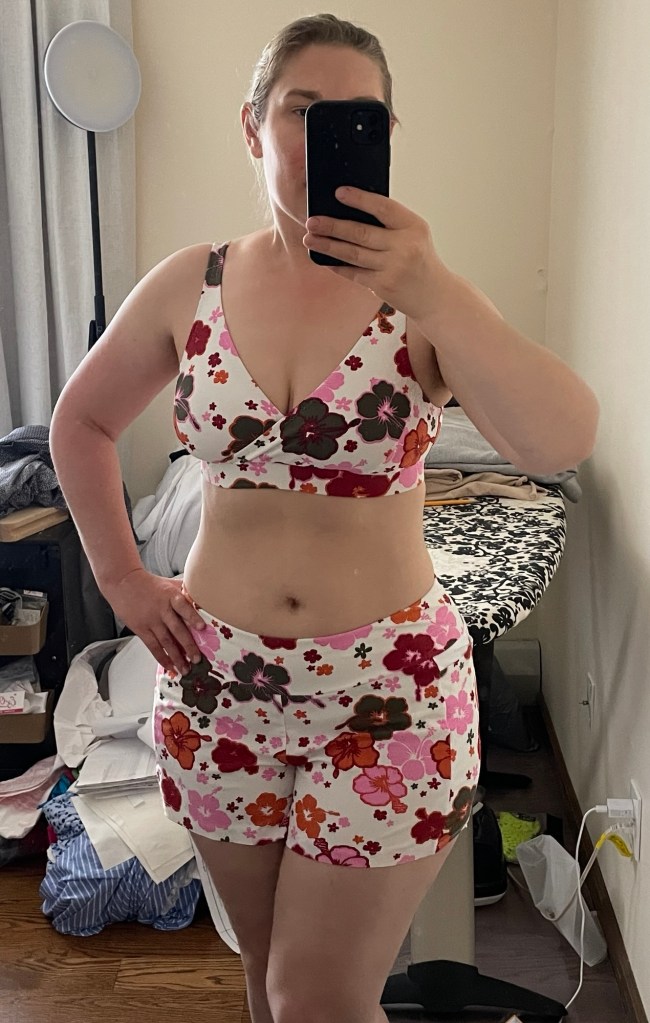
I’m extremely happy with the shorts. They fit and feel great! I wanted something I could confidently wear to the beach while playing with my little boy and these are perfect for that. Unlike with a skirt they won’t ride up in the water, and you get plenty of coverage if you’re self conscious about your lower half (which I definitely am post baby). The brief is full coverage and stays in place really well.

The bikini top feels secure and comfortable to wear. I think I am a 36C now (not sure since I haven’t worn a proper underwired bra in years now) and I feel like it gives good support. I have plans to make it as a bra top as well, because my toddler still nurses on occasion and the crossover styling makes that very convenient. (Jalie actually has a post on converting this pattern to an unlined bra top, though I would likely do a lined version for extra support.)

Jalie 3243: Pull-on Pants

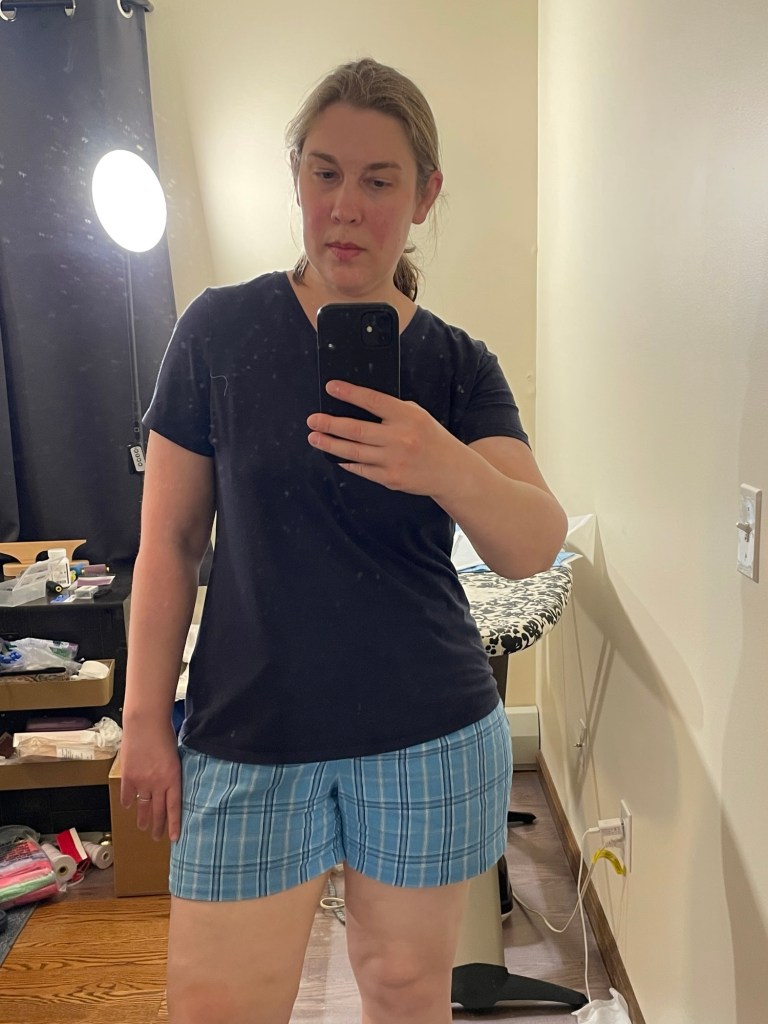
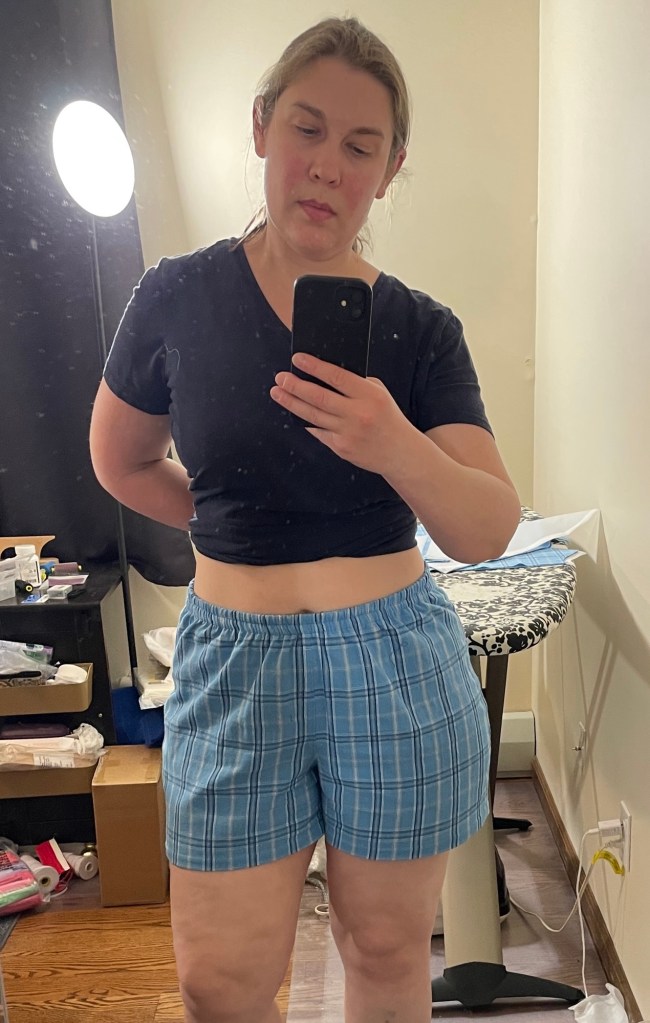
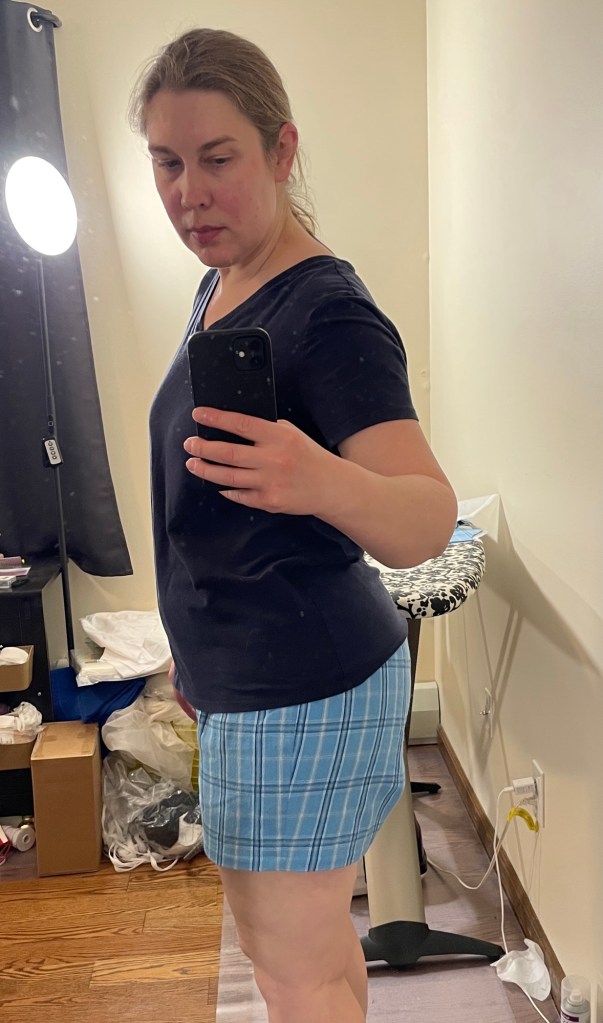
This was a very quick and easy Friday night project. I’ve been trying to get ahead of a summer wardrobe and needed some lightweight pajama shorts.

Pattern Background

Jalie 3243 pull-on pants and shorts have front patch hip pockets, an elastic waistband, and the option of having either the waistband facing showing on the front (nice if you want to do a contrasting color) or hidden inside. This pattern is drafted for wovens.

Sizes go from 2T all the way up to women’s size 22. As is often the case with Jalie, I chose this pattern because the wide size range and classic styling mean I can use it for my toddler son as he grows as well as for myself and my husband.

Materials

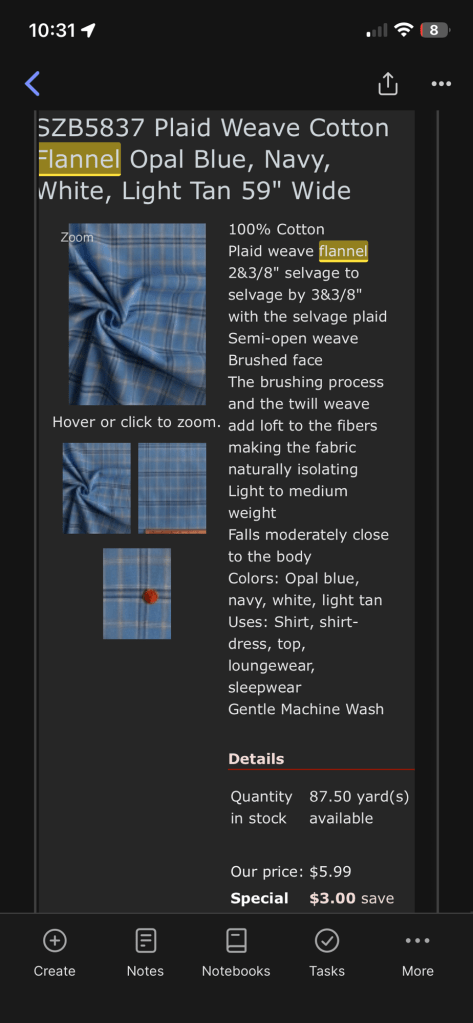
You can use both regular and stretch wovens. I used a lightweight plaid flannel I bought back in 2012 from Fabric Mart. It isn’t the best quality flannel but since I wanted these for summer pajama shorts the light weight and minimal nap worked in my favor. (And yes I really paid only $3 a yard! How I miss the times before rampant inflation and tariffs.)

Size and Alterations

I cut a size CC based on my hip measurement. For alterations I added 2.5” to the center back seam height, tapering to nothing at the center front. I also added 1/4” width to the front inseam. I left the pockets off because these are for pajamas and I just didn’t want to deal with trying to pattern match that.

My first pair wasn’t uncomfortable but they just seemed too snug for my taste. Jalie does note on their website that if you want a looser fit in the hip you should go up a size or use a stretch fabrics.

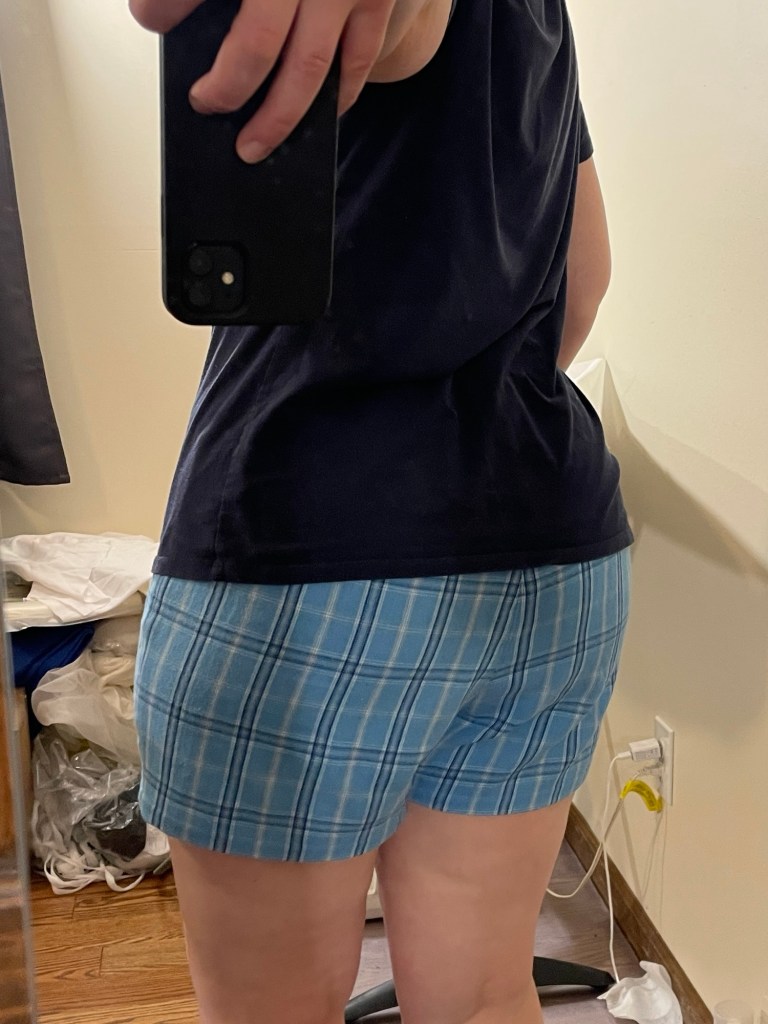
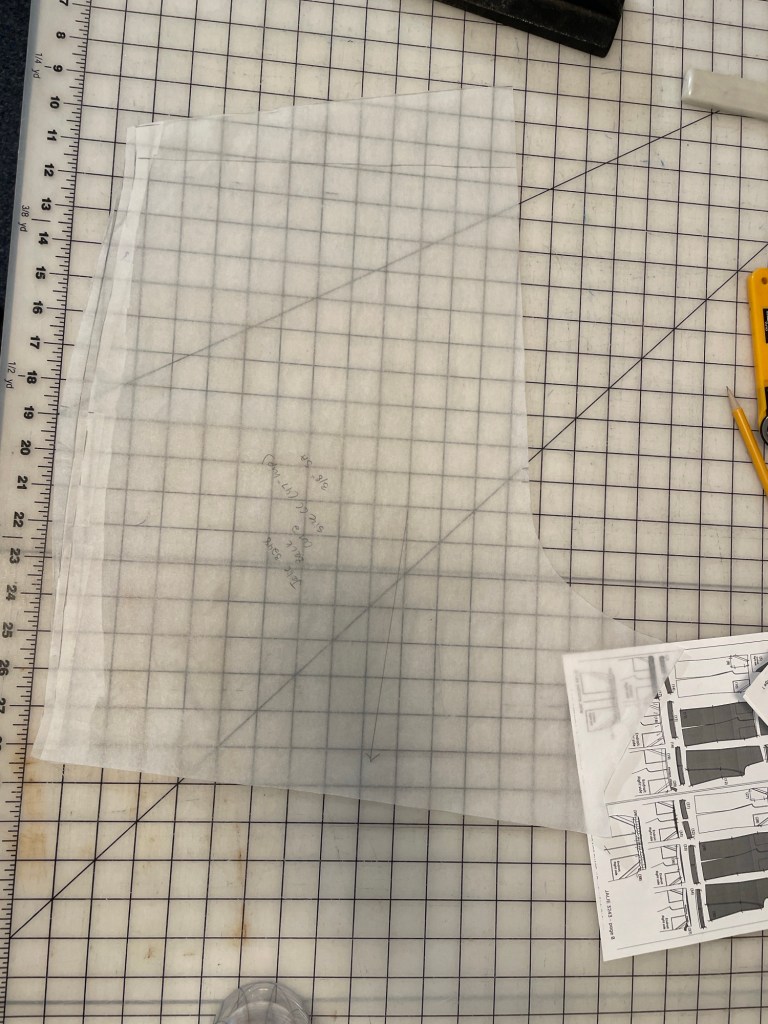
I also noticed they were too tight in the butt and the side seam wasn’t hanging straight. So for my second version I added 1/4” to all side seams, thus giving myself another 1” of ease, and added another 1/2” width to the back side seam at the hip. Here’s what the back piece looked like after I was done:

These alterations made my second pair much better.

Construction

These pants are very quick to make. I sewed them on my Juki TL-2010Q (always a pleasure to sew on for light to medium weight fabrics) and finished the inside seams on my serger. I did a couple things slightly different from the instructions though.

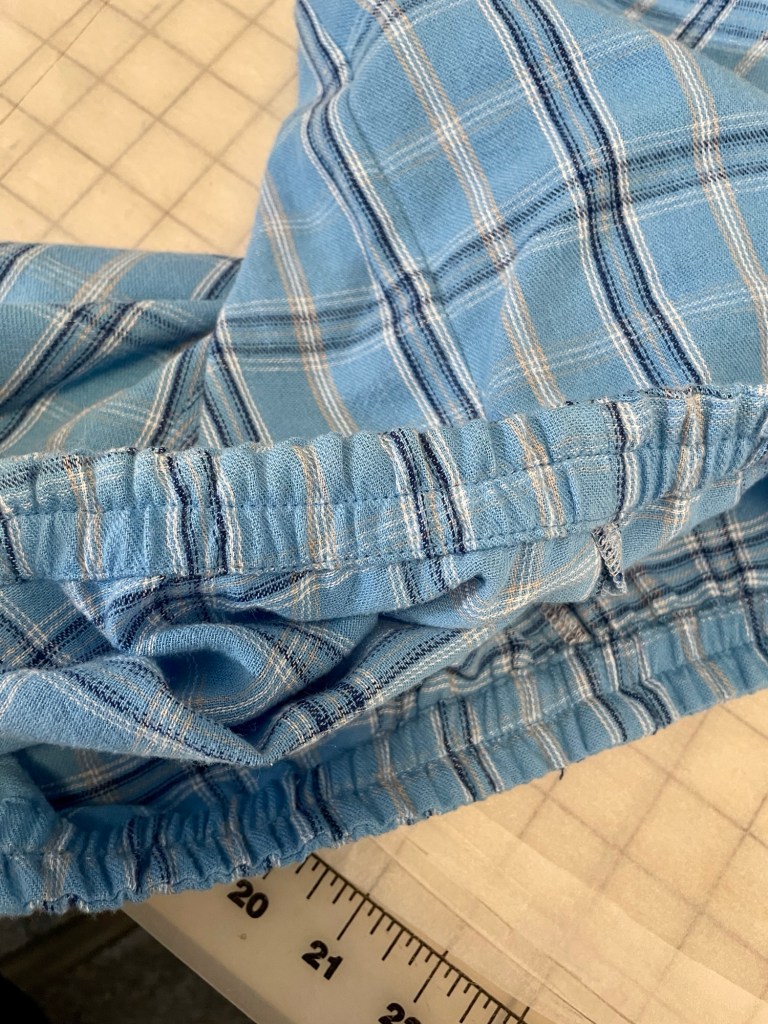
Rather than creating a casing and then pulling the waistband elastic through, I sewed the seam allowance of the waistband facing piece directly on top of the elastic, overlapping the edge of the seam allowance about 1/4” from the left edge of the elastic and using a 4mm length stitch so I wouldn’t overwork the elastic and stretch it out of shape. Then after I rolled the elastic to the inside of the shorts I stitched very close to the lower edge of the elastic. Once it was done the elastic was completely encased and then I topstitched in the middle. No need to make a casing and then pull the elastic through.

Of course it isn’t as adjustable after the fact so probably not good for kids clothes or your first version, but good for situations where you have confidence that you won’t need to alter it after the fact.

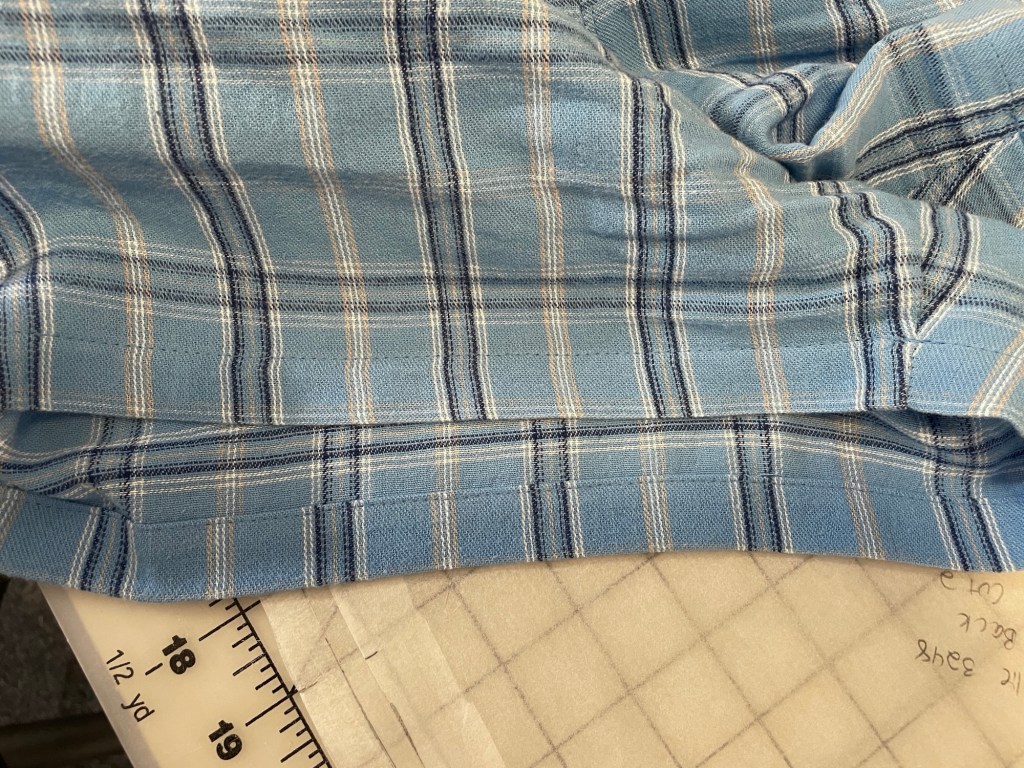
When I did the hem I first turned it up only 1/4”, then turned it up again another 3/4” and stitched very close to the edge. Very similar to how I did the waistband. This made for a very neat hem finish:

In the past I used to serge then fold to the inside and then topstitch over the serged edge, but I find myself preferring to try new things and do finishes like this lately. Helps distract from some recent sadness like my father’s health struggles and losing my beloved cat recently. (My dad actually improved enough that he was able to go home to my mom a couple of weeks ago, but I’m still doing a significant amount of caregiving duties. And while my cat had some health struggles the past six months, I wasn’t anticipating losing him quite so soon and miss him terribly.)

Conclusion

This is a really nice pull on pants pattern for all ages. The waistband facing eliminates having to measure and turn up a waistband casing, and the fit is actually quite tailored for this style of pants. I do recommend going up a size though if you use a non-stretch woven.