If you’re looking for a real thread color chart and not one of the wildly inaccurate online ones for Maxi-Lock serger thread, someone on Facebook is selling them for $35. We are in the same state but since she’s not super close to me I asked if she would be willing to ship it to me. She charged very reasonable shipping and it arrived quickly. The swatch cards are sturdy and there’s a nice big ring to keep it all together. Her communication was excellent as well.
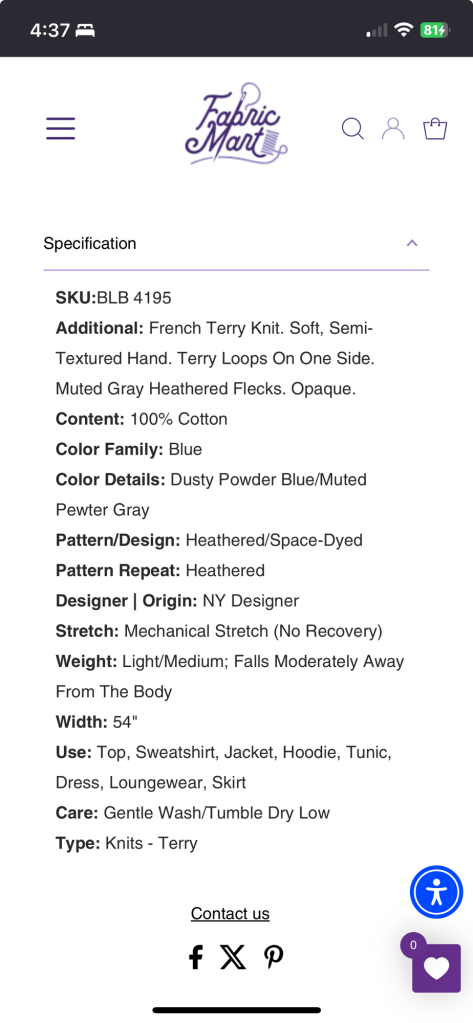
For the first version I used a heathered powder blue cotton French terry from Fabric Mart for the main fabric, and a baby rib knit from Nature’s Fabrics for the ribbing.
I really disliked working with this French terry. It was stiff and bulky and tightly woven, and at some point during the project my Janome 1100D serger got knocked out of time and required a trip to the dealer. Fortunately I have an old Janome MyLock 204D serger my parents gave to me way back when I was still in college and just learning to sew. I hadn’t used it in years, but after giving it a thorough cleaning, a couple of squirts of WD-40 in some strategic areas, and then more cleaning and a good oiling it was up and running. Even though it’s more difficult to thread and more work getting the tension correct, it did a better job handling this fabric than the 1100D.
Despite my dislike for working with this fabric my son has no issues wearing it! I can tell it will wear like iron too. He’s still not walking yet and the drier fall air is making the skin on his knees more sensitive, so I like him to wear pants out of sturdy fabrics.
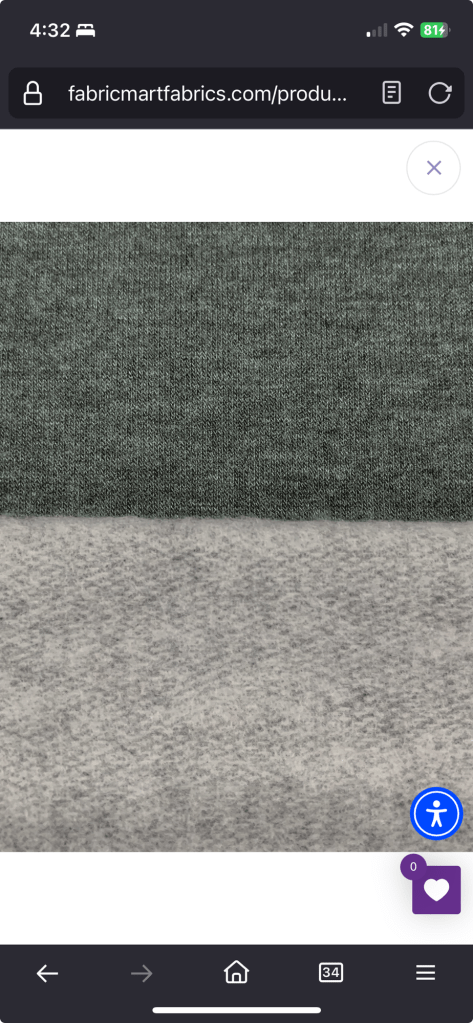
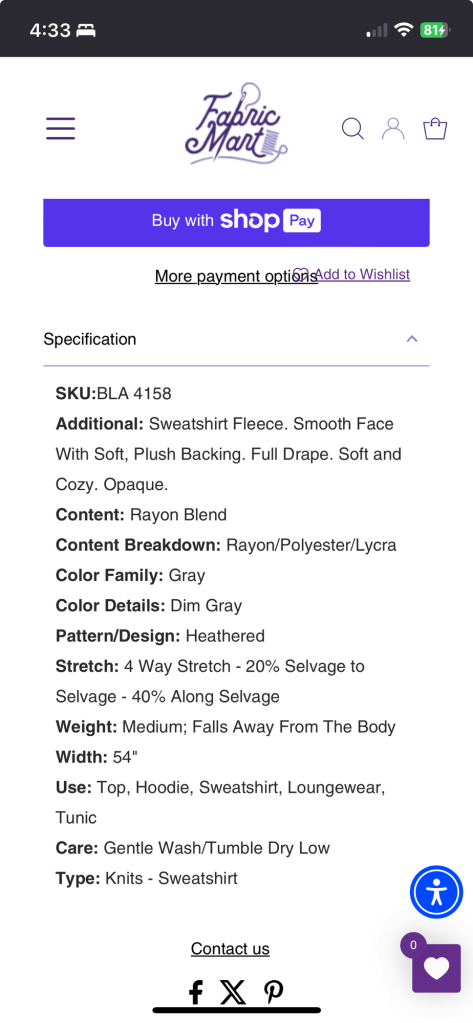
For my second version I used a much softer and flexible rayon/poly/lycra sweatshirt fleece from Fabric Mart for the main fabric. For the rib trim I used a cotton rib knit purchased years ago, likely from Fabric Mart. Since the stretch was greater along the selvage I cut it cross grain. I used the reverse side for the cat appliqué.
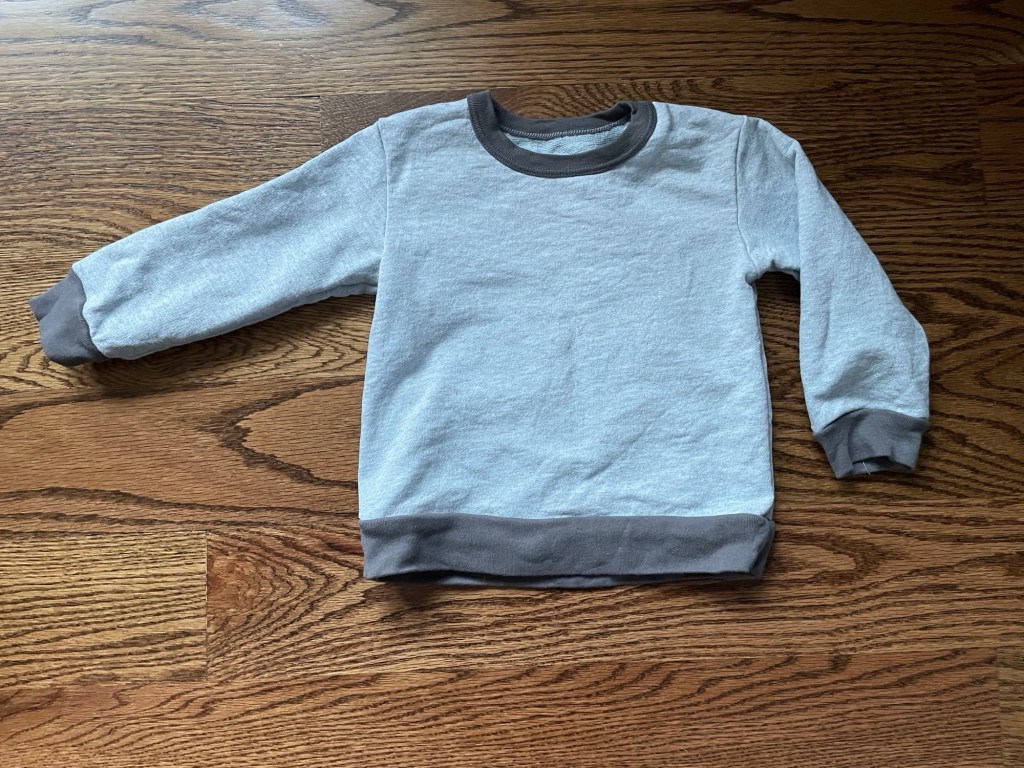
#4: Sweatshirt
This pattern is a simple crewneck sweatshirt pattern, with set-in sleeves and ribbing finishing off the cuffs and bottom band as well as the neckline. the pattern has placement markings for if you want to add a ribbon trim going down the sleeve.
I didn’t make any alterations. I was able to construct this entirely on the serger aside from cover stitching the neck band in place and securing the end of the ribbing once the right shoulder seam had been sewn. Ottobre has you usually attach bindings flat vs in the round and I much prefer it this way. I can adjust on the fly vs trying to guess how long the binding strip should be before attaching it. Once you sew the other shoulder seam you tack the binding/seam allowance in place with a small straight stitch.
After attaching the neckline ribbing to the gray version I felt like it would be nice to do something extra, so I decided to do my first ever appliqué. I chose a cat because my son likes cats and the design was simple. I first copied the cat from Kwik Sew’s Sewing for Baby book. I then cut out the piece of paper, traced it onto a scrap piece of fabric interfaced with Pro-Sheer Elegance with a Frixon marker, then traced the outline of the pattern again onto Sulky Solvy. I didn’t have any fusible web so I attached it to the fabric with a glue stick. Then I put another piece of Solvy on top of the one I glued in place to prevent it from sticking to my presser foot. I used some Magnifico thread from Superior Threads I had in my stash for the outline. For most of the appliqué I used a 4mm wide and 0.75 length zigzag stitch. For the smaller details, like the tip of ear, eyes, and mouth I changed to a 1.5mm width. The nose was tricky, I ended up starting with a 4mm width stitch and kept decreasing as I went further down towards the mouth. The workmanship isn’t as fine as I would have liked and I should have used a dark gray or black for the eyes and mouth, but I do think it helps add more visual appeal without requiring an embroidery machine.
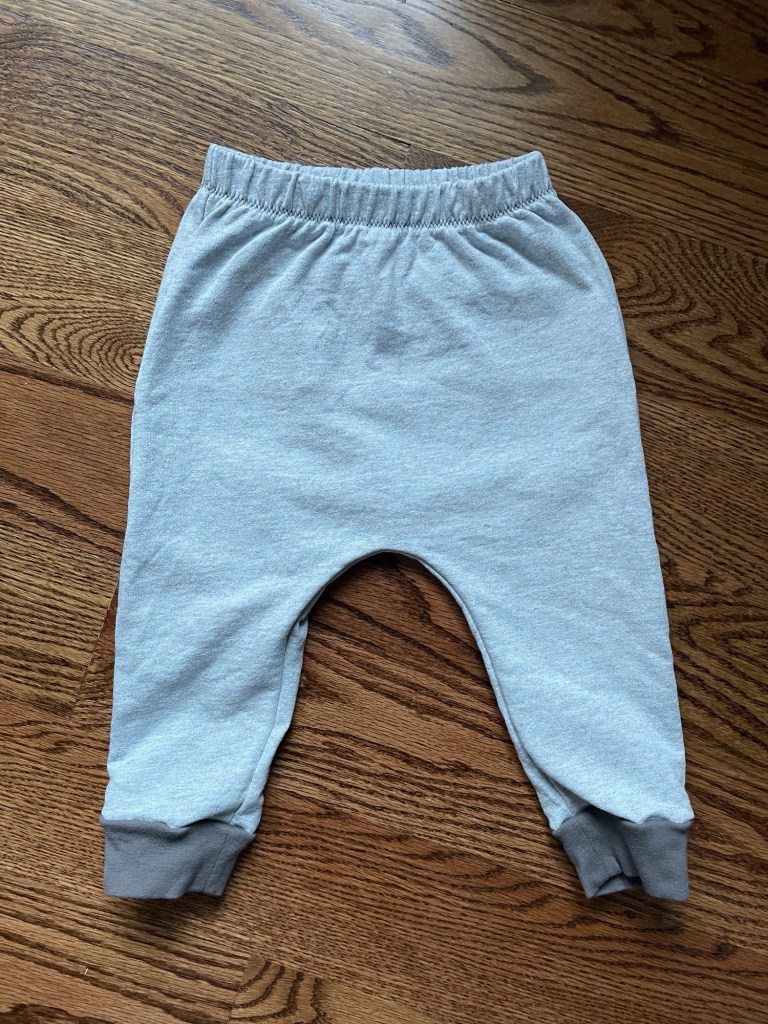
#5: Sweatpants
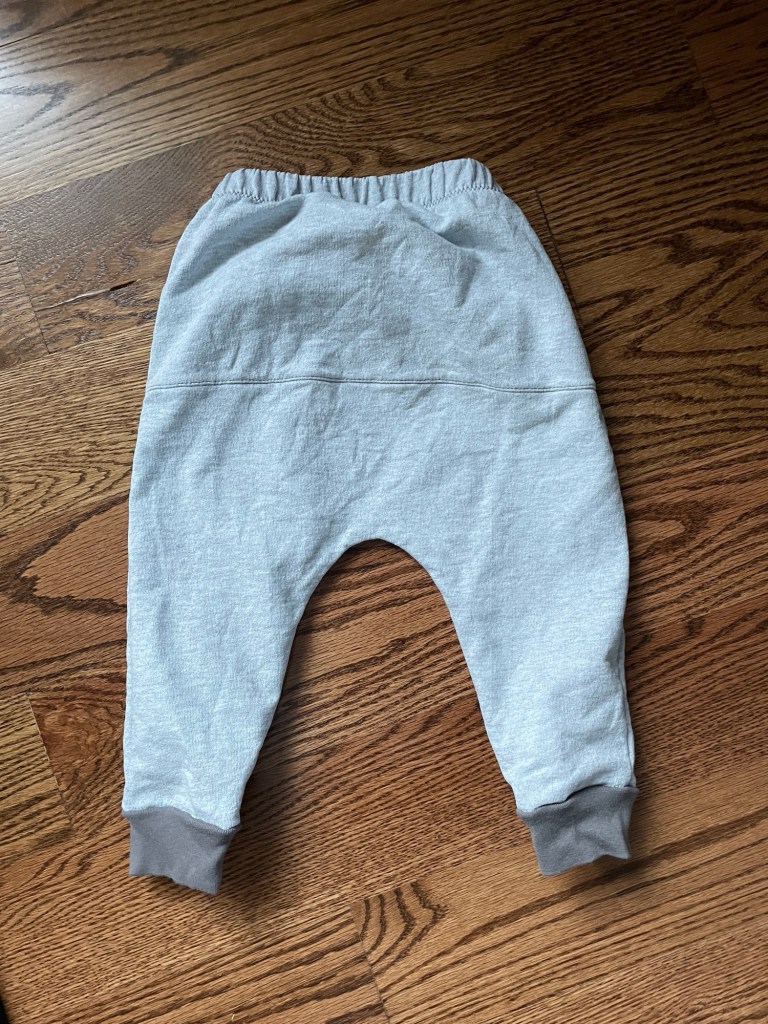
The sweatpants pattern has a two panel back with a horizontal seam and a drawstring at the elastic waist. There’s no crotch seam, instead all the shaping is done using that back horizontal seam. The back horizontal seam and the side seams are topstitched with a double sided cover stitch.
I chose to omit the drawstring because it was more materials to procure with little benefit, IMO.
For fit I did my usual alteration of adding 3/8” height at the center back. I find it makes pants fit better when he’s wearing cloth diapers.
For my first version I topstitched the center back seam with an ordinary straight stitch close to the edge. For my second version I skipped on topstitching the horizontal back seam entirely. I own the Janome Coverpro 2000CPX, which just does normal two and three thread cover stitches, not the double-sided cover stitch Ottobre recommends. I tried experimenting with the honeycomb stitch on my Janome 6500P and wasn’t impressed with the look, so I chose to just press it in place. It seems fine this way. Same for the side seams.
After making the Green Bean Baby pants and now these, I much prefer the Ottobre version. The back horizontal seam gives a lot of shaping over the butt area and the fact that the elastic is sewn in directly to the pants then folded over and topstitched instead of being inserted into a casing makes it much more secure (no rolling!) and easier to construct. The back seam also makes it more husband-friendly, as he struggles knowing the back from the front in home sewn clothes. The Green Bean Baby required more effort to fit and even so I feel like it still doesn’t fit as well as the Ottobre one does. The Green Bean Baby pattern seems short in the torso, long in the legs, and, if you’re making the full length pajamas, also seemed to run large in the neck. It often falls down over my son’s shoulder when he’s crawling around on the rug. Meanwhile the Ottobre patterns seemed to fit more consistently all over. I know Ottobre has a clothing industry background and even designed their own children’s collection at one point, so maybe that’s part of why the drafting seems to be better quality than the Green Bean Baby.
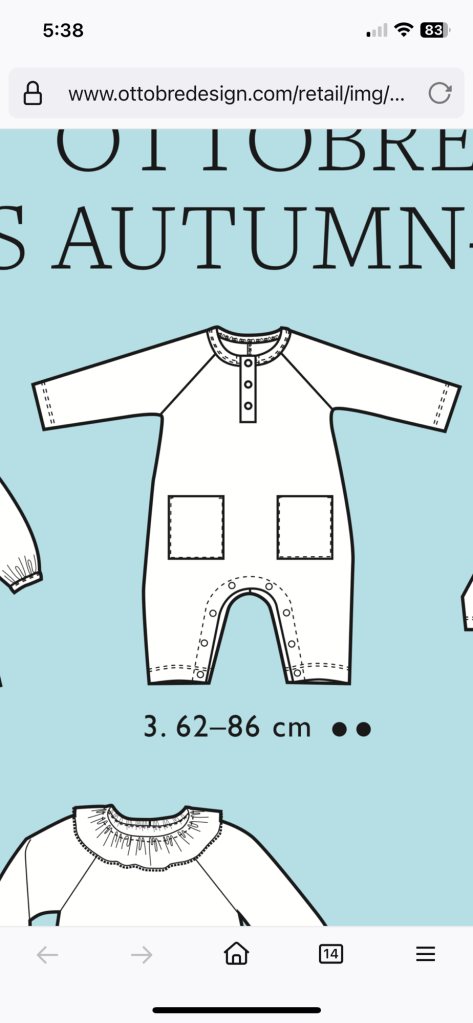
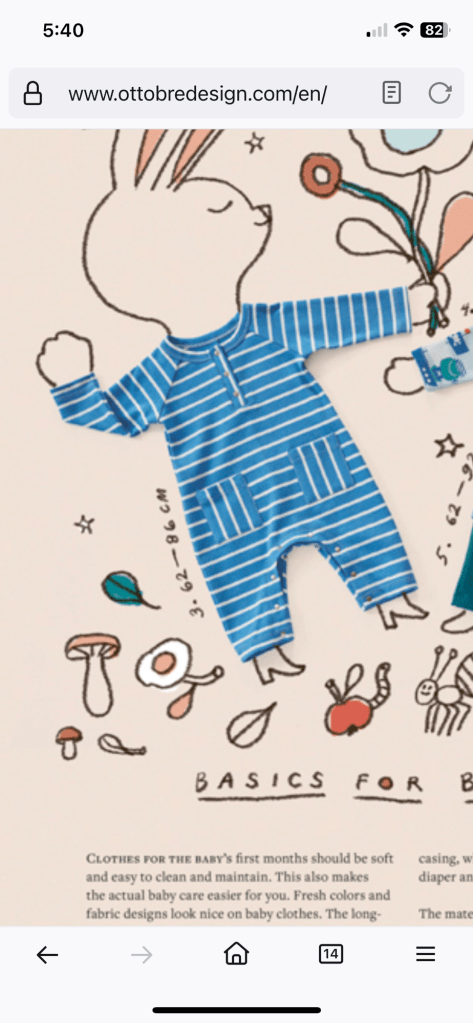
Ottobre 4/2023 #3 is an infant/toddler pajama with a front placket with snap fasteners, raglan sleeves, patch pockets at the hips, and snaps fasteners at the inside leg.
What attracted me to this pattern was that it doesn’t have feet, and he doesn’t need rib knit for the sleeve and leg cuffs. I feel like footie pajamas have a very narrow window of fitting well, either they are too long and their feet get “lost” or they’re too short and squish their toes. For this reason I prefer dressing him in regular leg pajamas with socks.
I also liked the placket at the front neckline. Most of my son’s pajamas have the “envelope” style neck and while it is convenient, I find it tugs down when he plays on the floor and it always requires some fussing in order to get it to lay straight at the shoulders. The other nice thing about a front placket is you can use a scrap of woven fabric for a bit of contrast. It gives it a slightly more formal look than the envelope neckline.
Materials
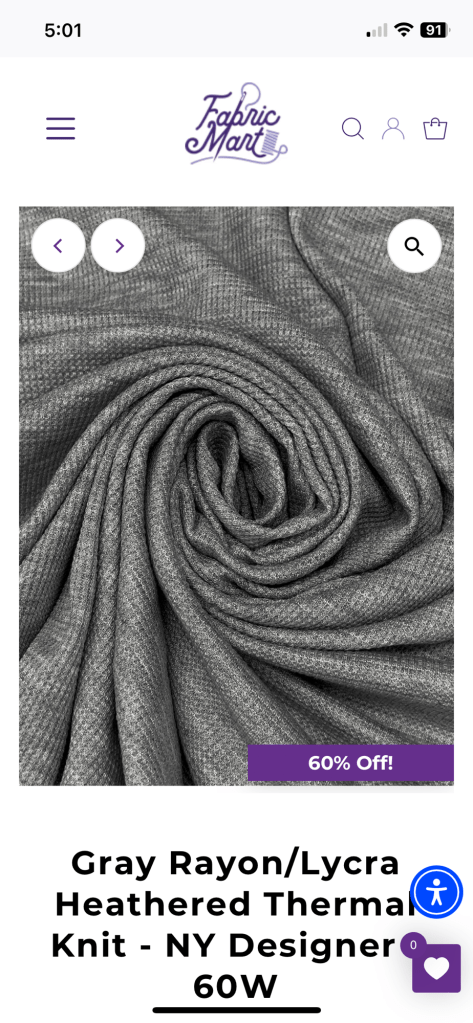
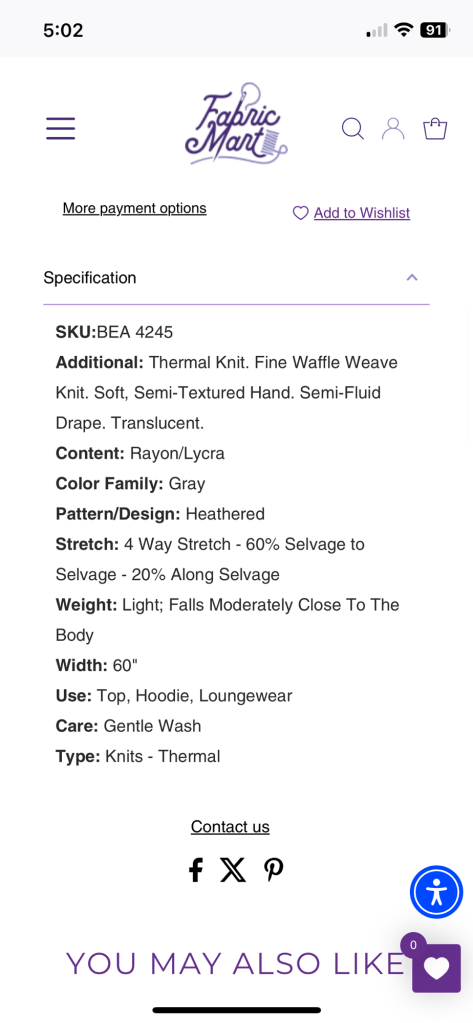
For the main fabric I used a heather gray rayon/lycra thermal knit from Fabric Mart. Due to the rayon content it has a nice drape and slightly silky texture. I did find it was a much lighter color than depicted in the photo though.
I thought it would be cute to match his dad’s pajama pants, so I used a bit of cotton flannel for the neck placket.
You’ll need a total of 11 snaps to complete this garment. I didn’t have quite enough red snaps in one size so I mixed and matched a bit. For the front neck placket snaps I used red size 16 open snaps purchased years ago from the now defunct Snap Source. For the inside legs I used size 15 red Snap Source open snaps. While I dislike the Snap Source setting tool (I find it cumbersome and prone to shifting when layering the various pieces) I love how sturdy the snaps themselves are. I’ve bought some other size 15 and 16 snaps on Amazon and they just don’t have the same robust feeling.
I interfaced the front placket, front inside leg facing, and back leg snap band with Pro-Sheer Elegance from Fashion Sewing Supply (possibly defunct as well by now). I didn’t interface the front neck placket because the flannel was sturdy enough to stand on its own.
Size and Fit
I cut a size 80 for my son. He’s currently about 30” long and weighs a little over 23 pounds. I found this overall a bit big (it is meant for a child about 1.5″ taller than my son) but I also want to get as much use out of it as possible! The longer length doesn’t seem to bother him one bit.
I found the fit in the body was a bit loose but not overly so. I much prefer this more relaxed fit to the skintight American 9+ month cotton pajamas, which is the biggest reason why I’m sewing instead of buying them. My son has a rather wiry build and even on him some of those pajamas are like sausage casings. I’m not sure what people with chunkier babies do. I guess you can buy looser fitting ones but they seem to be available only in synthetic fibers.
Construction
The instructions were the usual minimal, text only Ottobre instructions.
I skipped the pockets. They didn’t seem necessary since I wasn’t using a plaid or stripe print fabric.
Ottobre marks the placement of the neck placket snaps, but not the snaps at the inside leg. The only guidance is to place the middle two snaps each 2-3cm from the center front. I ended up placing the middle of the first snap at the leg hem about 1/2” from the bottom, and the next two snaps about 2 7/8” apart. This is less snaps and further apart than his RTW pajamas. I have mixed feelings about this, in some ways I actually prefer this as it still stays together and it’s less to deal with when he’s wiggling and fighting me diaper changes. But they do seem pretty far apart. I think 10 snaps would have made more sense for size 80. The Snap Source snaps come in packets of 10 and I had accidentally botched a couple of snaps during setting so even if I wanted to do 10 snaps I was limited to just 8. (A not inconsiderable amount of the time spent on constructing this garment was dedicated to setting snaps.).
Rather than try to sew tiny sleeve and leg hems in the round, Ottobre has you sew the hem, sew the seam, then use a straight stitch or bartack to secure the seam allowance at the hem edge. I much prefer this method.
Conclusion
I’m definitely making this again. As soon as I put it on him he wanted to nurse and then fell asleep for his nap shortly after – I consider that a sign of approval!
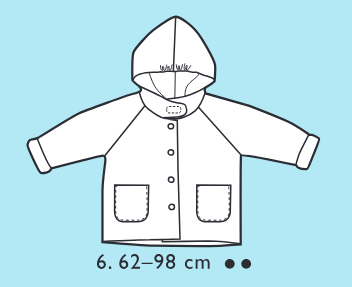
Ottobre 4/2023 #6 is a children’s winter coat pattern for European sizes 62-98 (basically infants through toddlers). It features rounded patch pockets, a hood with darts at the back and elastic at the middle front for additional shaping, and extra long raglan sleeves meant to be cuffed. This jacket is fully lined.
I made a size 80 for my son. I think he’s about 31″ long and 22-23 pounds so at this point (just a guess, he’s really hard to measure now).
Materials
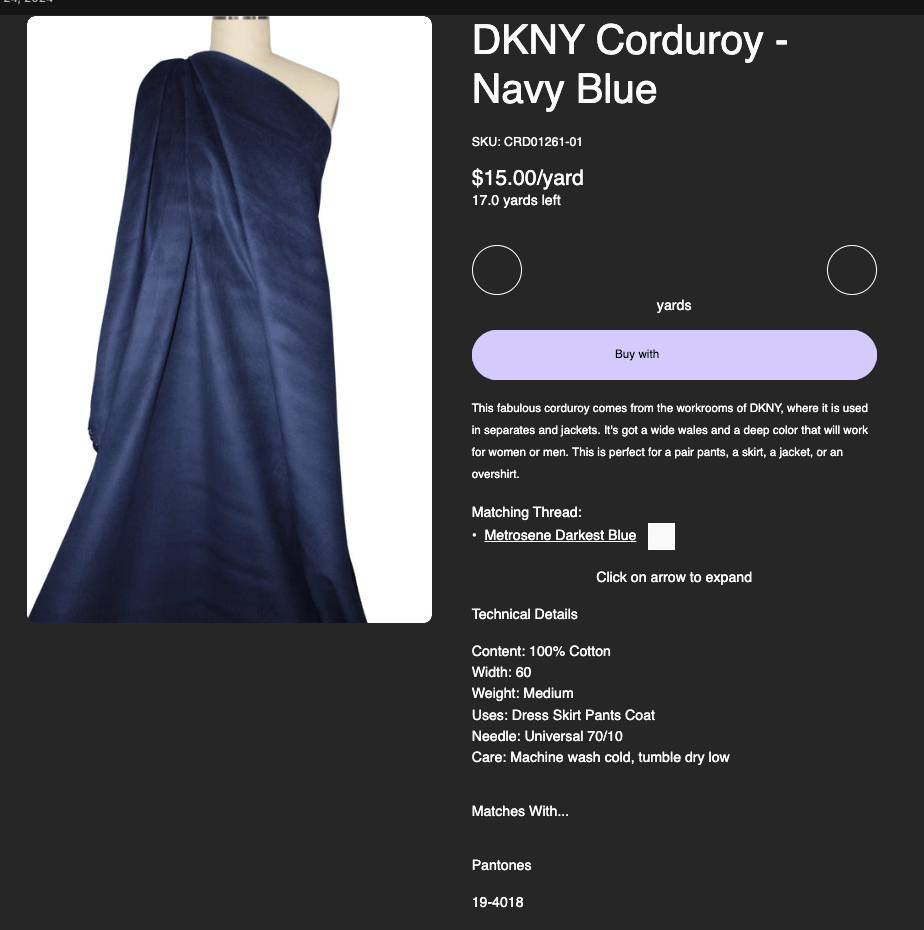
The pattern calls for ready-quilted fabric and fleece lining. I chose instead to use a wide wale deep navy medium weight corduroy from Gorgeous Fabrics.
Since this is meant to be a winter jacket I wanted more warmth, so I used 3M Thinsulate C150 from Vogue Fabrics for the interlining. I actually bought the Thinsulate a dozen years ago…just getting around to using it!
Instead of velcro for the hood and snaps for the front I chose to use wood buttons. It seemed to fit in more with the rustic corduroy and flannel fabrics.
Construction
The pockets are a single piece which is folded over, sewn, then turned out. This makes it very easy to get a nice rounded edge, plus it provides a self lining.
For the Thinsulate interlining I placed attached it directly to the lining, with the fleecy side facing the wrong side of the lining and the quilted side facing the wrong side of the corduroy. I never worked with Thinsulate before so it was a new experience for me. I didn’t need to baste it to the lining as the flannel provided plenty of “grip.” I did trim it down to 1/8″ seam allowances after sewing a seam. This stuff is pretty fragile with heat, so pressing the seams needed to be done lightly and carefully. (I accidentally melted a section of it.) It does have some loft but is lightweight and easy to sew through. I had no problem making the buttonholes, though I did use a buttonhole stabilizer plate simply due to wanting to eliminate error with the bulky fabric.
Ottobre instructions are quite minimal (basically the same as Burda’s used to be) so you should have some experience with sewing a coat before you attempt this pattern. The nice thing again about baby clothes is since they take so little fabric it isn’t a big deal if you need to recut and start over again! I haven’t sewed a lined jacket/coat in forever so I needed to think a bit about how to bag the lining, but I managed just fine. There’s no front facing so that makes things simpler.
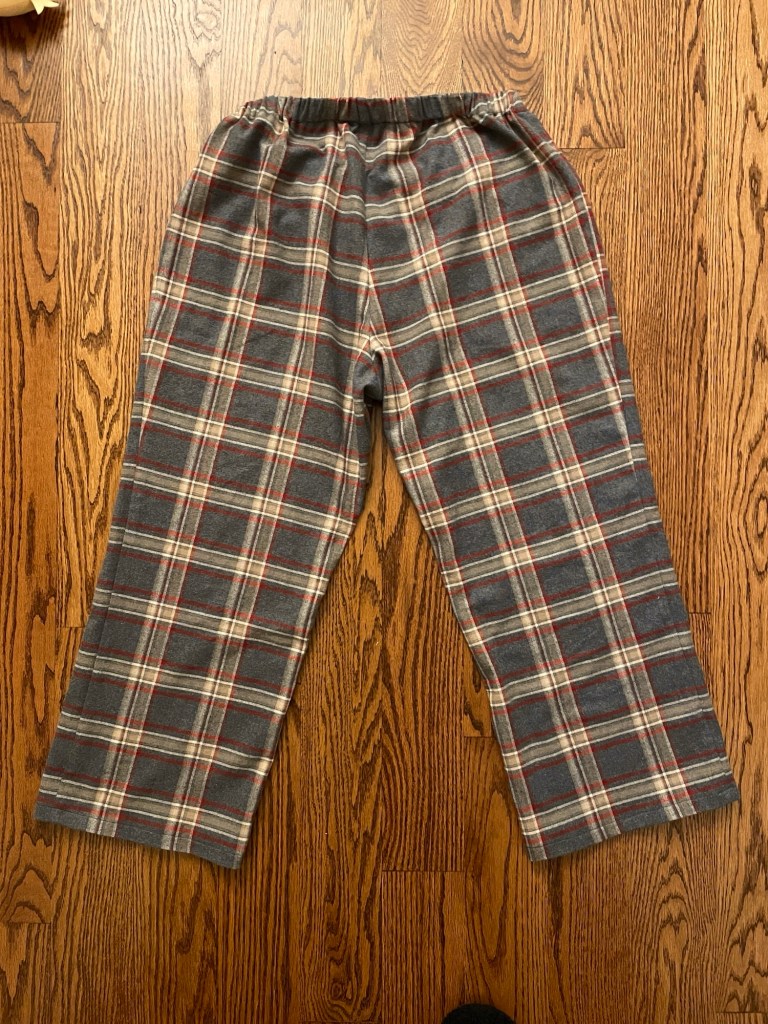
I couldn’t stand seeing the holes in my husband’s pajama pants any longer, so I got to work in the swing room.
Front Back
Sorry, no modeled photos – my husband is camera shy!
Background
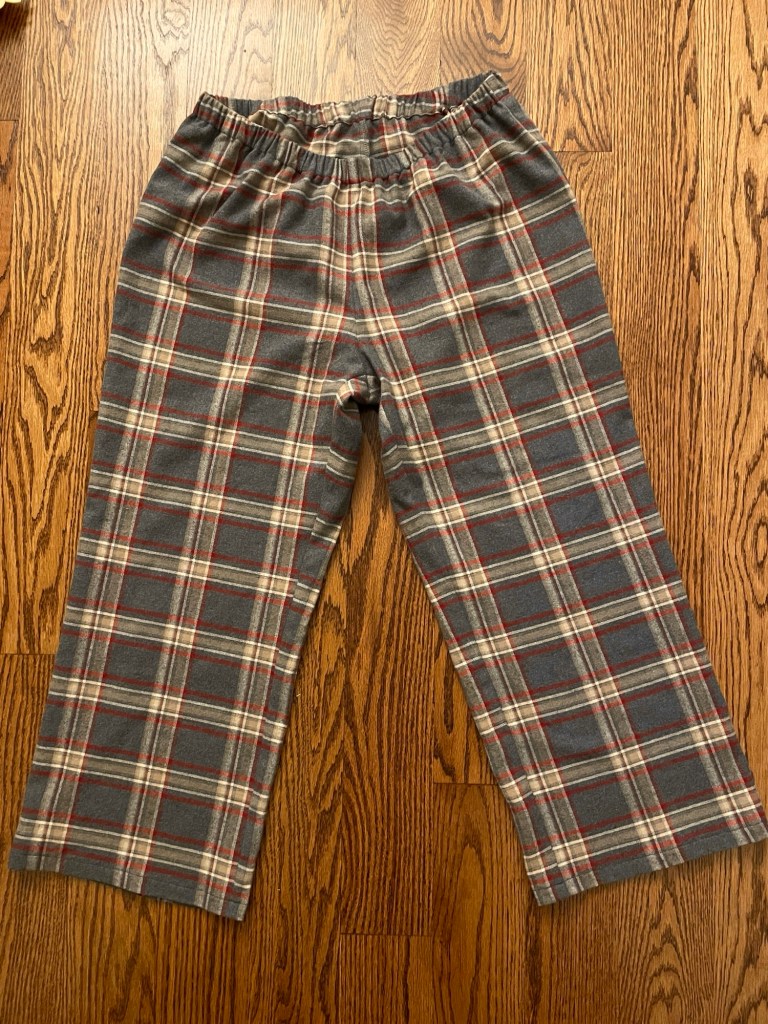
The 7/2018 issue of Ottobre is the “family” issue, which means it includes menswear as well as women’s clothing. These issues also sometimes include maternity patterns. This particular pattern is for men’s pajama pants with an elastic waist and side seam pockets. Very plain and simple, but it is exactly what I was looking for right now.
Materials
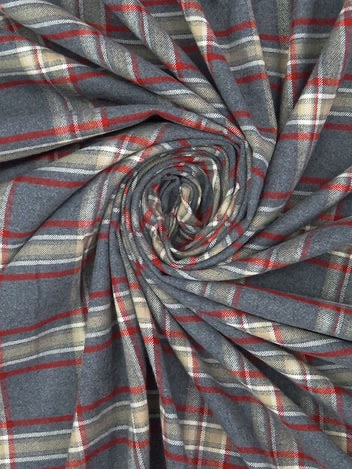
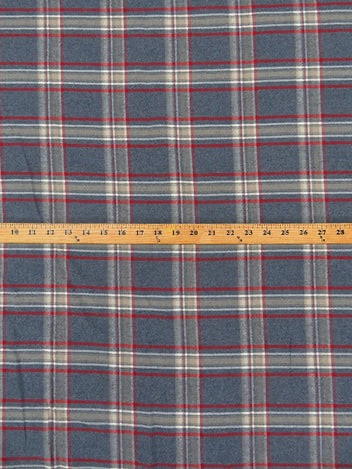
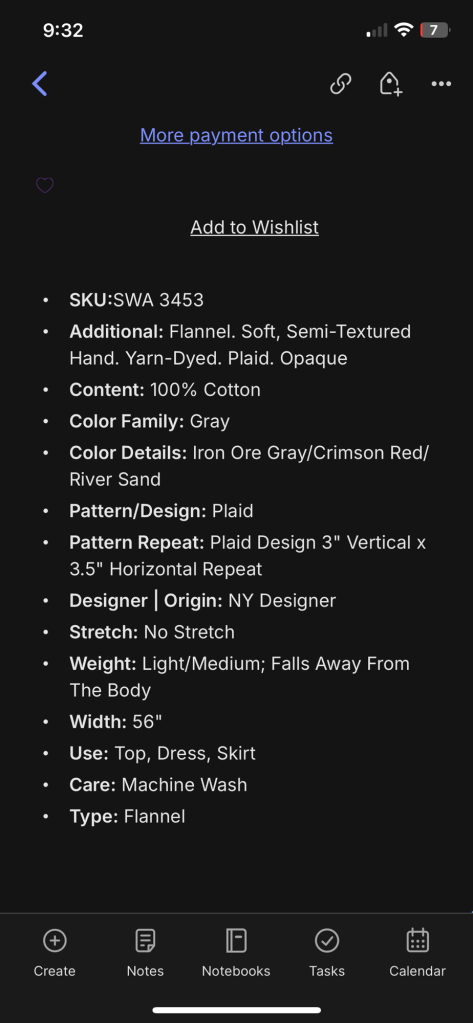
I used a double napped cotton flannel from Fabric Mart, purchased during their recent Columbus Day weekend sale. I’m really happy with it, it is very sturdy and a good neutral tone plaid.
I cut a size 52. Ottobre drafts for a 6’ tall man. I believe this is a good 2” taller than what Burda drafts for. My husband is 5’4” sp to start I shortened the legs 4”. During fitting I discovered I needed to shorten them an additional 2.5”. (He told me “I told you I was short! You don’t believe me!” 😂)
After fitting I also lowered the front rise by 1.5”. My husband has a bit of a belly and prefers to wear his pants lower in the front. I noticed they hung much better after this adjustment.
I cut out the pocket pieces as well, but my husband said he didn’t want them so I left them out. Made it even easier for me!
Conclusion
When asked how they felt my husband said “they’re comfy!” He also noticed they’re much warmer and thicker than his old RTW pants. He wears stuff into the ground (seriously, he has some pieces of clothing that are around 25 years old) so I fully anticipate him getting full use out of his new pants!