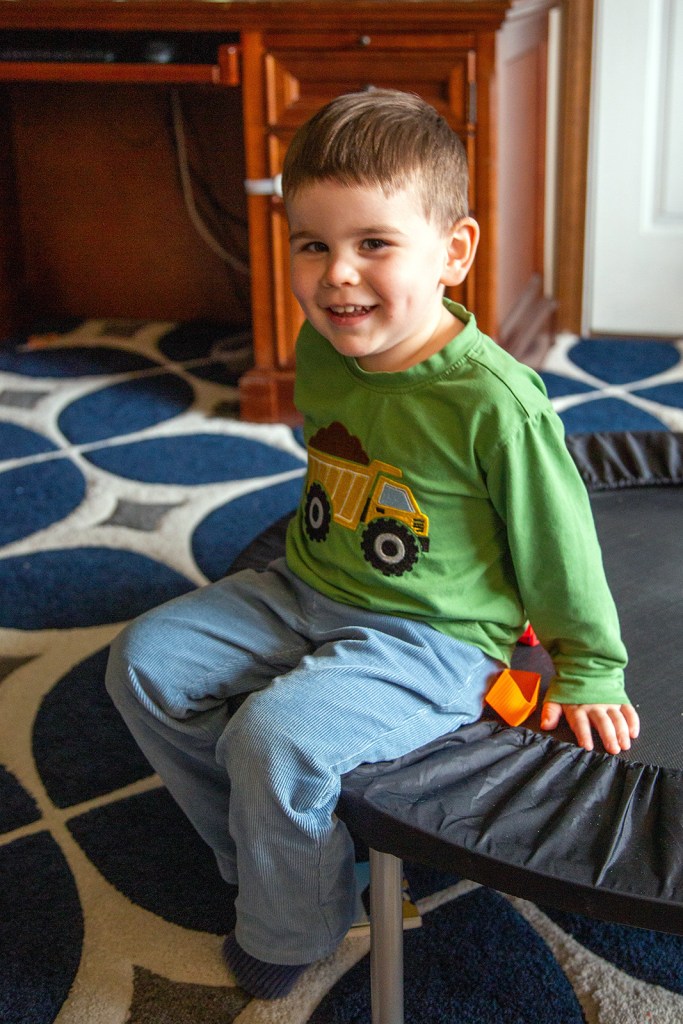
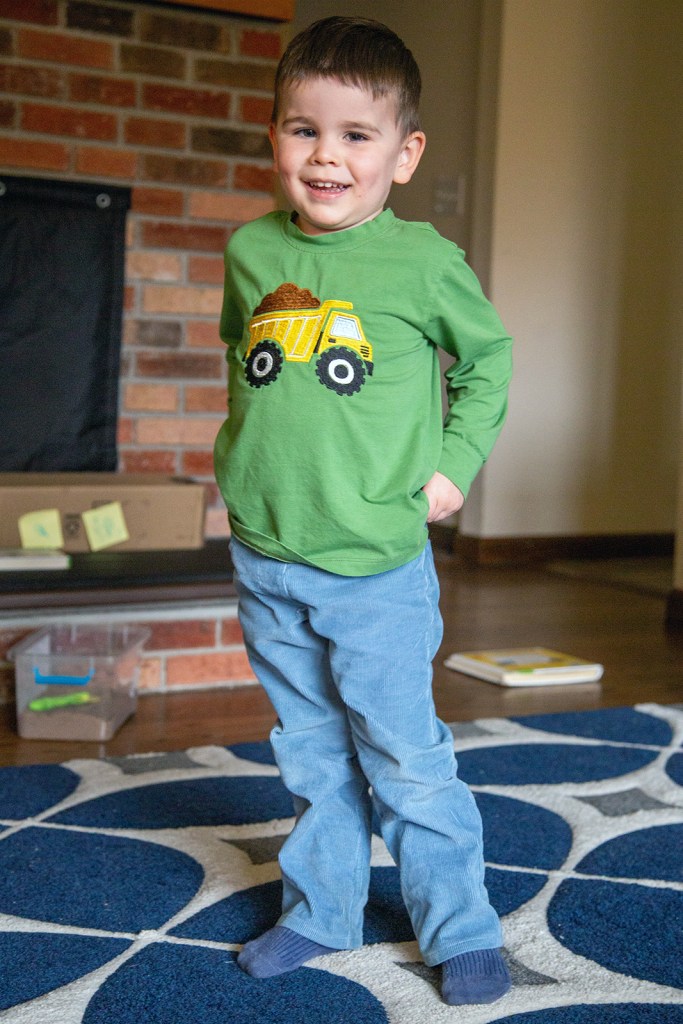
Styled here with a Jalie Laurent t-shirt, which I embroidered with this design.
Pattern Background
Classic straight leg jeans pattern for kids size 2-8. It can be made either as a pull-on pant or with a front fly.
Fit and Sizing
I made a size 3. My son measures closer to a 2 in width, but his height is a 3 right now. I figured since I was doing a pull-on style, using a non-stretch fabric, and want him to get some wear out of it that it was better to go bigger than smaller.
The only alteration I made was lengthening the legs 1/2″ to allow a little bit more room for growth. You can see when he’s sitting that they sit at a good height and don’t ride up too much.
Materials and Notions
The fabric I used was a 100% corduroy my mom gifted me from her stash, purchased many years ago.
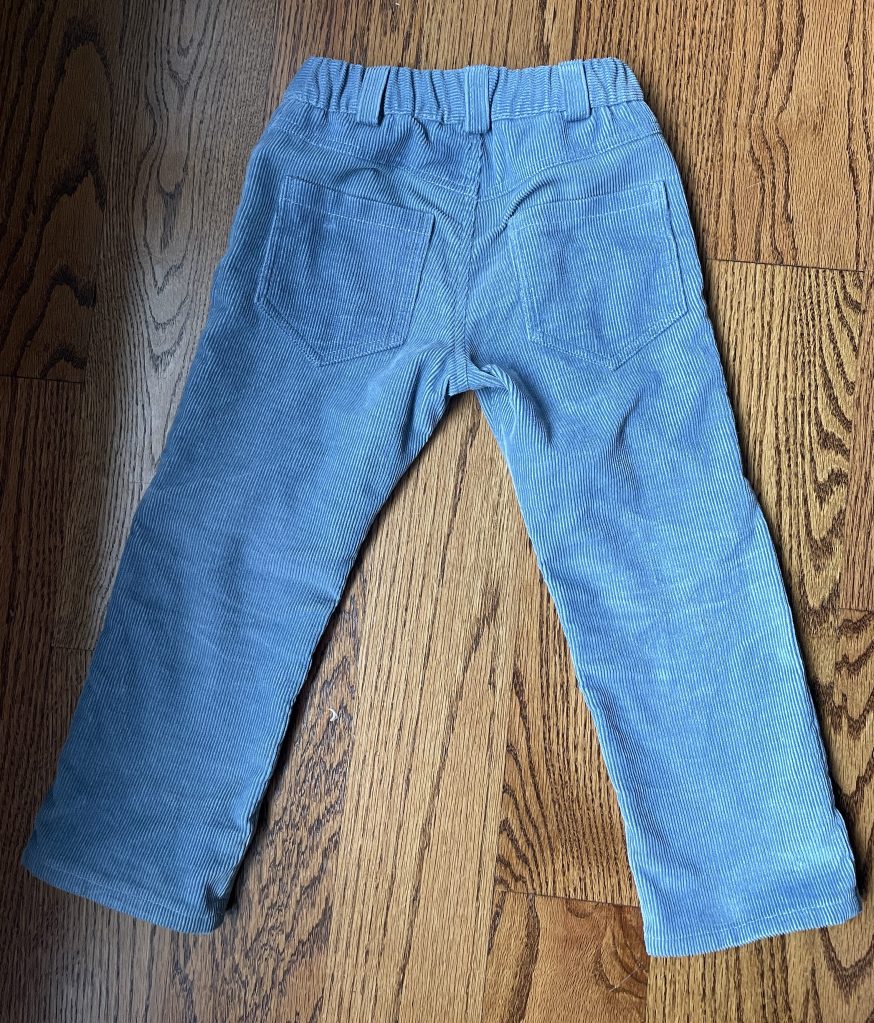
Instead of self fabric I used pants pocket lining from Wawak for the pocket.
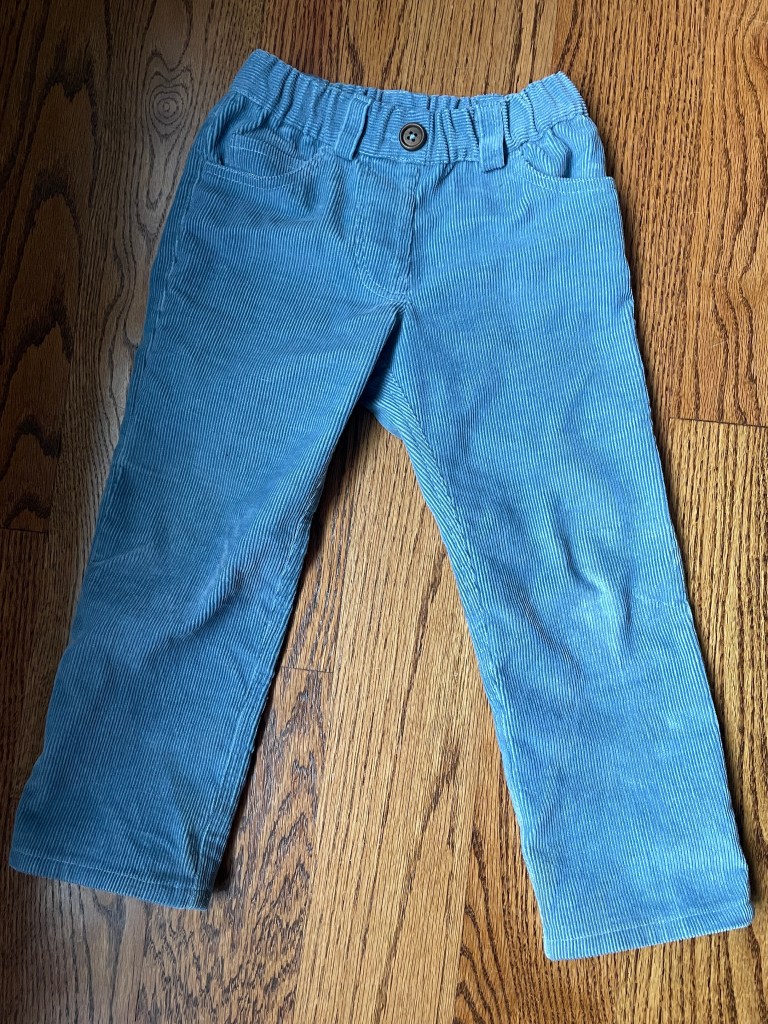
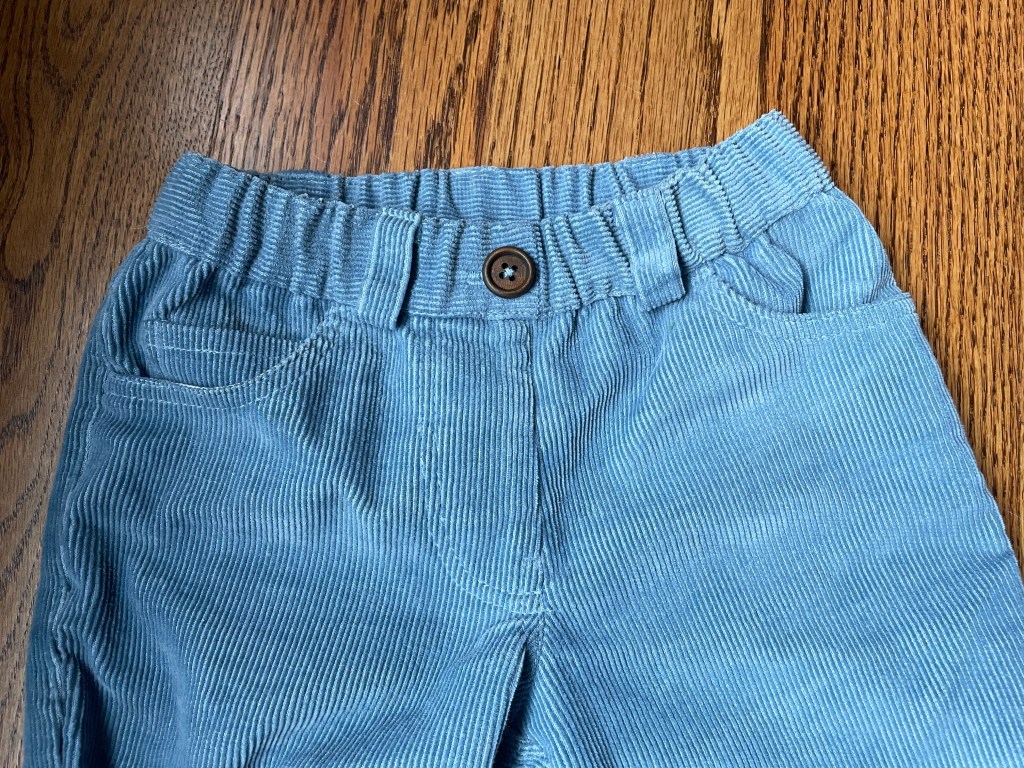
I didn’t use buttonhole elastic, instead I encased 1 1/4″ elastic inside the entire waistband.
I used Gutermann Mara 100 thread for all of the stitching.
Construction
I constructed these entirely on my Juki TL-2010Q, including the faux buttonhole (which was done with my Singer vintage buttonholer).
I did notice that certain pieces with this pattern (like the front fly piece) were cut the wrong side up if you were following a mens style pant with the fly facing the left instead of the right. Just something to think about when you’re cutting this out. I also noticed the pocket facing was 3/8″ too wide and needed to be trimmed at the side seam when sewing it to the pocket lining.
I chose to do a pull-on style. Just makes things easier for a newly potty trained three year old! When I sewed the two front pieces together at the center front I also enclosed the front fly piece inside, which acted as both a stabilizer and guide when topstitching the faux front fly detail.
Instead of the buttonhole elastic I chose to encase 1 1/4″ inside the entire waistband. It feels really secure. When I attached the waistband I did it Jalie 3243 style. After sewing the faux buttonhole in the front I pressed up the outer waistband, stitched the inside first (right side of the waistband to the wrong side of the pants), then flipped the outer waistband over and stitched it in place. While I stitched the outer waistband in place I carefully encased the elastic. (I tried doing a casing and then pulling the elastic through, but the stiff fabric was causing it to roll.) Before attaching the waistband I basted the belt loops in place to the upper edge of the pants so they ended up being sewn in place at the bottom while stitching the inner waistband in place. Once the outer part of the waistband was sewn in place I stitched the belt loops at the upper edge of the waistband. This helped keep the elastic tacked in place in a subtle way.
Conclusion
This is a great, versatile kids jeans pattern that can be remade over and over as they grow. The leg is a nice cut, neither slim nor wide, and you can easily customize the waist based on the child’s preference and/or developmental stage. He’s got enough pants for now but I will definitely will be making it again for him in the future!
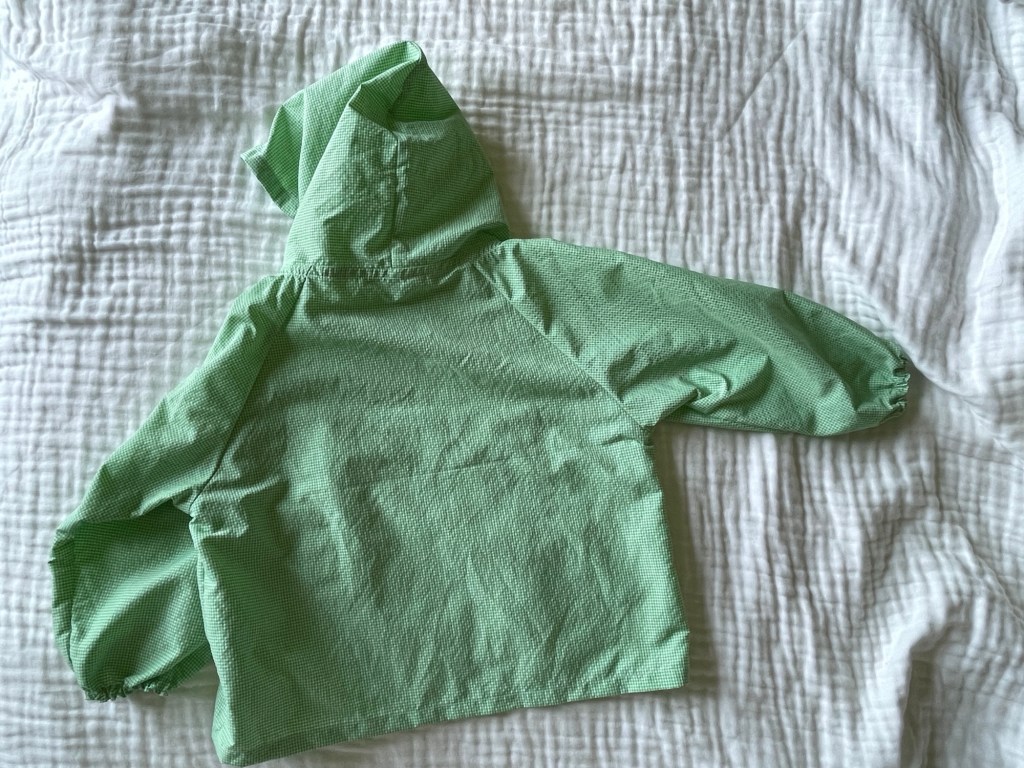
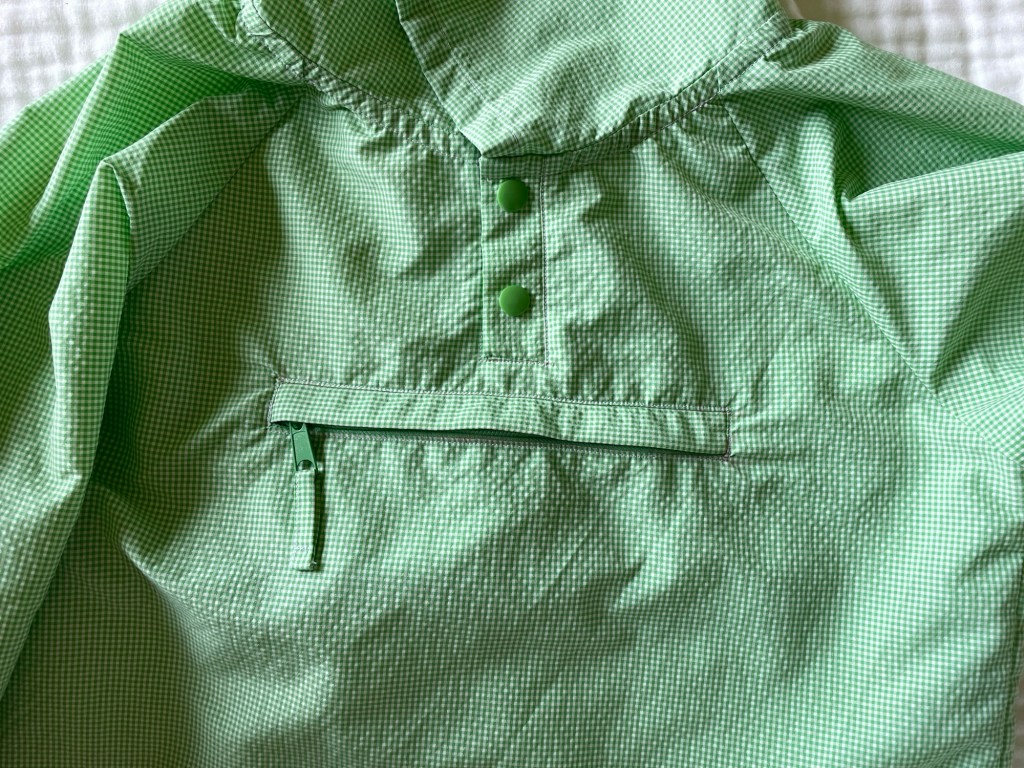
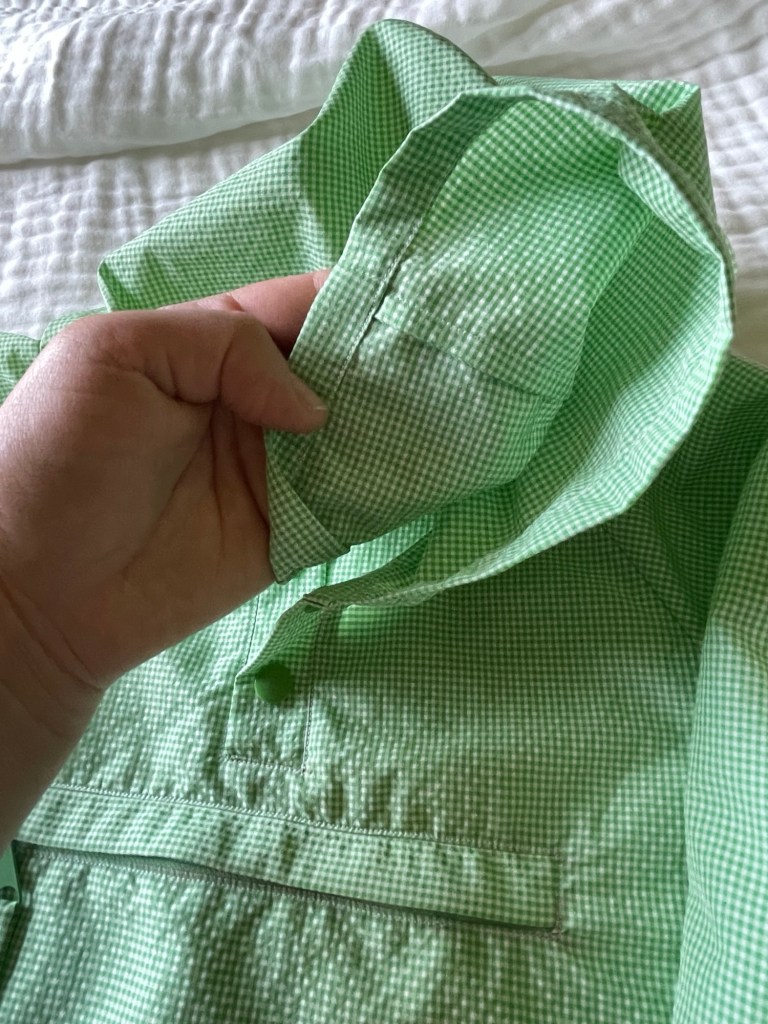
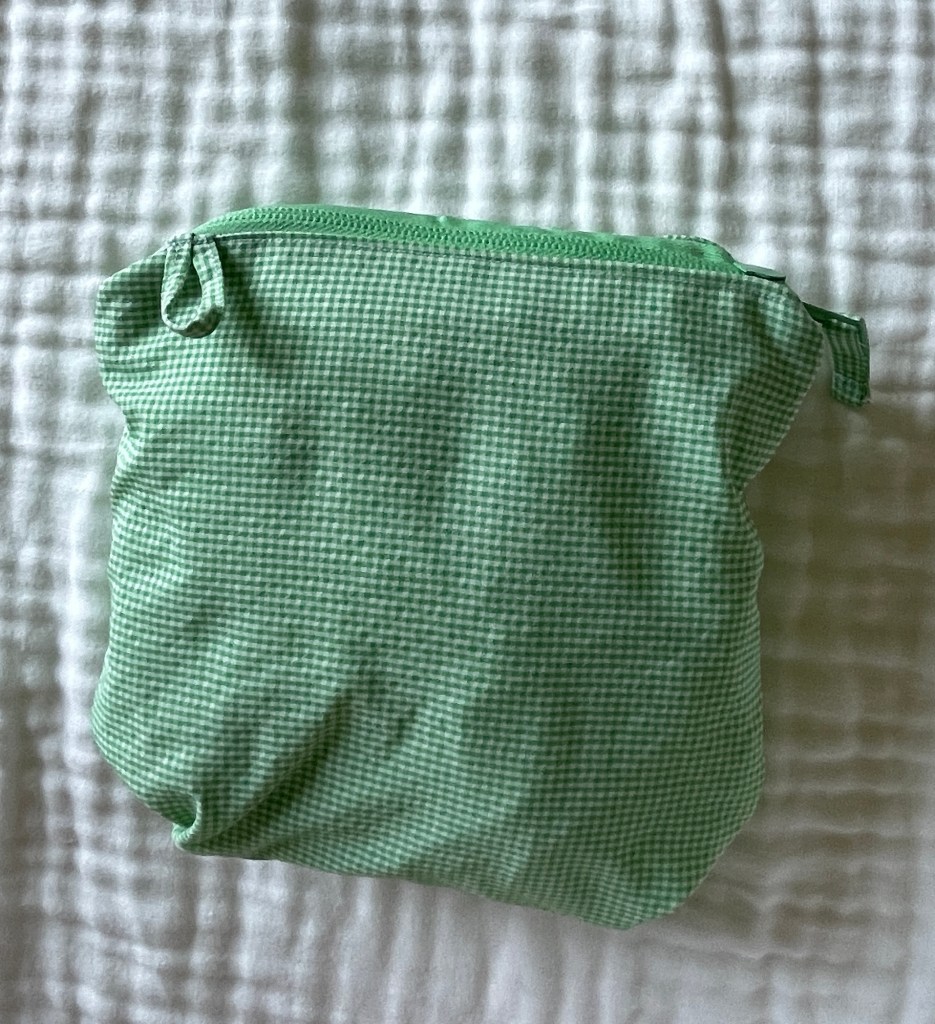
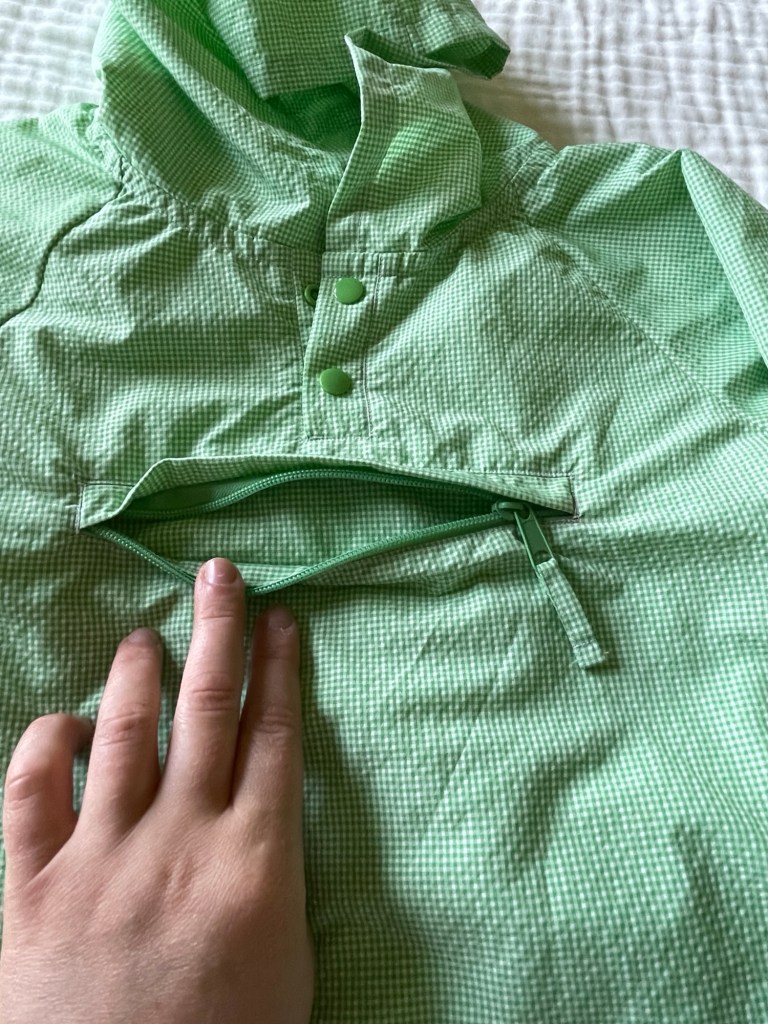
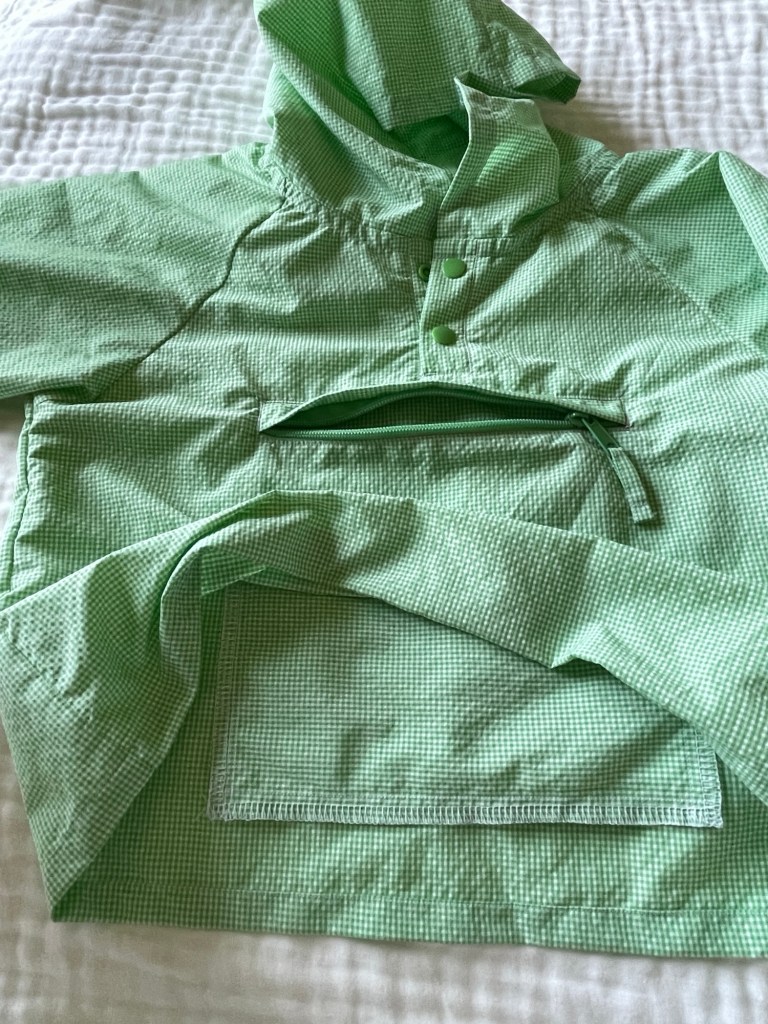
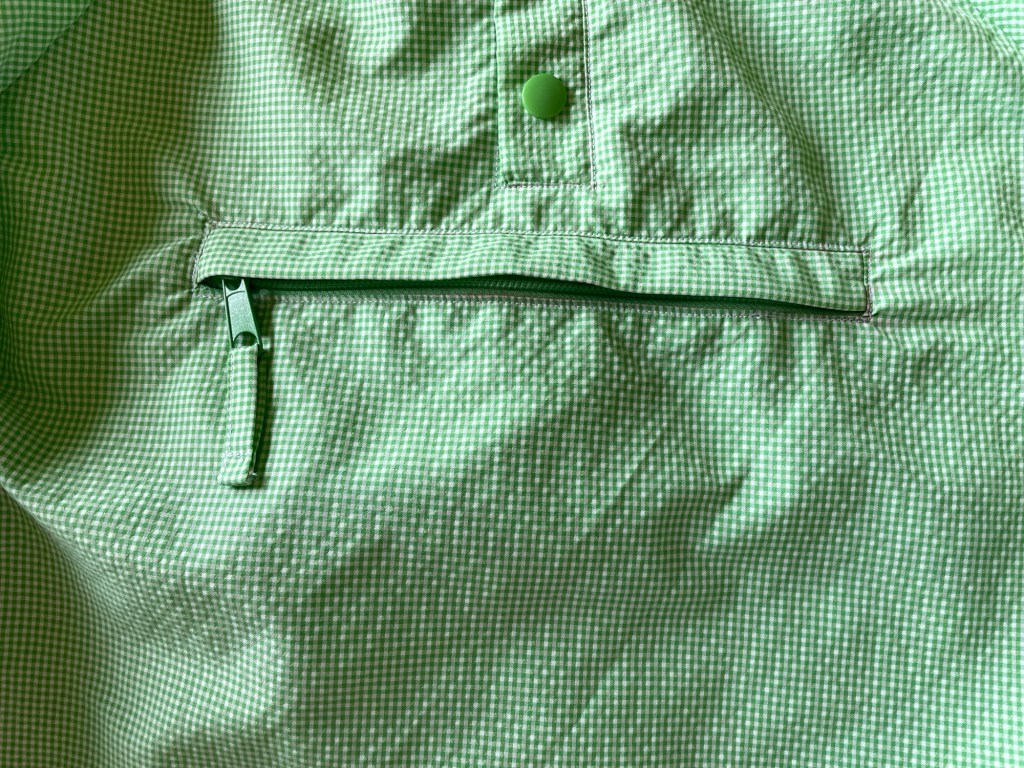
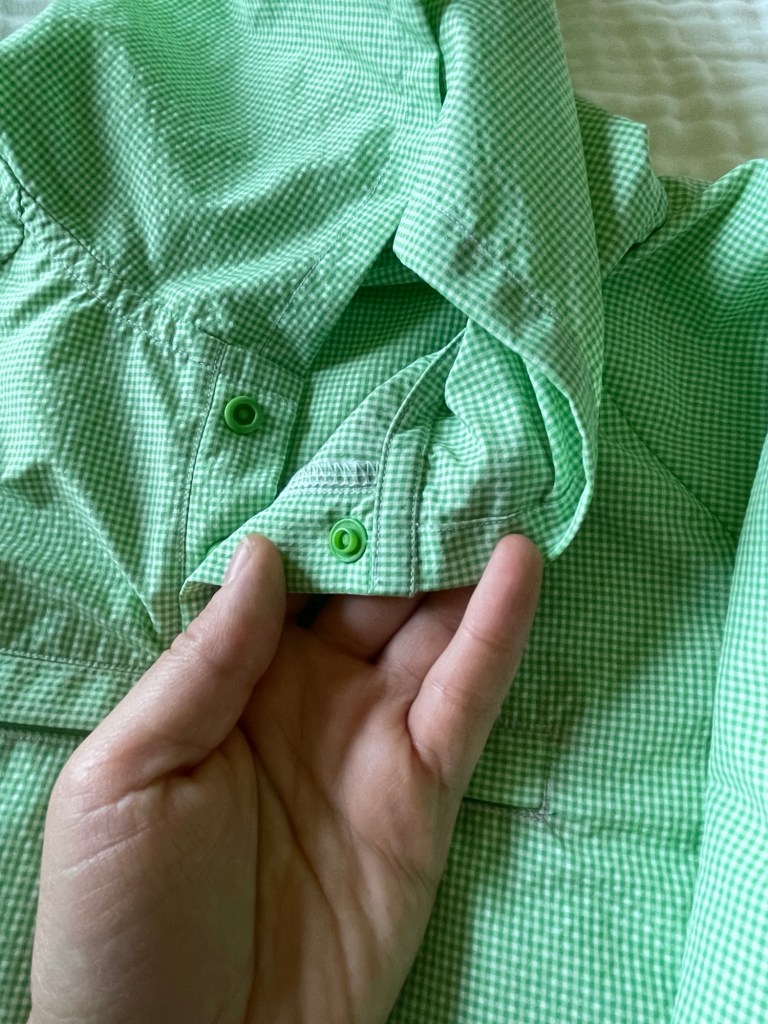
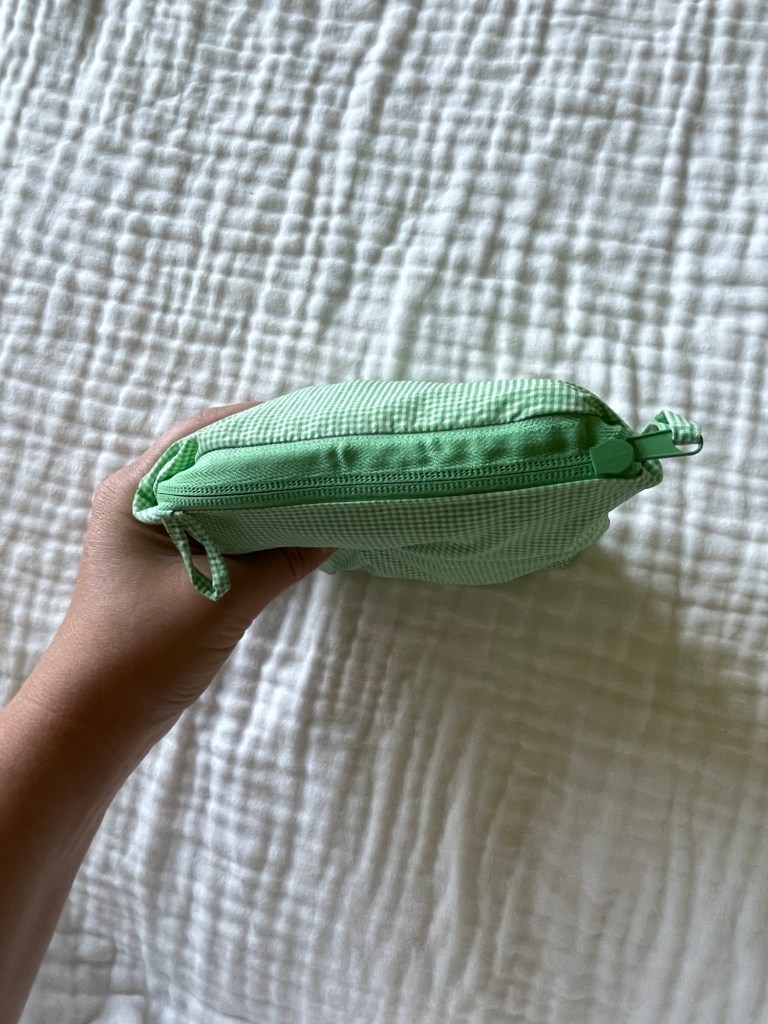
French seam inside the hood. Hood edge is a double folded hem (my choice)Bundled away Inside of front pocketFront pocket
Pattern Background
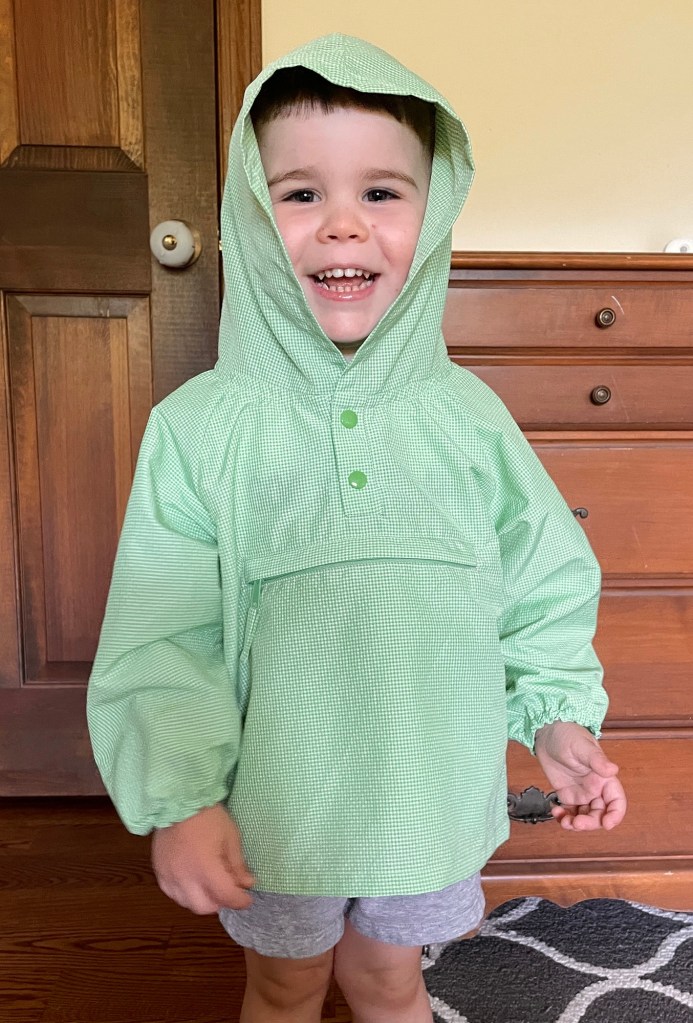
The Ash anorak, available in kids sizes 2-8, is an unlined anorak with a snap front placket and zippered self storage pocket.
Size and Fit
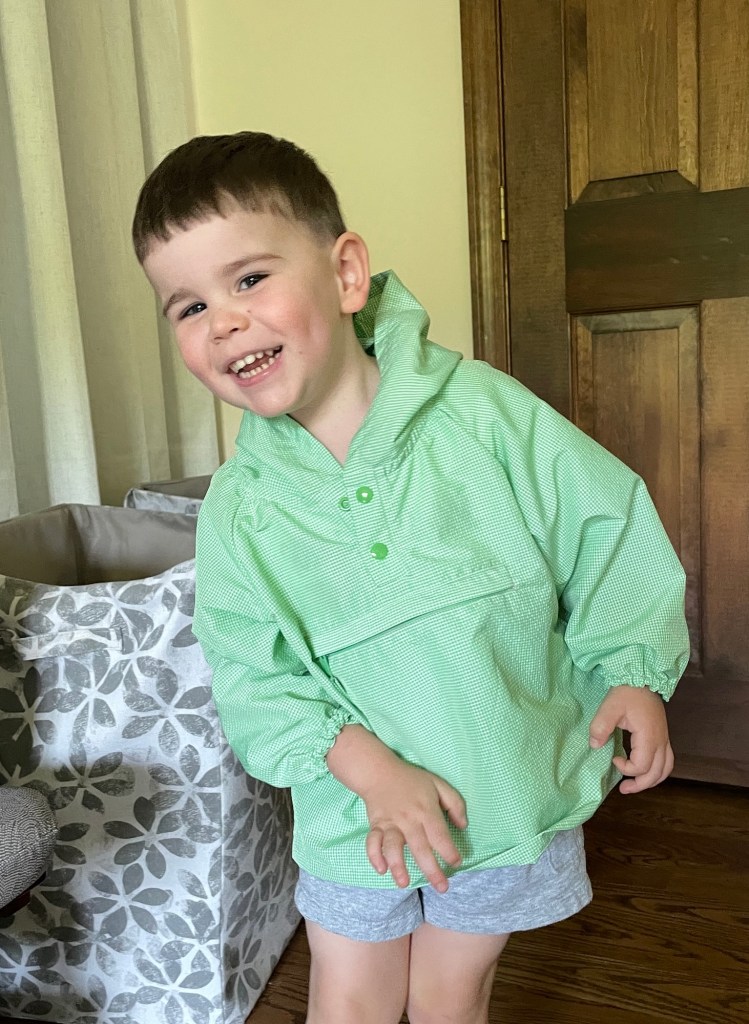
My son is closer to a 2 in width (if not a bit smaller) but 3 in height. I made a 3. I feel like it’s a good fit, especially once I add layers when the weather starts to cool next month.
I made no alterations. Now that he’s out of diapers he doesn’t need the extra hip room.
Fabric and Notions
I used a 100% nylon gingham print raincoating from the outlet section of Gorgeous Fabrics. It was only $9.60 for a two yard piece. You need something lightweight and thin or else the self storage pocket won’t work.
I interfaced the welts for the front placket and front pocket using Heat N Bond fusible tricot interfacing from Wawak. I don’t particularly love this interfacing (the non-fusible side feels so plasticky to me) but it is good for lightweight, stable fabrics that just need a bit of reinforcement.
Snaps are from KAM.
The zipper is a #4.5 handbag zipper from Amazon. It is one of those that come on a roll that you cut to length and then add the zipper pull to.
Construction
Ever work on a project that just seemed to fight you every inch of the way? That was this project for me. I stayed up way too late both nights I worked on it because I refused to be defeated. Ironic, because I specifically chose this pattern over the Jalie Maxime jacket thinking the Style Arc Ash would be a quicker, easier sew. I had spent several hours last weekend fixing my 10 year old Rowena steam generator iron so my available sewing time was less than I had initially planned.
This fabric was awful to work with. Very difficult to mark (and finally the chalk I used ended up being hard to remove), very difficult to fuse anything to, horrible to press, and completely unforgiving when sewing. It reminded me of how I hate working with waterproof/water resistant fabrics. There’s some puckering around where the hood attaches to the body and after carefully unpicking and re-sewing some sections I decided to just let other imperfect sections go. After all, it is an anorak for a three year old, not a wedding dress.
As noted on the Style Arc website, this is an archive pattern so instructions are minimal. This wasn’t a huge issue for me, but I do recommend either printing out the instructions on a color printer or viewing the instructions directly on an electronic device. I printed this out on a black and white laser printer. Which is normally fine, except the illustrations for the zippered pocket in the front were nearly impossible to decipher correctly because the colors in the diagram for the zipper and the welt were so similar when printed out in grayscale.
After too much time spent both trying to transfer the markings, fuse the pocket welt, and get the zipper pull onto the zipper, I realized that I had messed up along the way. When faced with the prospect of unpicking and trying to redo this work I decided it was better to just chuck the front piece and recut the front and pocket welt and try again. (I had plenty of fabric to left over to recut.) Even so, the fabric was just irritating to work with and my welt is still far from perfect because I couldn’t get the nice fine marking lines I needed. (The key to good welt pockets is precision in both marking and sewing.) I spent an embarrassing amount of time trying to get it right and in the end it still isn’t great.
I messed up again when doing the front neck placket. I didn’t sew the hood to the rest of the jacket when I was supposed to, instead realizing my mistake only after I had the front placket done and edges finished with serging and topstitched in place. I realized that the hood would look sloppy when attached to the body if I serged the seam like I did for the inner seams, so I made a self fabric binding, sewed it to the seam, and then topstitched it down. Similar to how you would do the neck binding of a hoodie. Even though it technically isn’t correct and adds some stiffness, I think it looks good and functions well enough.
Of course right after I added the last snap at the top I noticed I had not lined it up correctly when marking, so it’s a bit uneven when snapped. I was so over this project by the time I finished I just sighed and shrugged it off because it’s just a play jacket for a three year old.
I still have some confusion about the cuffs. Even if you turn back a double hem to make a casing for the cuff elastic, it is still far too wide for the 1/4” elastic noted in the supply list. It seems like it should be for 3/8” or even 1/2” elastic, depending on how you chose to sew the casing. (I would probably try 3/8” first because I edgestitched the upper edge of the casing to make things stay in place better when sewing the bottom of the casing.) Not sure if this is a mistake or if this is some sort of design choice but I’m thinking of redoing just this tiny section with wider elastic because I just know that elastic is going to roll and twist, plus the gathering doesn’t sit quite right.
I didn’t have a reversible zipper pull on hand, let alone one that would match my green zipper. So I used one of the normal handbag ones that came with the zipper coil. It makes zipping and unzipping the anorak into its pouch slower and more difficult, but not impossible. I added a self fabric zipper pull to help make it a bit easier. Instead of sewing right sides together then turning it out I folded it like binding and then edgestitched where the folded over edges meet. I should have done this for the pouch loop too, it’s much faster than turning that tiny piece out.
Conclusion
Even though my workmanship on this particular garment isn’t the best and I struggled more than I should have, I do think this is a valuable piece to have in my son’s wardrobe. It is loose fitting enough to wear over a sweatshirt in the fall and the fact that it folds into its own little pouch makes it easy to have on hand in my giant bag for sudden rainstorms. I really how the front pocket is fully functional for storage (he likes to pick up rocks and store them in his pockets when he plays outside) as well as for storing the actual anorak itself. Plus I think he’s really cute in it!
While I struggled more than I should have, I don’t feel there is something innately wrong with this pattern. It was more my inability to mark this fabric with the precision I needed, and the fabric just being rather inflexible and unforgiving.
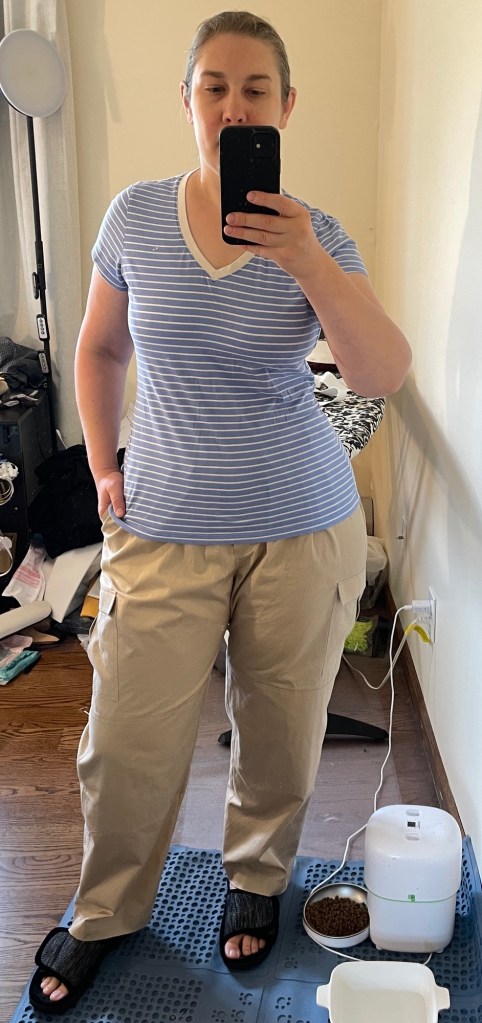
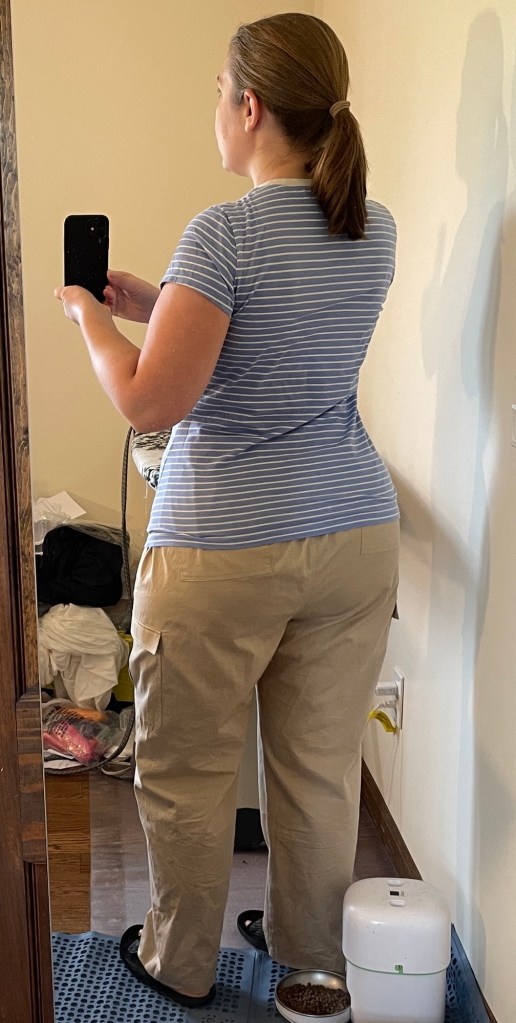
I made these pants with the intention of them being lightweight outdoor work pants. I help out a lot with yard work at my parents’ house now and weed whacking is a perilous task with shorts. So I wanted something full length that would be lightweight, breathable, and comfortable to wear in the heat. The Delta provide plenty of range of motion despite the non stretch fabric so I’m pretty happy with them.
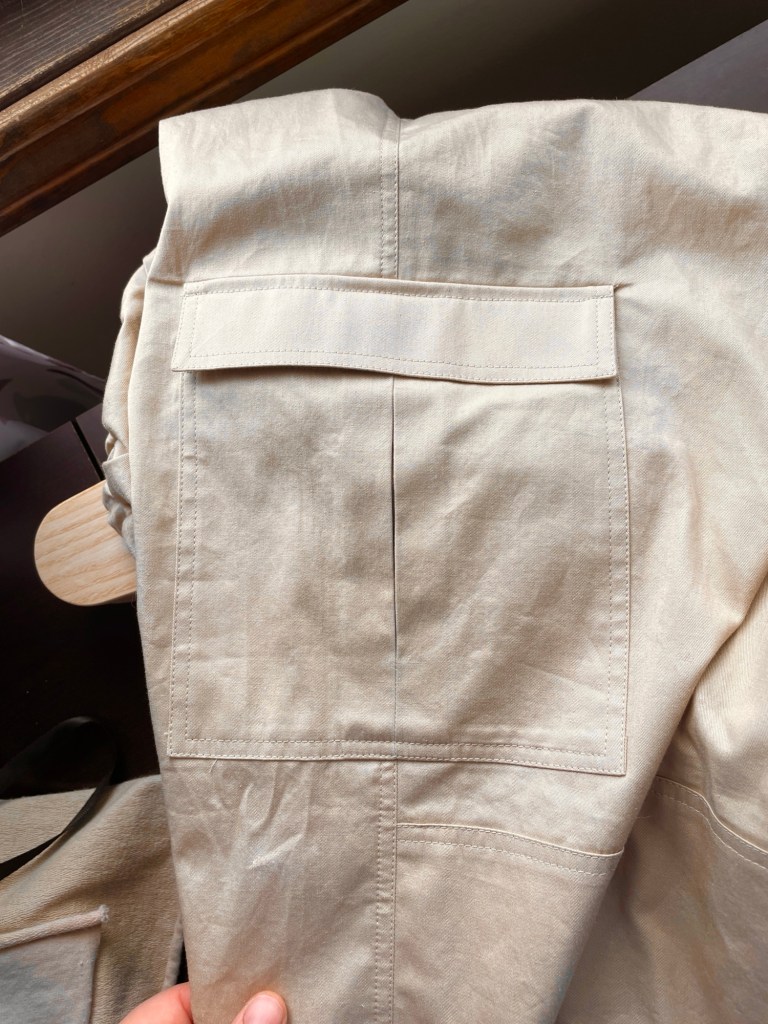
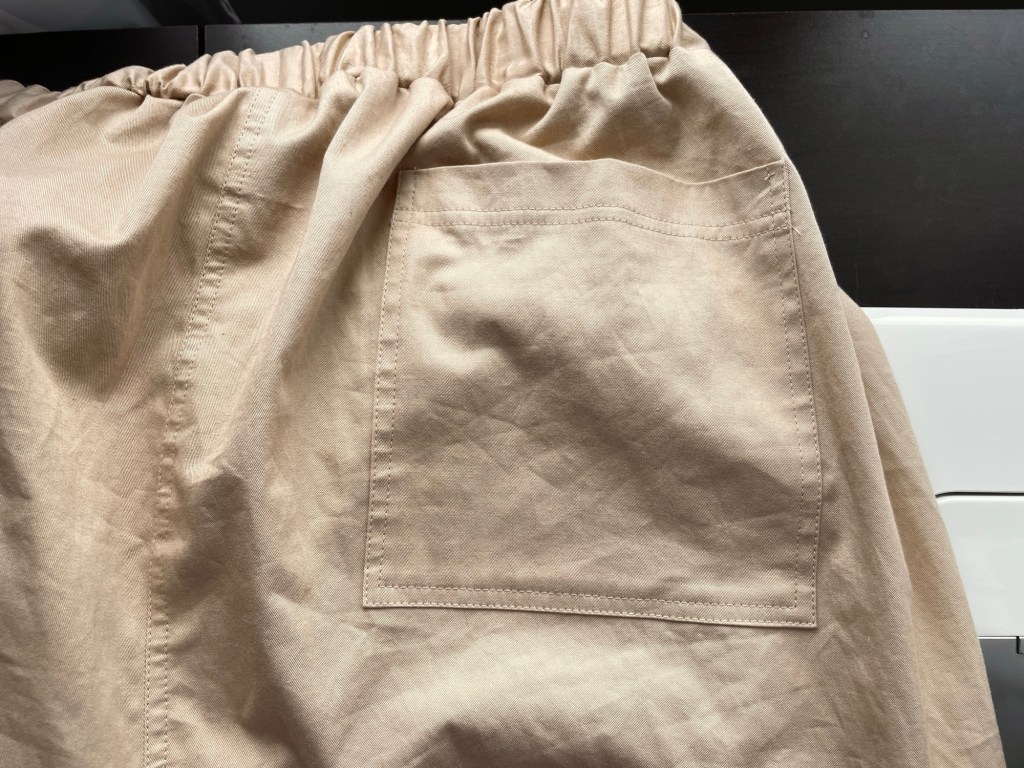
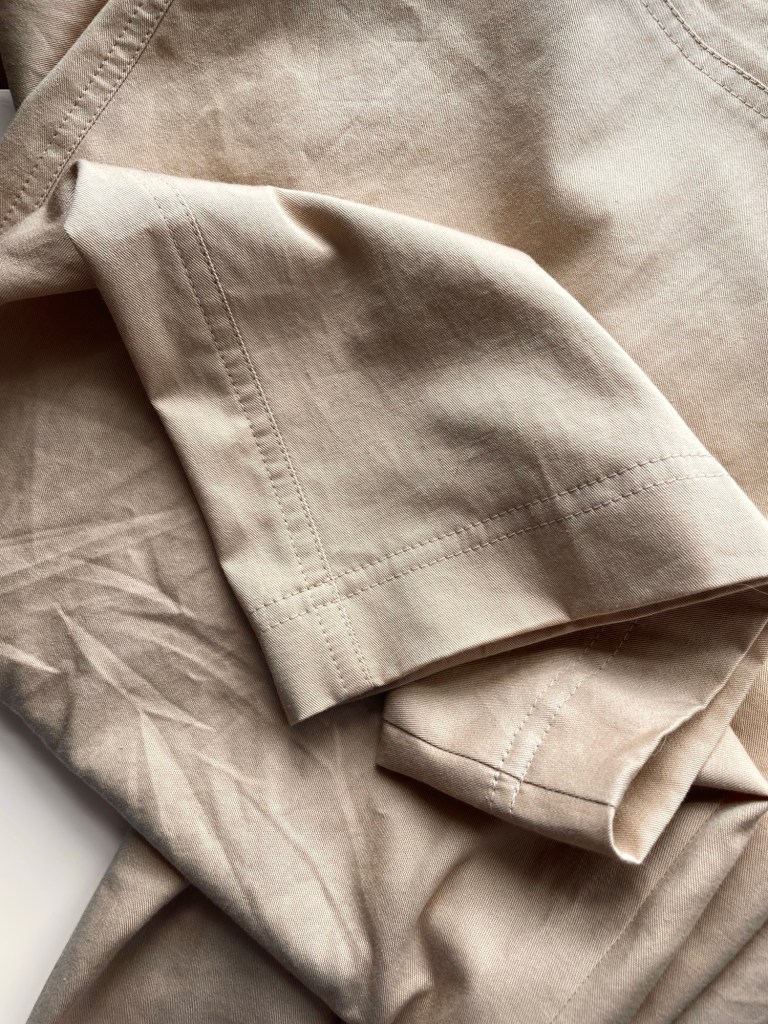
Shown with one of the several Jalie Tina t-shirts I’ve made recently. Faux front fly with elasticized waistSide cargo pocket with flapMy knee patchBack patch pocketPants hem. Lots of double row topstitching throughout these pants.
Pattern Background
The Style Arc Delta is a relaxed fit cargo pants pattern. There’s back patch pockets, faux front fly, and slash side pockets along with side cargo pockets with flaps. The elasticized waist is cut to be just slightly larger than the body hip measurement, which allows you to get them on while eliminating bulk at the waist as much as possible.
As you can see from the back leg piece, the leg is slightly tapered at the hem rather than being a true wide leg from knee to hem. I actually prefer this as it makes for a more controlled silhouette, and you don’t have to worry about your hem dragging the ground or getting soaked when it rains.
Size and Alterations
I made a size 20, with the following alterations:
Lengthened the legs 1”
Added 2.5” height to the back crotch curve, tapering to 1” at the side seam and then to nothing at the center front
My finished measurement for the waist elastic ended up being 34.25”, which is between size 16 and 18.
Since I made these to be summer outdoor work pants and the fabric is fairly thing for pants fabric, I added another layer of fabric to the knee area for more durability.
Fabric and Materials
I used the same 100% cotton Robert Kaufman fineline twill fabric from Fabric Mart that I used for my Jalie Denyse shorts.
Note: even though Style Arc only gives the yardage estimate for 58” fabric, I was able to use 44” wide fabric. My size 20 with a few length alterations and doubled up knee fabric took 3.25 yards.
For the waistband elastic I used some 1.5” non-roll Stretch-Rite elastic I had in my stash. It comes in a small retail package so I must have gotten it from Joann’s at some point.
The thread is Gutermann Mara 100 from Wawak.
The interfacing for the pocket flaps is Pellon Shape-Flex from Wawak.
Construction
I constructed these entirely on my Jukie TL-2010Q. The standard foot on it is fantastic for a project like this with the double row of topstitching because you can use the very inner edge of the foot as a guide for the first row of stitching so it is 1/16” away from the edge, and then switch to using the scant 1/4” outside as a guide against the first row of stitching. Eyeballing it works great, no need to switch out for guide feet.
When I did the waistband I wasn’t sure what my finished elastic measurement would need to be since this non-roll elastic is stiffer than my usual knit elastic. To better manage this I used the same method as my Jalie shorts where you sew the center back seam for the waistband but leave a 1” opening inside, then use that to thread the elastic through and trial it before trimming and sewing it. Then I hand stitched the opening closed.
Comparison to the Jalie Denyse
These two patterns seem similar, with similar finished measurements, but the drafting is actually quite different. I would say that in general the Delta is a trouser style draft and the Denyse is more of a slacks style draft. An explanation of trouser vs slack vs jeans crotch curves can be found in this old Pattern Review post. Just for reference, the Jalie Denyse is size CC and the Style Arc Delta is a size 20. These are the corresponding sizes for a 48.5” hip.
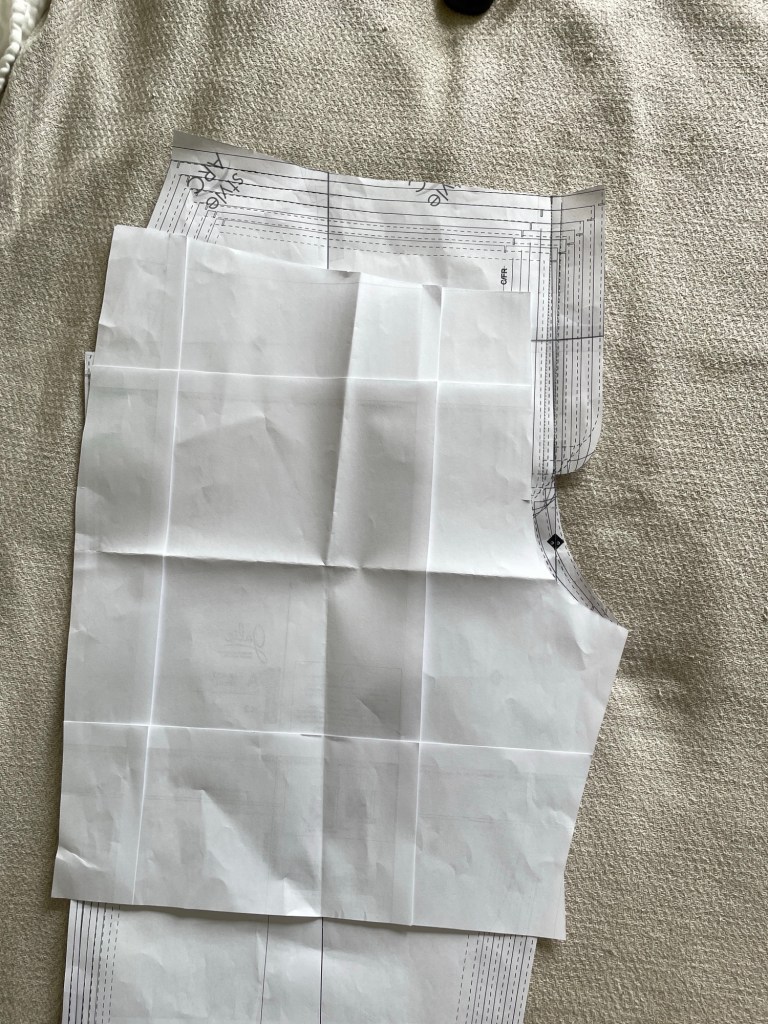
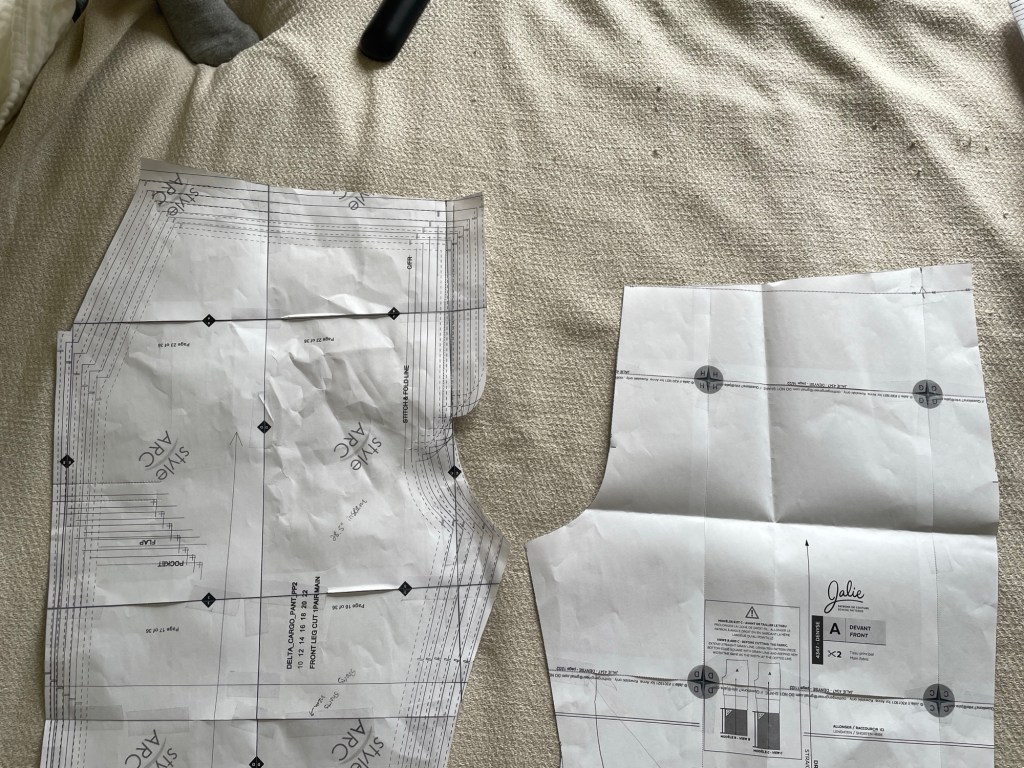
Overall the Style Arc Delta has a much higher rise than the Denyse: about 1.5” in the back and 2.5” in the front. The back crotch curve of the Delta is also straighter, with a more scooped out back crotch curve. The Denyse is definitely more angled, with a shallower crotch curve. In the photo below I’ve overlaid the Denyse on top of the Delta. They are actually really similar measurements from hip to center back seam, but the Denyse has it shifted more towards the side so the back crotch curve ends more angled.
Here’s a comparison with the Delta on the left and the Denyse on the right.
Now for the front crotch curve comparison.
The Denyse rise is 2.5” lower in the front than the Delta.
Unfortunately the Delta crotch curve paper got a little crumpled but you can see how the Delta is much shallower and taller compared to the shorter, more scooped out curve of the Demyse.
Here they are overlaid, with the Denyse on top of the Delta. (Note that the Jalie Denyse has inseam pockets and the Delta has front slash pockets, so that’s why the top of the Delta is a lot smaller than the Denyse.) As with the back piece the distribution of the pants is so the fabric is shifted to the side seam, so you get the same amount of width across the hip despite it appearing smaller in the photo below.
Now heres the front view of the Denyse and Delta respectively. Keep in mind they’re the exact same fabric.
Jalie DenyseStyle Arc Delta
So despite appearing to have similar style and ease, the drafts for these patterns are actually quite different. The Jalie Denyse feels and looks a bit slimmer than the Delta. To me neither one is better or worse. It depends on your body type and what look you are going for. For me, the Delta flows over my hips better. You can see how there’s no diagonal lines from the elastic to the my hips. But it also has a bit more excess fabric around the center front, which does correspond more to a trouser style crotch curve/fit. With the Denyse I definitely have more under butt wrinkles than the Delta, but again this corresponds to the Denyse having more of a slacks draft. (This is why you need to think carefully about the intended draft of a pants pattern before trying to remove every single wrinkle under your butt.)
In general I would say that Jalie is drafted more for straight hips and Style Arc is more for curvier hips. You can even see this in their size chart where the Jalie waist measurement is two centimeters (about 3/4”) larger and the hip one centimeter (3/8”) smaller than the same size would be for Style Arc. That doesn’t necessarily mean you should avoid one or the other, just be aware of it and alter accordingly.
Yup…I’m pregnant! My husband and I are expecting a little boy, due two days before our first wedding anniversary in August! Since I’m tall, long in the waist, and its my first pregnancy I don’t have much of a bump at this point (my doctor said not to expect much of one until around 23-26 weeks), but my waist has thickened quite a bit (3-4″ larger than before I got pregnant) and while they are still big on me, maternity pants feel far more comfortable right now.
Faux front fly detail and stretchy waistband panelTopstitched back yoke and outer side seams Adjustable waist, with buttonhole elastic
Background
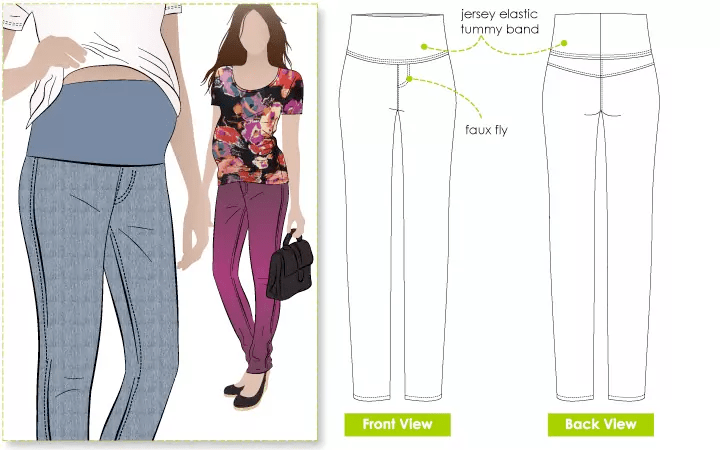
The Style Arc Andy is a slim leg maternity pants pattern…basically the maternity version of the Style Arc Elle. They are the type of maternity pants that go over the belly and have a stretchy waistband panel. Almost like a built-in belly band.
I struggled a lot during my first trimester, and all I could do was focus on basic survival. I spent sooo much time in bed feeling awful. If I didn’t know I was pregnant I would be convinced that I was terminally ill. Some women seem to love pregnancy and just breeze right through it. I am not one of those women. You could not pay me enough to be a surrogate. Unisom + B6 helped a lot with the motion sickness and nausea, but I still felt terrible. I have no idea how some women successfully hide it from everyone for months, because I looked and felt like such a wreck I had to disclose to a few people at my job very early on. Of course numerous older women in my life would take one look at me and accurately guess right away what was going on!
Due to the hormones, inactivity from feeling so exhausted/weak/dizzy, and eating way too many carbs every 2-3 hours because of food aversions and nausea, I gained 10-15 pounds during my first trimester. (I never realized just how active I was before!) Very little of my original wardrobe was suitable at this point. I have never had an easy time buying RTW pants but I was so exhausted and bloated and needed something to wear to work and out in public. I ended up buying and then returning a ton of RTW because most of what I bought fit really badly, making me feel even more frumpy and awkward. It seems that 99% of pregnancy-friendly “pants” are just leggings and sweatpants, and I really wanted pants that looked like regular pants. Once I was in my second trimester and starting having some almost-normal days again I started working on getting back my strength and making plans for sewing again! I still haven’t gotten that second trimester “burst of energy” they talk about, but life is definitely starting to feel a bit easier and more “normal” again. I feel fortunate that I was able to easily conceive and everything looks good so far (despite being considered high risk due to “advanced maternal age” and “elderly primigravida”). He’s bouncing around in there like a happy little puppy, completely oblivious to all the chaos he’s causing!
Materials
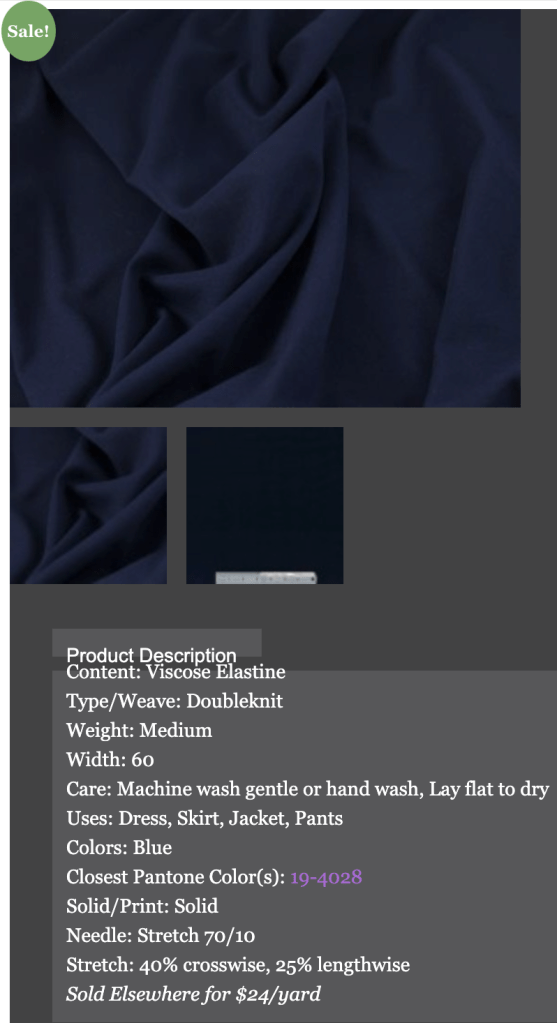
The fabric I used for the pants was a navy viscose double knit/ponte from Gorgeous Fabrics that’s been sitting in my stash since 2016. The pattern description says it is for stretch wovens, but ponte is structured enough to work as well. In my opinion the slight vertical stretch makes it work even better.
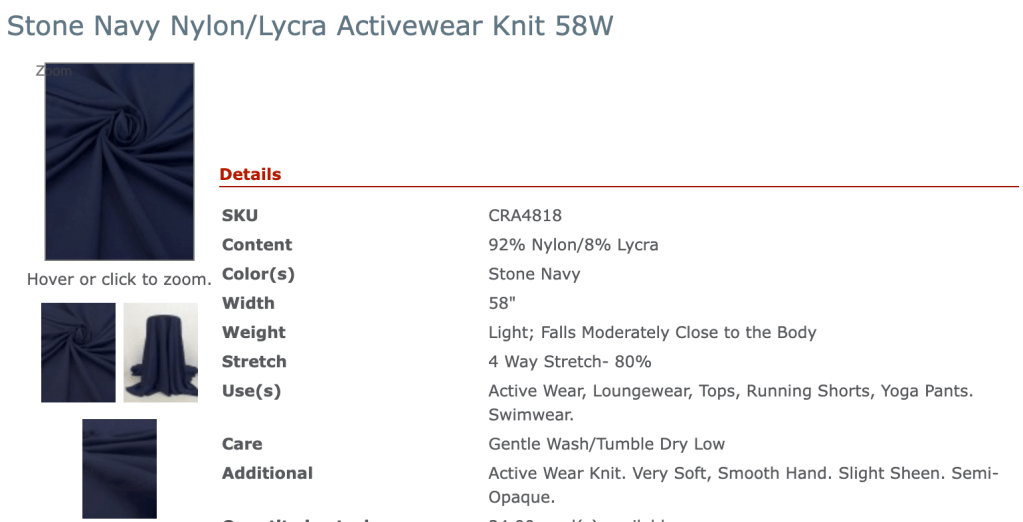
For the waistband I used a nylon/lycra activewear knit from Fabric Mart, purchased way back in 2015.
These pants are extremely wash and wear friendly. One of the best things about making your own clothing is you can treat the fabric thoroughly before sewing with it. I washed on warm and dried on high to get rid of as much shrinkage as possible, and the fabric is no worse for the wear. SO much of my RTW ends up shrinking despite carefully following the care instructions…one pair of pants from Amazon seemed to fit ok, then shrunk 2-3″ in the length after being washed on cold! I’ve found this problem has gotten significantly worse since the pandemic. Maybe manufacturers are taking more shortcuts now.
For the waistband elastic I used a 5/8″ wide black buttonhole elastic from Cleaner’s Supply, along with a 3/8″ navy button.
My husband noticed that the fabrics don’t match in color (the waistband is lighter than the pants) but this seems very common in RTW maternity pants. These maternity pants are over $200 and they have a very different color waistband. My shirts will cover it anyway. I’m just thrilled to have something that is machine washable, long enough, good quality, and will still fit in a couple of months…and they cost me only $26 to make. The only $30 and under maternity pants I’ve found online are either polyester or leggings, and none of them come in tall sizes either.
Fit
Fitting adjustments were as follows:
I used a size 14 for the waist/back yoke, then tapered out to a size 16 at the hip/thigh/leg
Removed 3/8″ length from the upper part of the front crotch curve
Added 1/2″ to the upper back crotch curve
Added 2″ width to the leg opening, making these more of a slim straight leg rather than a true slim leg
Added 1.5″ to the length. Due to the vertical as well as horizontal stretch of my fabric, I ended up removing 1.25″ after hemming and left them a tiny bit on the long side just in case if there’s any future shrinkage. Yet when I compared them to the paper pants pattern after sewing, they were still a bit longer. I think the fabric relaxed a bit during construction.
You probably noticed from the photos that waistband is rather loose at this point, and the back waist is definitely a bit baggy, but I’m reluctant to mess with it as I am sure I will be filling it out in the not so distant future.
Construction
I made this entirely on my sewing machine, and then hemmed them using my coverstitch machine.
I chose to go with the buttonhole elastic option for the waistband. I am not entirely happy with it as it is soft so it tends to roll when taking the pants on and off, but at the same time I like how it is going to allow for plenty of adjustment as my body continues to grow. When I sewed the buttonholes in the inner back waistband I used a lightweight cut-away stabilizer on the wrong side of the fabric and trimmed it away afterward. It worked out great! When making the waistband elastic casing I traced a line 5/8″ away from the folded edge of the fabric with chalk, then used a 3.5mm length and 2.5mm width zigzag stitch to create the casing, making sure the edge of the zigzag stitch just hit the chalk marking. I went with a zigzag instead of a cover stitch because despite my waist getting much thicker I’m still pear shaped and wanted the extra stretch for getting over my hips and thighs. A cover stitch stretches, but a zigzag gives more durability and stretchiness.
I found there’s one mistake with this pattern. The front crotch curve has only a 1/4″ seam allowance, but every other seam allowance on this pattern is 3/8″. Not a big deal to fix, but just something to be aware of.
This pattern has a faux fly. I did a double line of topstitching for the fly, and then a single line of topstitching 1/8″ away from the edge for the front and back crotch curve. I topstitched 1/4″ away from the edge for both the upper edge of the yoke and the outer side seams. (I pushed the seam allowance towards the front when I topstitched the outer side seams, instead of to the back. This helped with some of the bulk created by the back yoke). The topstitching at the outer side seam helped make sure those side seams stay very flat and in place.
When I attached the waistband to the pants I used a 4.0mm length and 2.5mm width zigzag stitch. I pushed the seam allowance up towards the lycra and topstitched in place fairly close to the seam line, again using a 4.0mm length and 2.5mm width zigzag stitch. Then I trimmed the seam allowance after stitching.
Conclusion
I LOVE THESE PANTS. I’ve got two more pairs in black ponte cut out and ready to sew. They’re a cinch to make and I feel so much better having them to wear. They’re slim without being tight and pair well with looser fitting untucked dress shirts (my go-to work style right now). There’s so few modern maternity pants patterns on the market, and I am so grateful to Style Arc for offering this pattern. Highly recommend it to the other pregnant ladies out there!