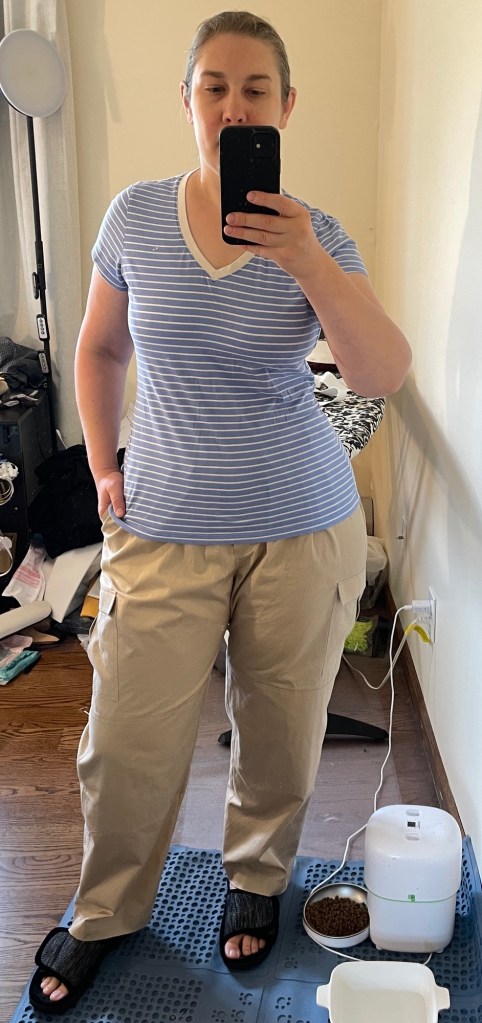
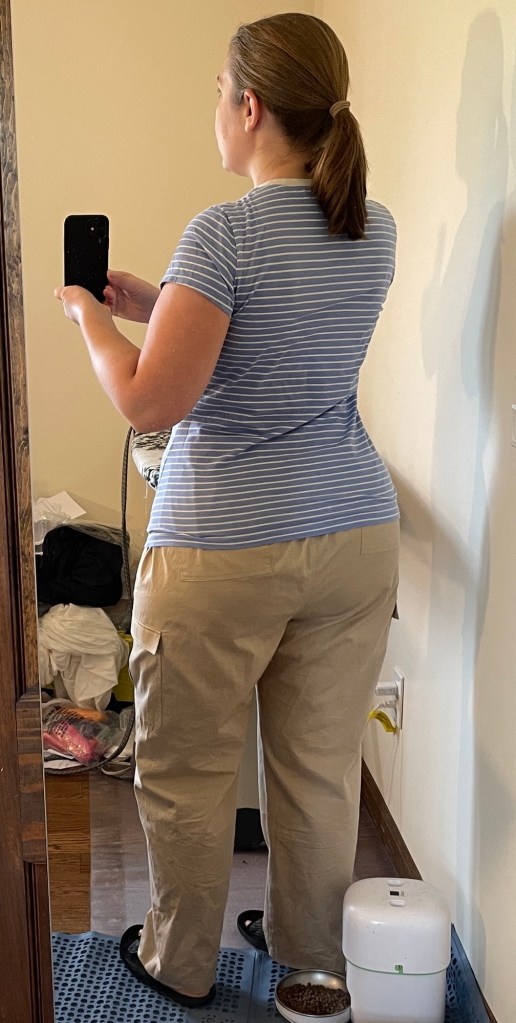
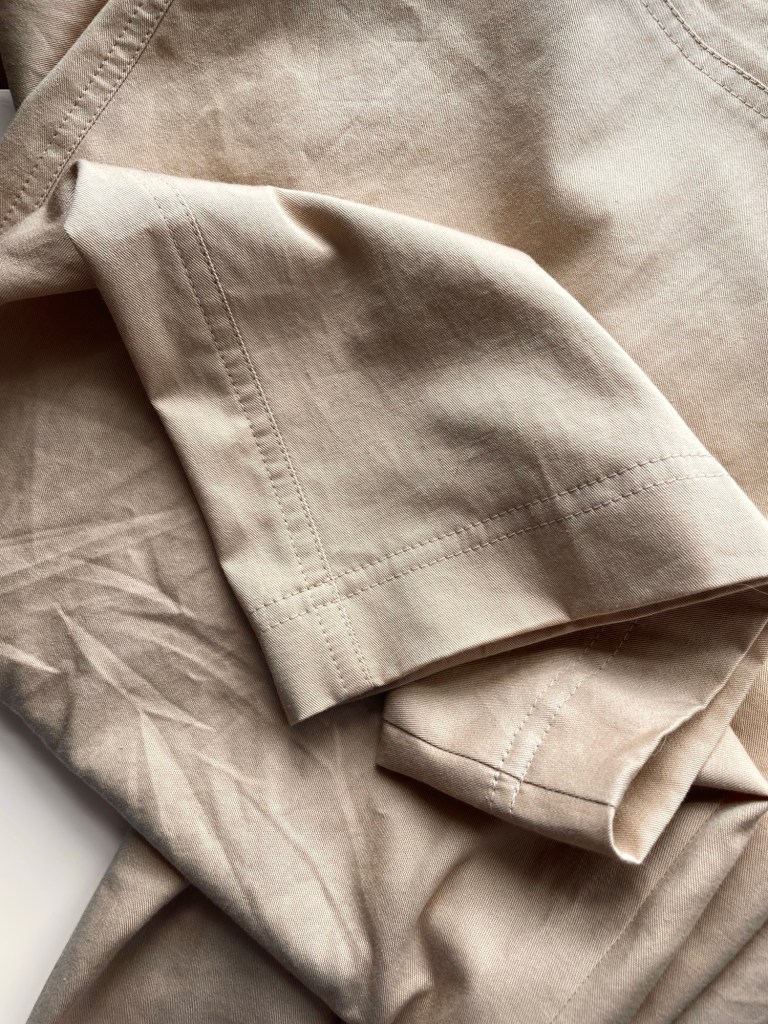
I made these pants with the intention of them being lightweight outdoor work pants. I help out a lot with yard work at my parents’ house now and weed whacking is a perilous task with shorts. So I wanted something full length that would be lightweight, breathable, and comfortable to wear in the heat. The Delta provide plenty of range of motion despite the non stretch fabric so I’m pretty happy with them.



Pattern Background
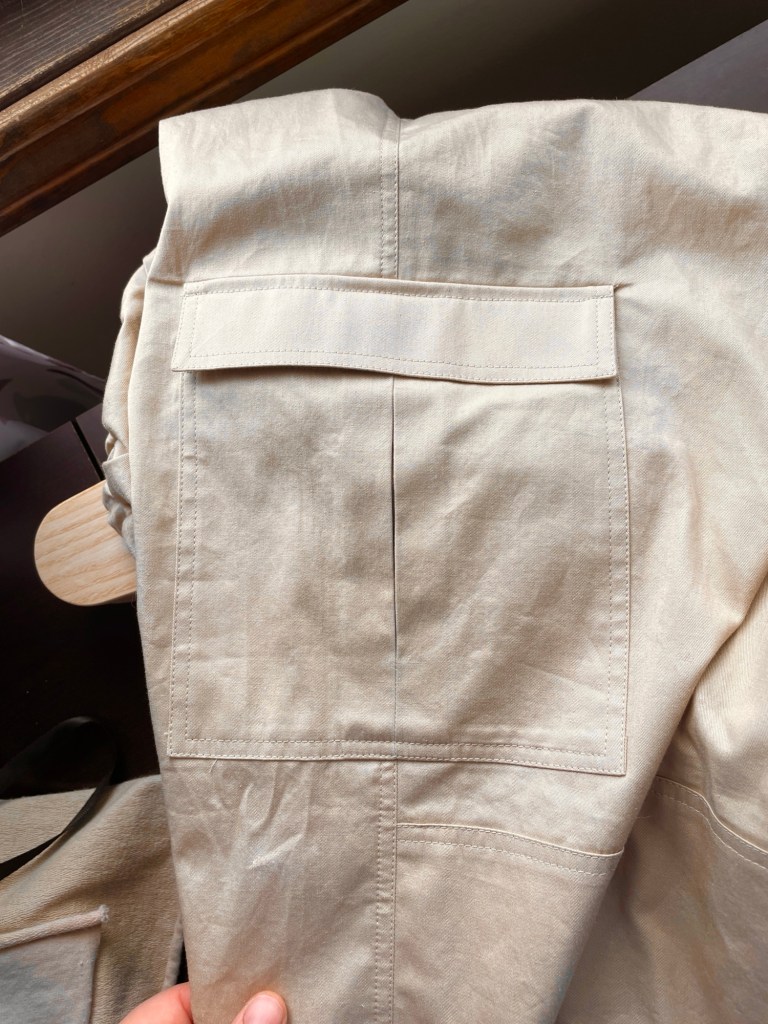
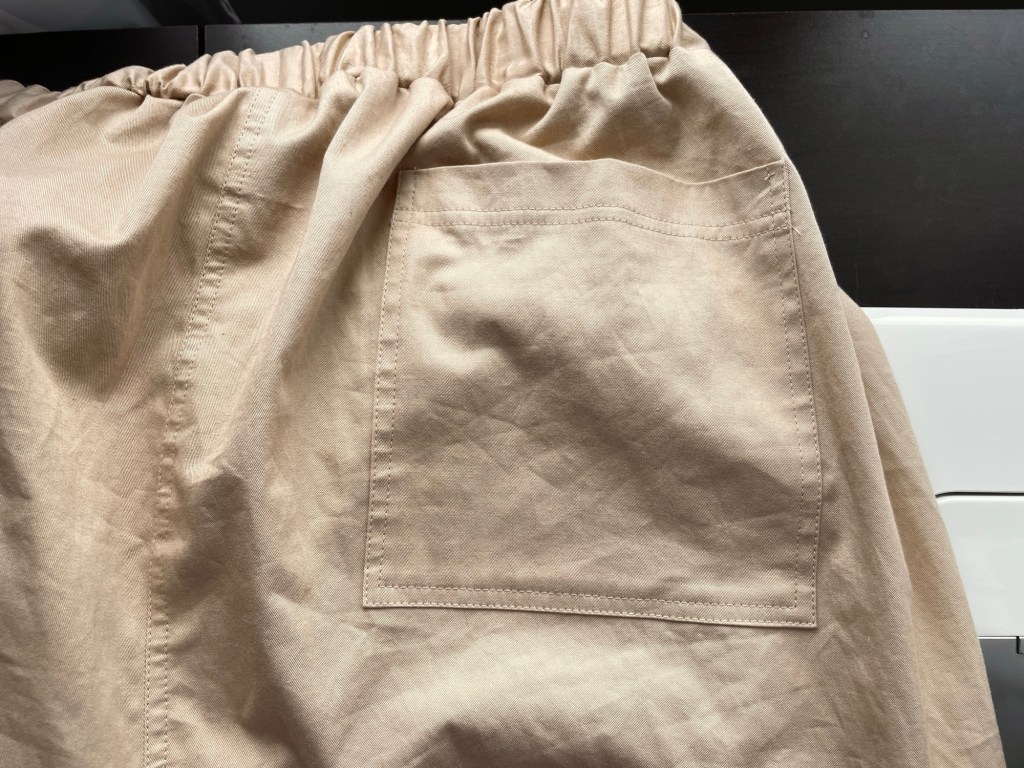
The Style Arc Delta is a relaxed fit cargo pants pattern. There’s back patch pockets, faux front fly, and slash side pockets along with side cargo pockets with flaps. The elasticized waist is cut to be just slightly larger than the body hip measurement, which allows you to get them on while eliminating bulk at the waist as much as possible.
As you can see from the back leg piece, the leg is slightly tapered at the hem rather than being a true wide leg from knee to hem. I actually prefer this as it makes for a more controlled silhouette, and you don’t have to worry about your hem dragging the ground or getting soaked when it rains.

Size and Alterations
I made a size 20, with the following alterations:
- Lengthened the legs 1”
- Added 2.5” height to the back crotch curve, tapering to 1” at the side seam and then to nothing at the center front
- My finished measurement for the waist elastic ended up being 34.25”, which is between size 16 and 18.
- Since I made these to be summer outdoor work pants and the fabric is fairly thing for pants fabric, I added another layer of fabric to the knee area for more durability.
Fabric and Materials
I used the same 100% cotton Robert Kaufman fineline twill fabric from Fabric Mart that I used for my Jalie Denyse shorts.
Note: even though Style Arc only gives the yardage estimate for 58” fabric, I was able to use 44” wide fabric. My size 20 with a few length alterations and doubled up knee fabric took 3.25 yards.
For the waistband elastic I used some 1.5” non-roll Stretch-Rite elastic I had in my stash. It comes in a small retail package so I must have gotten it from Joann’s at some point.
The thread is Gutermann Mara 100 from Wawak.
The interfacing for the pocket flaps is Pellon Shape-Flex from Wawak.
Construction
I constructed these entirely on my Jukie TL-2010Q. The standard foot on it is fantastic for a project like this with the double row of topstitching because you can use the very inner edge of the foot as a guide for the first row of stitching so it is 1/16” away from the edge, and then switch to using the scant 1/4” outside as a guide against the first row of stitching. Eyeballing it works great, no need to switch out for guide feet.
When I did the waistband I wasn’t sure what my finished elastic measurement would need to be since this non-roll elastic is stiffer than my usual knit elastic. To better manage this I used the same method as my Jalie shorts where you sew the center back seam for the waistband but leave a 1” opening inside, then use that to thread the elastic through and trial it before trimming and sewing it. Then I hand stitched the opening closed.
Comparison to the Jalie Denyse
These two patterns seem similar, with similar finished measurements, but the drafting is actually quite different. I would say that in general the Delta is a trouser style draft and the Denyse is more of a slacks style draft. An explanation of trouser vs slack vs jeans crotch curves can be found in this old Pattern Review post. Just for reference, the Jalie Denyse is size CC and the Style Arc Delta is a size 20. These are the corresponding sizes for a 48.5” hip.
Overall the Style Arc Delta has a much higher rise than the Denyse: about 1.5” in the back and 2.5” in the front. The back crotch curve of the Delta is also straighter, with a more scooped out back crotch curve. The Denyse is definitely more angled, with a shallower crotch curve. In the photo below I’ve overlaid the Denyse on top of the Delta. They are actually really similar measurements from hip to center back seam, but the Denyse has it shifted more towards the side so the back crotch curve ends more angled.

Here’s a comparison with the Delta on the left and the Denyse on the right.

Now for the front crotch curve comparison.
The Denyse rise is 2.5” lower in the front than the Delta.
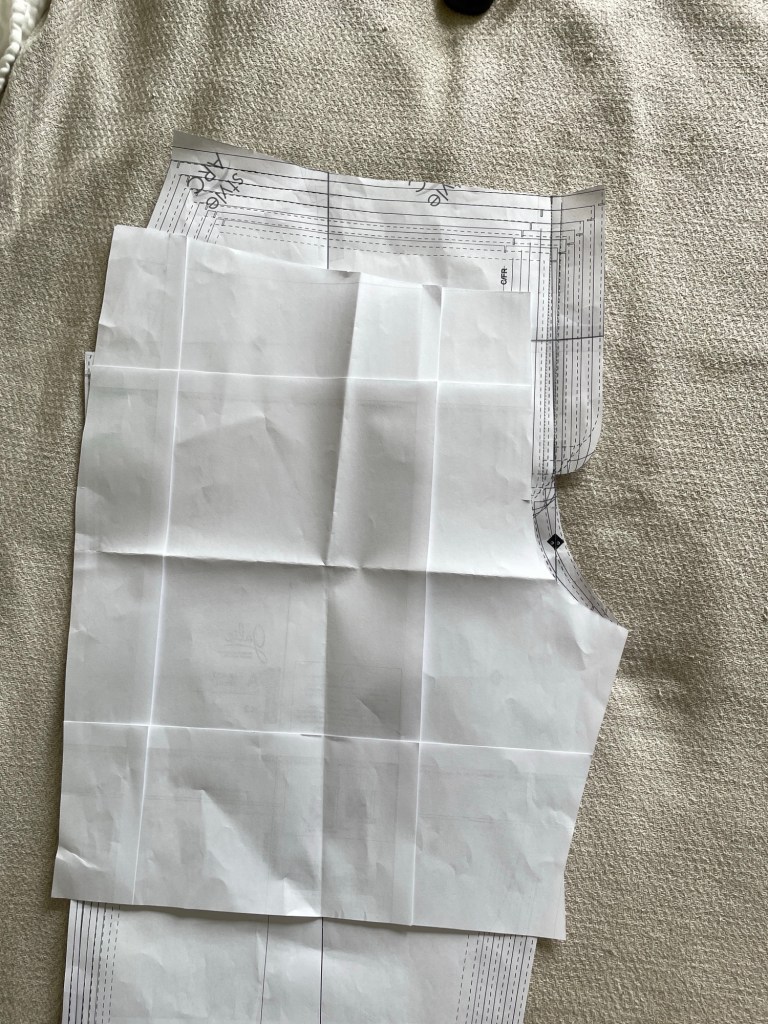
Unfortunately the Delta crotch curve paper got a little crumpled but you can see how the Delta is much shallower and taller compared to the shorter, more scooped out curve of the Demyse.
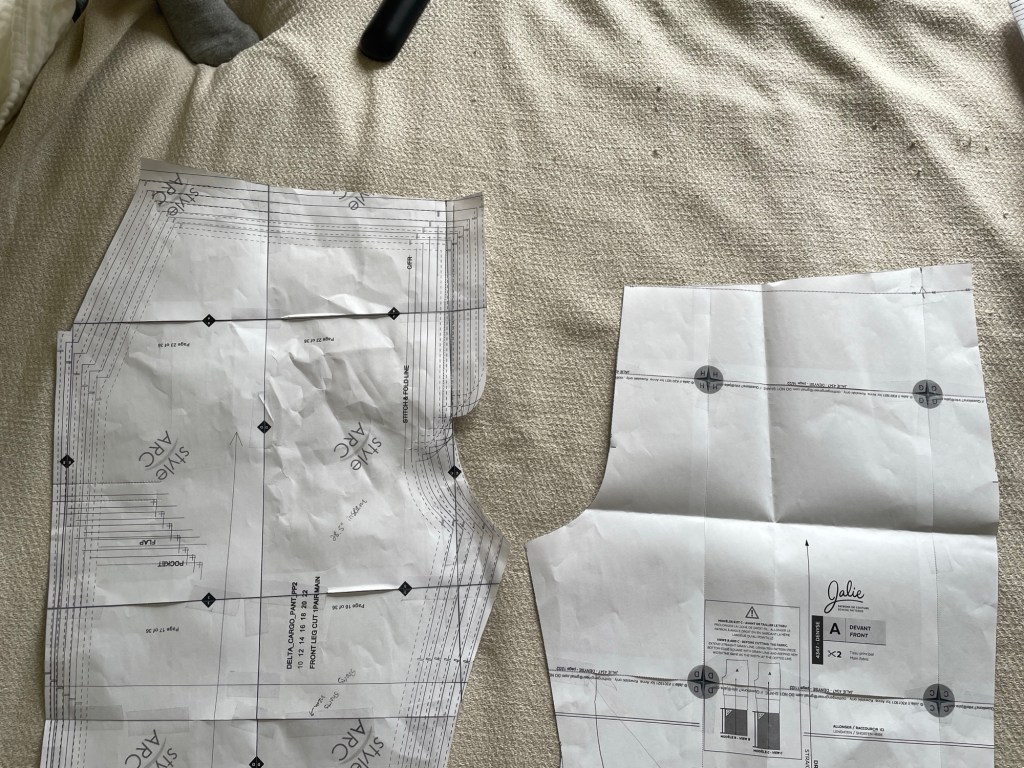
Here they are overlaid, with the Denyse on top of the Delta. (Note that the Jalie Denyse has inseam pockets and the Delta has front slash pockets, so that’s why the top of the Delta is a lot smaller than the Denyse.) As with the back piece the distribution of the pants is so the fabric is shifted to the side seam, so you get the same amount of width across the hip despite it appearing smaller in the photo below.

Now heres the front view of the Denyse and Delta respectively. Keep in mind they’re the exact same fabric.


So despite appearing to have similar style and ease, the drafts for these patterns are actually quite different. The Jalie Denyse feels and looks a bit slimmer than the Delta. To me neither one is better or worse. It depends on your body type and what look you are going for. For me, the Delta flows over my hips better. You can see how there’s no diagonal lines from the elastic to the my hips. But it also has a bit more excess fabric around the center front, which does correspond more to a trouser style crotch curve/fit. With the Denyse I definitely have more under butt wrinkles than the Delta, but again this corresponds to the Denyse having more of a slacks draft. (This is why you need to think carefully about the intended draft of a pants pattern before trying to remove every single wrinkle under your butt.)
In general I would say that Jalie is drafted more for straight hips and Style Arc is more for curvier hips. You can even see this in their size chart where the Jalie waist measurement is two centimeters (about 3/4”) larger and the hip one centimeter (3/8”) smaller than the same size would be for Style Arc. That doesn’t necessarily mean you should avoid one or the other, just be aware of it and alter accordingly.


Hello, I always enjoy reading about your sewing projects, especially all the technical details. I learn so much. I have a similar shape to yours and also need to increase the rise in pants (more in back than in front). I’m wondering when you add to the rise do you do it midway between crotch and waist, or do you add higher up. Also, when there is a pocket like on the cargo shorts, do you simply add to the pocket the same amount (also tapered) or do you handle that differently, and if so I’m interested to know what you do. I know you are a very busy mom, and I really appreciate any guidance you can provide! Thank you!!
LikeLike
If I’m lengthening the entire rise from front to back I usually do it somewhere between waist and crotch. I try to do it in an area with as little disruption as possible to pockets and any other details, but for example side seam like the Denyse or slanted hip pockets like the Delta will also be altered since they are so much a part of the side seam. If I’m just adding to the top of the crotch curve as a fitting thing for my butt I do it at the top (like you can kind of see on my patterns here). I just put markings in key areas like 2.5” at the center back and 1” at the side seam and then just freehand a connection between these two points. If there’s a separate waistband I will measure the upper edge after adjustment and true up the waistband pieces as necessary so they match.
A lot of whether to adjust pockets or not depends on where the adjustment is, how much you’re adjusting, and even just personal preference. Sometimes lengthening things like side cargo pockets or back patch pockets as well as the rise will help with giving a more proportionate and flattering look.
For a detail like the cargo pockets on shorts I often leave those pieces alone and just alter the height where they attach. Like the back patch pockets, I think on the Style Arc Delta they are placed 2 3/8” from the cut edge where the waistband is attached, so I just raised and angled my pockets so they were parallel with my altered upper edge after adjustment. If you look at the picture of the Jalie Denyse back piece compared to the Style Arc Delta you will see how I scribbled out the original placement line and drew in my new one. With the Delta I forgot to draw the new line, so after I transferred it to the fabric I redrew it on the fabric so it was parallel to the new back upper edge.
LikeLike
Thank you very much for your reply!
LikeLike
very useful, thank you 😊
LikeLiked by 1 person
The relaxed fit and elasticized waist sound perfect for outdoor work, especially on hot days! I love that you used 100% cotton twill, as it must enhance the breathability. Have you found any particular adjustments you’d recommend for someone with a different body type?
LikeLike
Something like this is easy to work with because of the looser fit and elastic waist. I think a good place to start off is measuring any RTW you might have and comparing it with a similar style pattern. It was through measuring a particularly well-fitting pair of Lands’ End pajama pants that I randomly discovered that I need a much higher crotch curve in the back than what pretty much any pattern offers. Pattern fitting books would have me add it all to to the back crotch curve extension, but I needed it more in the height.
LikeLike