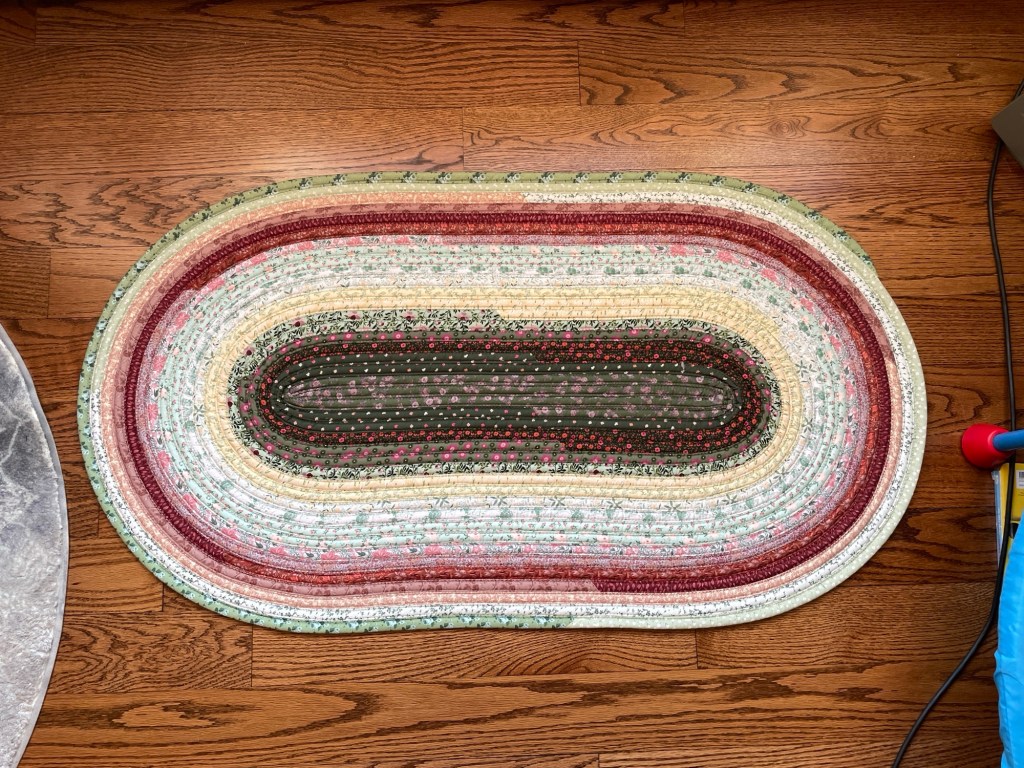
A few different things about this one from my first one.
I finally bought replacement legs for my Janome’s extension table, so I had that properly set up this time instead of it being balanced on some books. I also worked on my dining room table when it came time to zigzag the edges together. As the rug grew I was careful to push away anything that could bump up against it, like the chairs opposite from me. What a difference it made! It was much easier getting a flat rug this time.
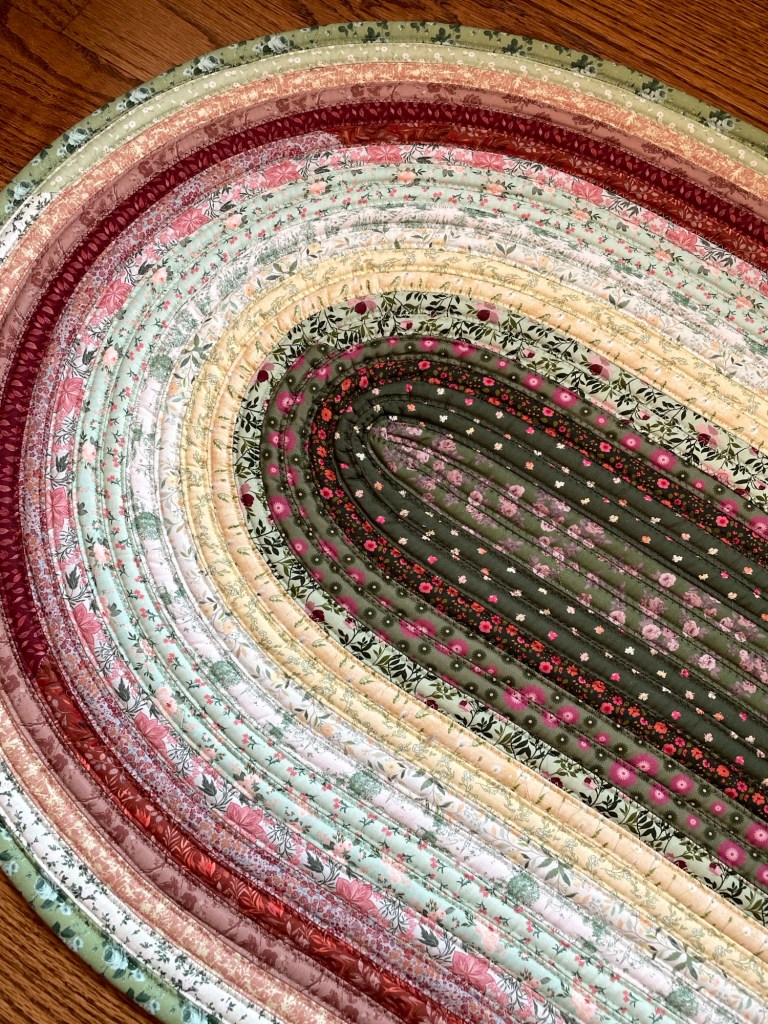
I decided to try to blend the thread colors with the fabric instead of using one color like I did for my first one. I like the more subtle look.
I also applied Gotta Grip-It rug fixative to the bottom after sewing. I have mostly hardwood floors in my house, which is downright dangerous when paired with a jelly roll rug. For my first rug I bought a rug pad to put underneath but didn’t like how it kept sliding out, so I decided to try something more permanent. With Gotta Grip-It you just paint on a thin layer and let it dry. It paints on white but dries clear, and once it’s finished drying it creates a tacky finish on the bottom of the rug. Aside from texture, the only indication Gotta Grip-It is there is a slight sheen.
After trying it on this rug, I am in love. It really keeps the rug in place! No rug pad sliding out, and the rug can still be washed.
With this particular rug I didn’t do a great job rounding the first few corners, and as a result they’re kind of squished. I was working with my toddler playing around me and wasn’t able to press as I went, so I just did my best with my fingers. I do think in the future it is worth taking the time to press as you round the first few corners.
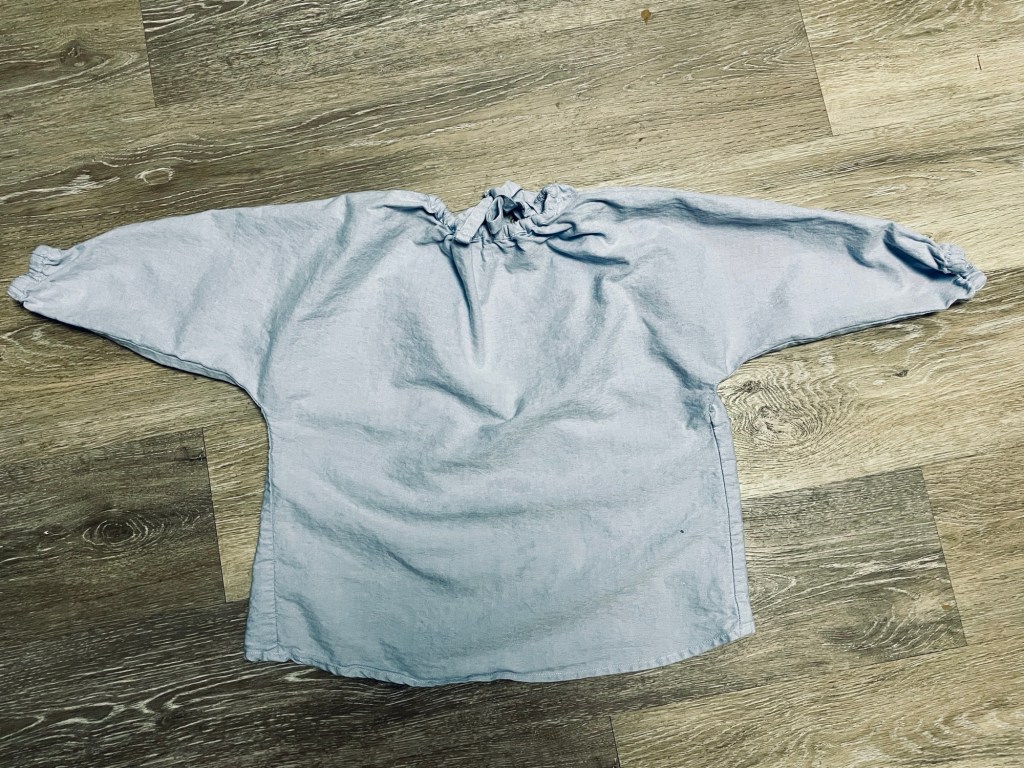
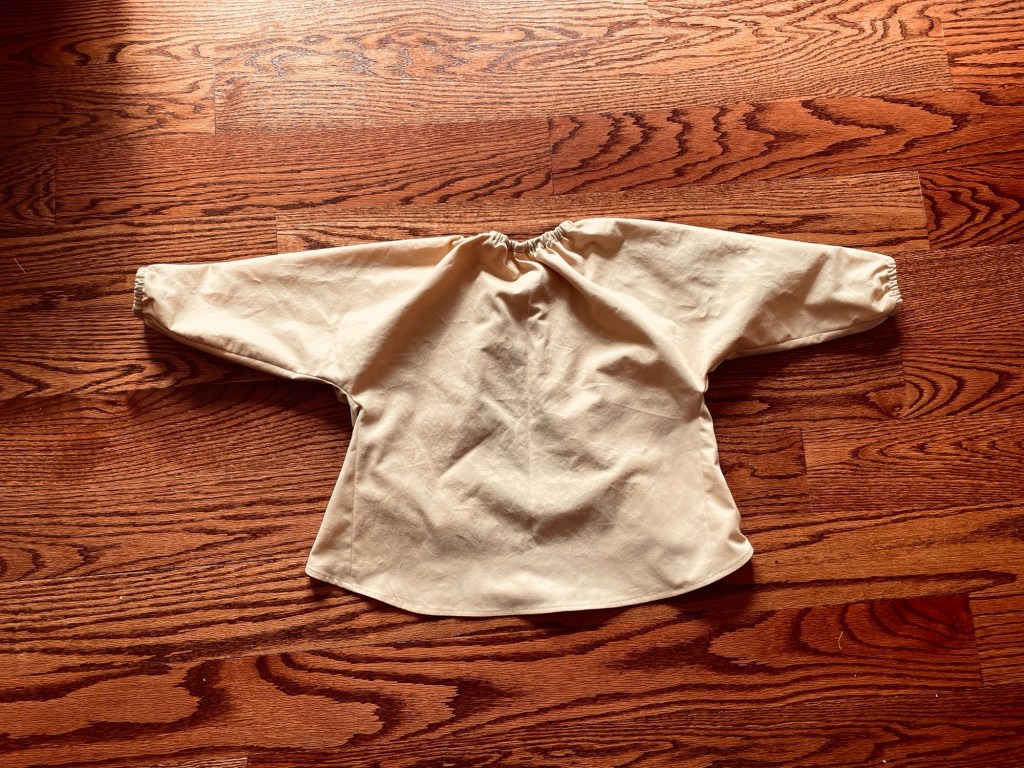
My son, who will be turning three this summer, has always been a messy eater. When he was an infant, during the warmer months we would just strip him down to his diaper (suggested by our lactation consultant) and put on a bib and let him go to town. For the colder months I discovered these waterproof smocks. My husband and I have been suiting him up with a silicone catch-all bib and smock and it’s been working really well. We are at the point now where the smocks are too small and the Velcro has gone out. While the waterproof fabric is good in some ways, it also delaminated over time and tended to be very sweaty during the non-winter months. For this reason I wanted to make him some sturdy 100% cotton smocks in a larger size. I wanted to avoid Velcro this time around too because as I mentioned before, over time it lost its effectiveness and it made washing more of a pain because things would catch on it (and over time fuzzies got caught in it too).
I found it surprisingly difficult to find a sleeved smock pattern. The sleeves are pretty crucial because as I mentioned before he’s messy and always finds a way to get his arms into whatever yogurt or marinara sauce he happened to have in front of him.
After some searching on Etsy I found the My Mum Makes art smock. I chose it because it had the size range I was looking for, good reviews, and actual finished garment photos.
Pattern Background
This is a PDF only digital pattern. The two sizes included are 1-4 and 4-8. In addition to written instructions the seller has video instructions available as well. I love this trend because it makes sewing so much more accessible to younger people who may not an actual in-person mentor to help them out.
The smock has two pieces: front and back. They’re cut-on sleeves and just sewn together. The hems are finished with bias tape. Elastic is used to gather the neckline and sleeves.
Materials
For my first version (the blue one) I used a sturdy cotton Kaufman Oxford cloth shirting I got from the long gone fabric.com back in 2012. It is the weight of a lightweight denim shirting.
For my beige versions I used a Robert Kaufman 100% cotton fine line twill from Fabric Mart.
Construction
I changed a few things from the instructions.
I didn’t use binding for finishing the back and hem. Instead I did a 1/4” rolled hem. For my blue version I used a rolled hem foot on my Juki TL-2010Q. For my beige version I used the paper hem method.
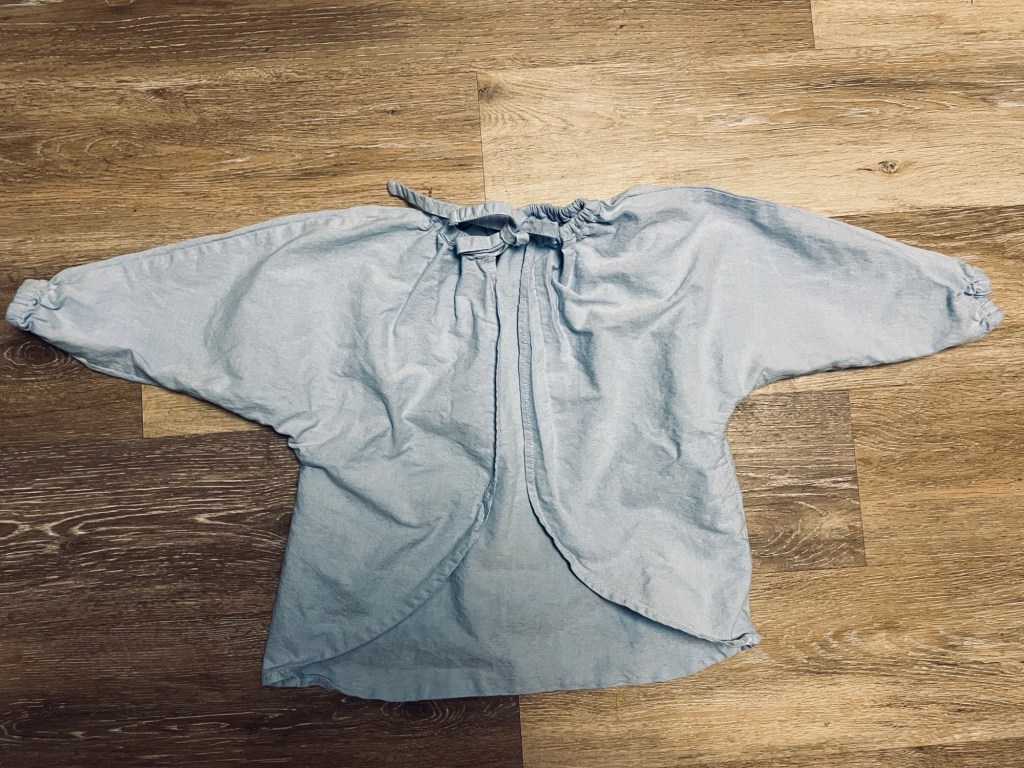
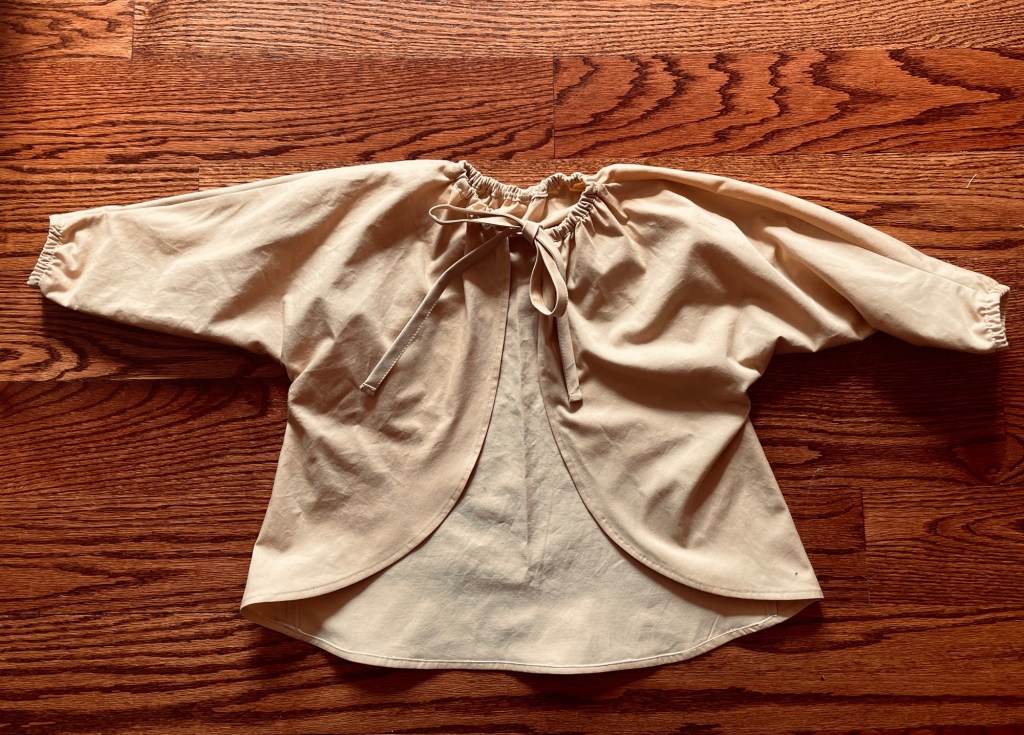
I wanted to use a tie in the back instead of the elasticized bias binding as it isn’t important to me that he get it on and off independently. (In fact I want him to need help because I want to get a chance to wipe off his hands before he touches his hair/clothes!) So I ended up cutting out some self fabric bias binding, making it long enough to tie in the back. I then threaded the elastic through the casing made by the binding and secured it where the back ends. It was tedious. For subsequent versions I used 1/4” elastic, stretching it as much as it could go to fit and stitched it down in the middle. Then I applied the binding, stretching the elastic out as I went along so it wasn’t gathered. Then once I was done I carefully steamed it so it shrunk back into shape.
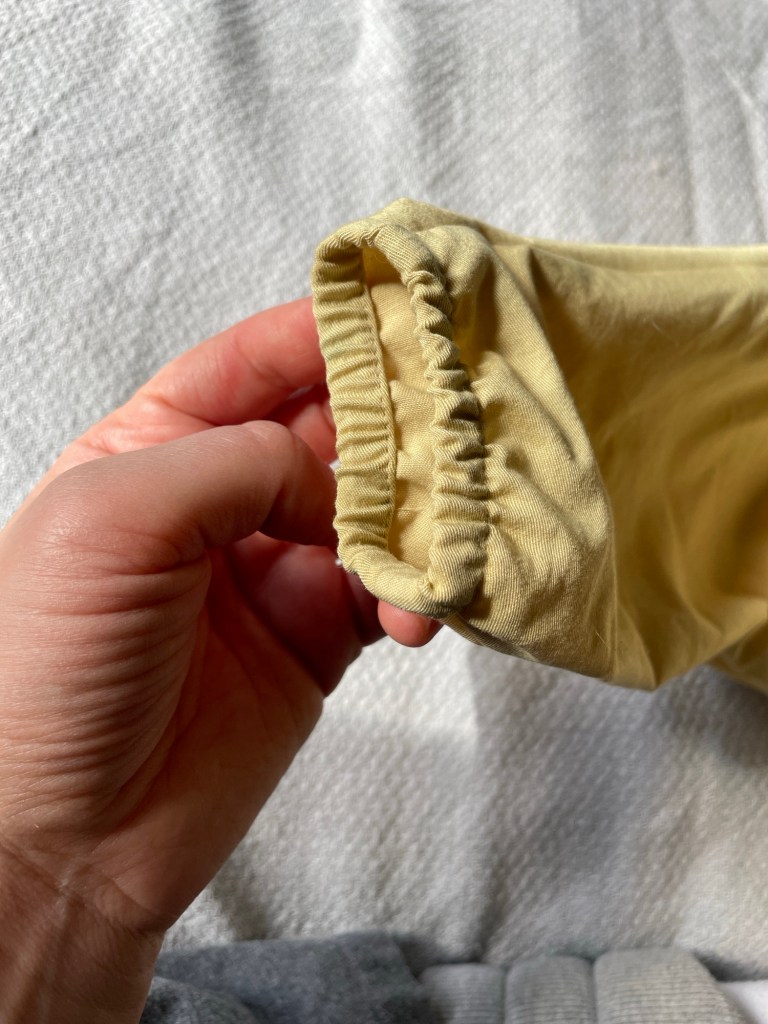
The cuffs called for 1/4” elastic with a 1” casing. Like what?? The cuff is quite small so I ended up cutting a piece of 3/8” elastic, overlapped and sewed the ends, tacked it down at the seams, then stitched it in place to the wrong side down the middle, stretching to fit. Then I flipped it over twice so that the raw edge was fully enclosed and stitched along the edge very closely. Much neater and the elastic won’t roll during washing.
Conclusion
This pattern is not really professionally done pattern like you’d get from Jalie, Style Arc, Ottobre, Burda, etc. The drafting IMO should be cleaned up a bit more (it is literally just hand drawn lines) and I noticed some errors. There’s no grainlines drawn and both pieces are labeled “front.” This didn’t give me a ton of confidence However, it fits my son well, keeps his clothes clean, and is very easy to wash.
Another winner from the Ottobre 1/2024 issue. He’s been wearing them all fall, winter, and spring!
Pattern Background
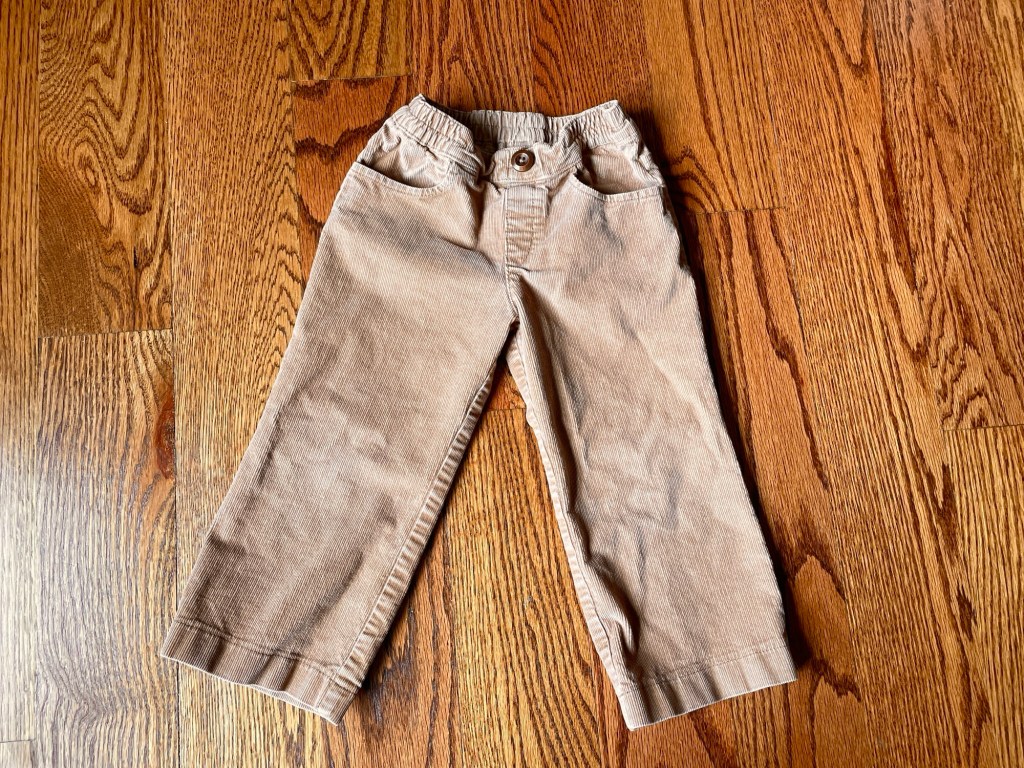
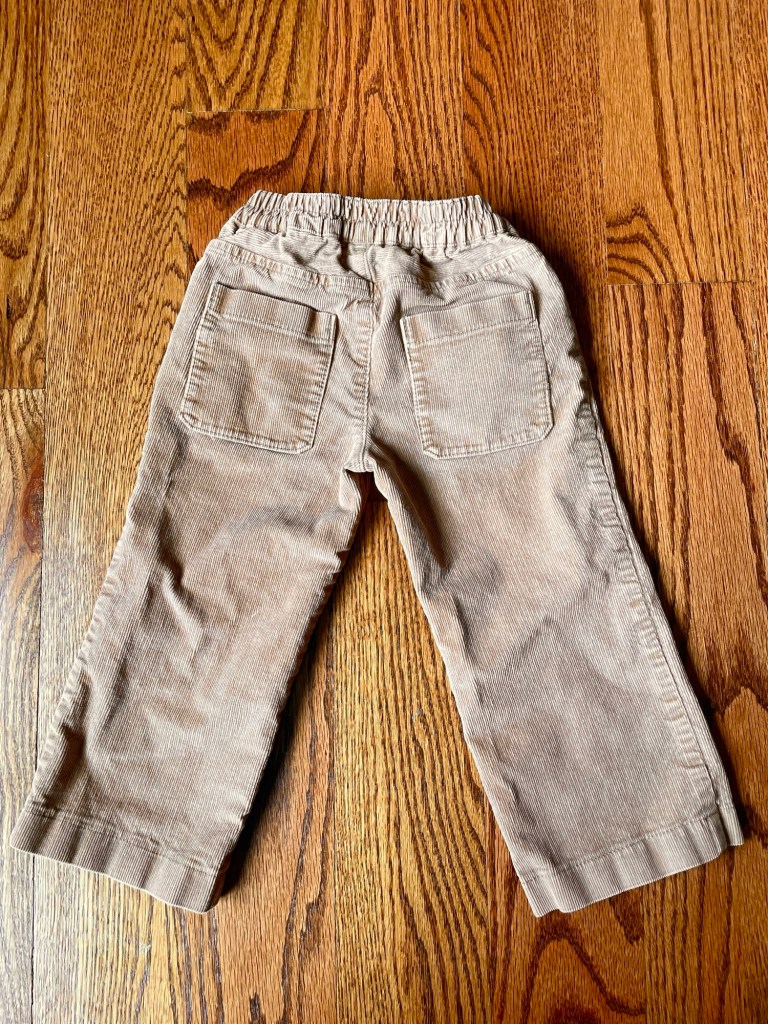
This is a wide leg pants pattern with back and front pockets, faux front fly, and a partially elasticized waistband. It has a wide range of sizes. #17 is European 92-122, and #22 is 128-170.
As I mentioned above, these pants start at 92 and go all the way to 170. I made a size 92. I do find the waist is a bit on the low side with these pants, especially since he wears cloth diapers, so in the future I may extend the rise a bit to help with coverage. I did my usual adding 1/2″ length to the top of the center back seam to help with coverage and and honestly it could have been more.
Fit/Sizing
When I first made these they were a bit too long and needed to be cuffed, but not long after he had a growth spurt and now they’re totally fine as long as he’s wearing shoes with them.
Materials
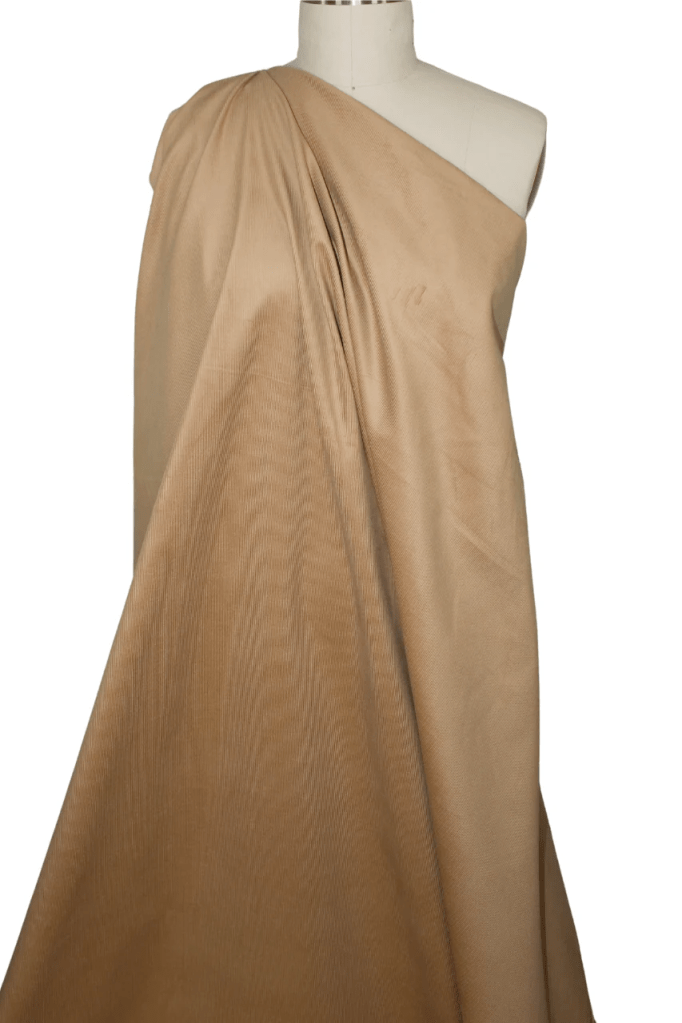
Any sort of woven with a bit of stretch will work for these pants – denim, corduroy, twill, etc.
I used a slightly stretchy fine wale corduroy, purchased from Gorgeous Fabrics last year.
Construction
These pants are fairly straightforward. As I mentioned in the description its a faux front fly, so you just turn back the inside pieces and topstitch and then sew a button onto the front. The waistband is elasticized except for a small section in the front between the pockets.
Conclusion
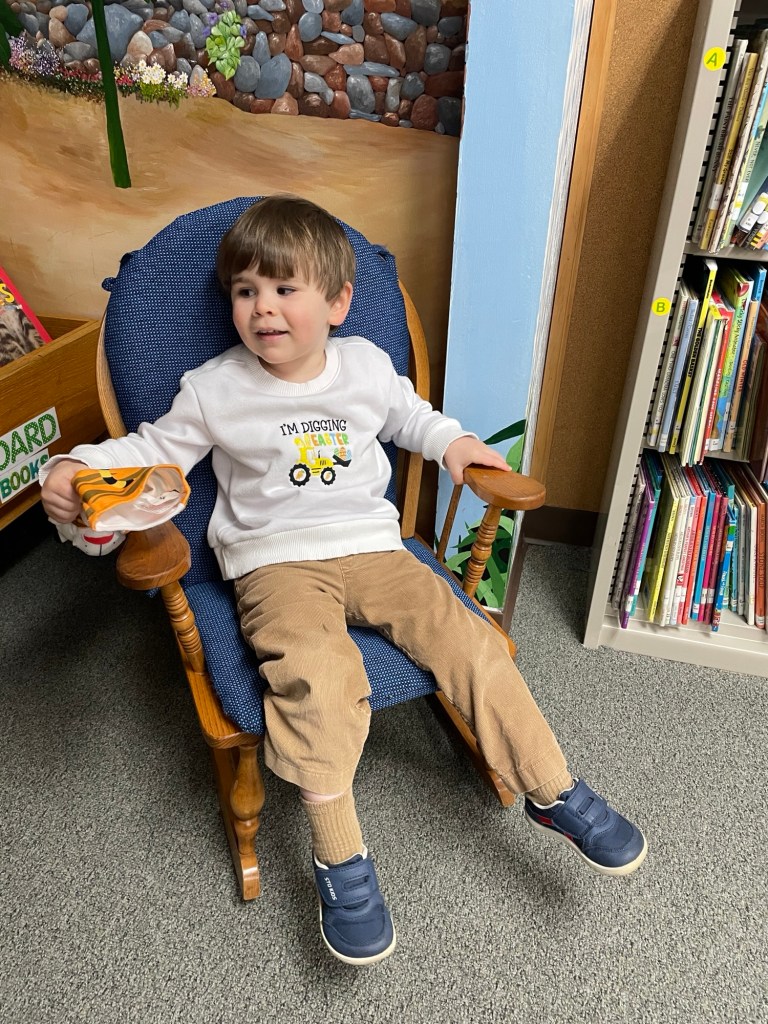
I’ve made my son a couple of pairs of woven pants for the fall and this is my favorite pattern. He really likes the wide cut (easier for playing). I was unsure at first about how it would look on him since he has a slim, muscular build for a toddler but I really like them on him. They have a modern look and go well with looser fitting sweatshirts as well as slimmer fitting t-shirts.
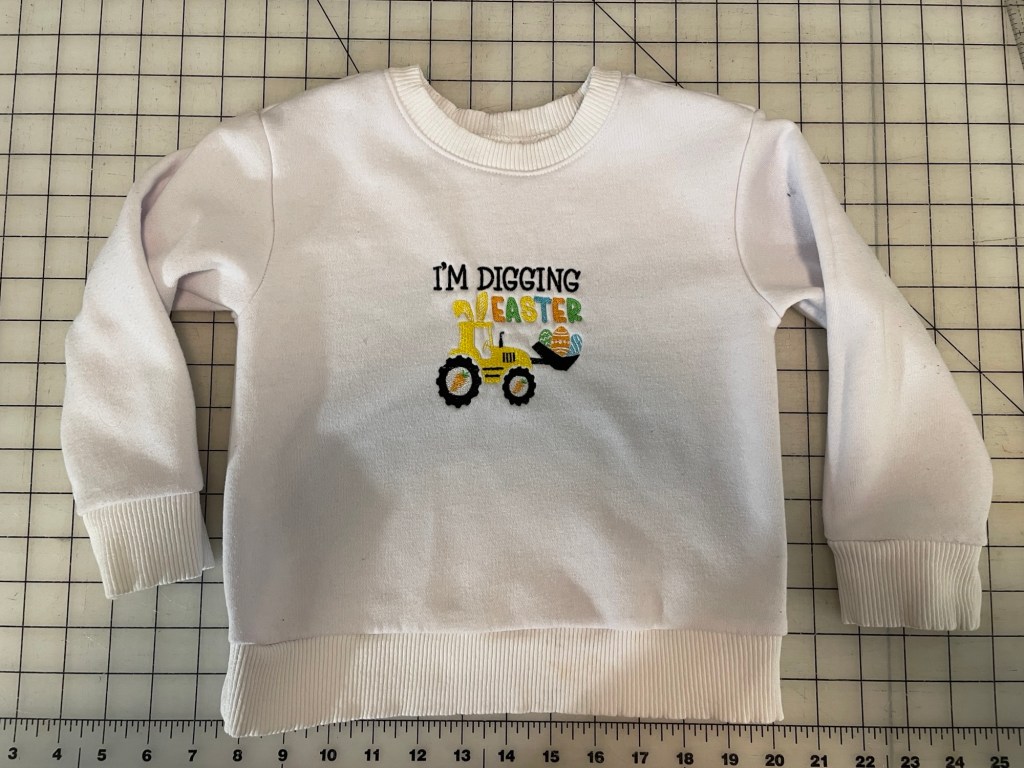
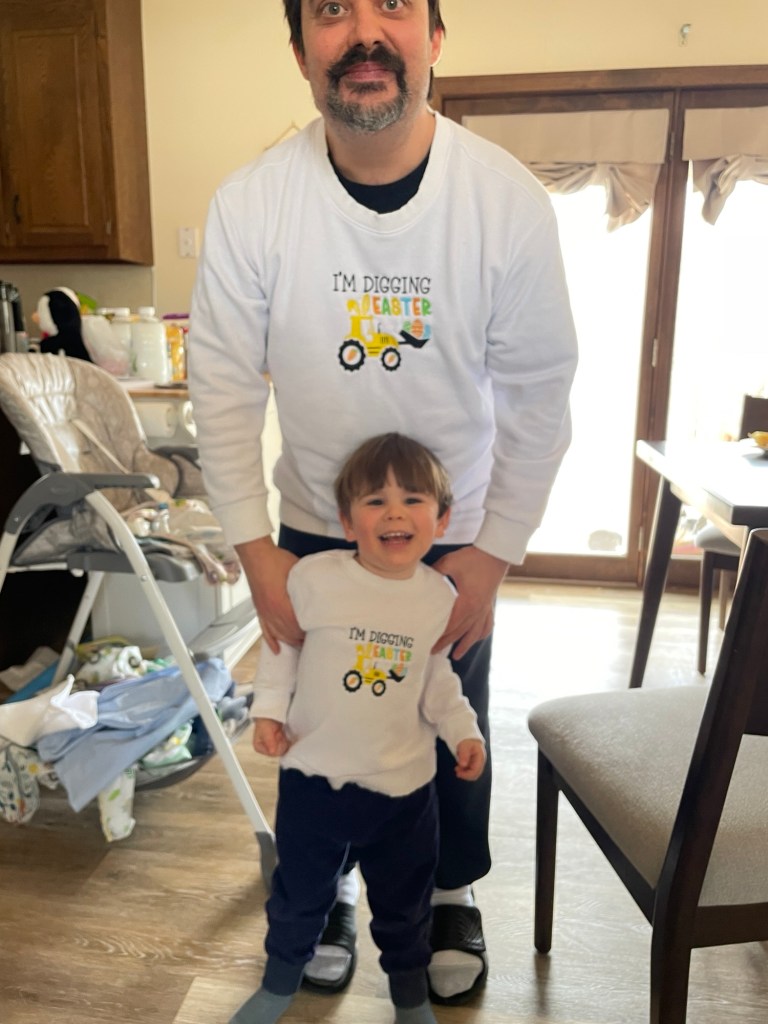
I made this several times so far for both my husband and son. The latest version, which is shown in the photos, were matching Easter sweatshirts. I embroidered both of them on the ancient Janome 300e my mom gave me last fall (another new obsession of mine). The machine is ancient and was sitting in a closet completely untouched for about 20 years. I oiled the bobbin and needle bar and have been using it ever since. I had to hunt on Amazon for memory cards that would actually work and designs often require me to do some rotation and size adjustment in Ink/Stitch, but I’m making it work.
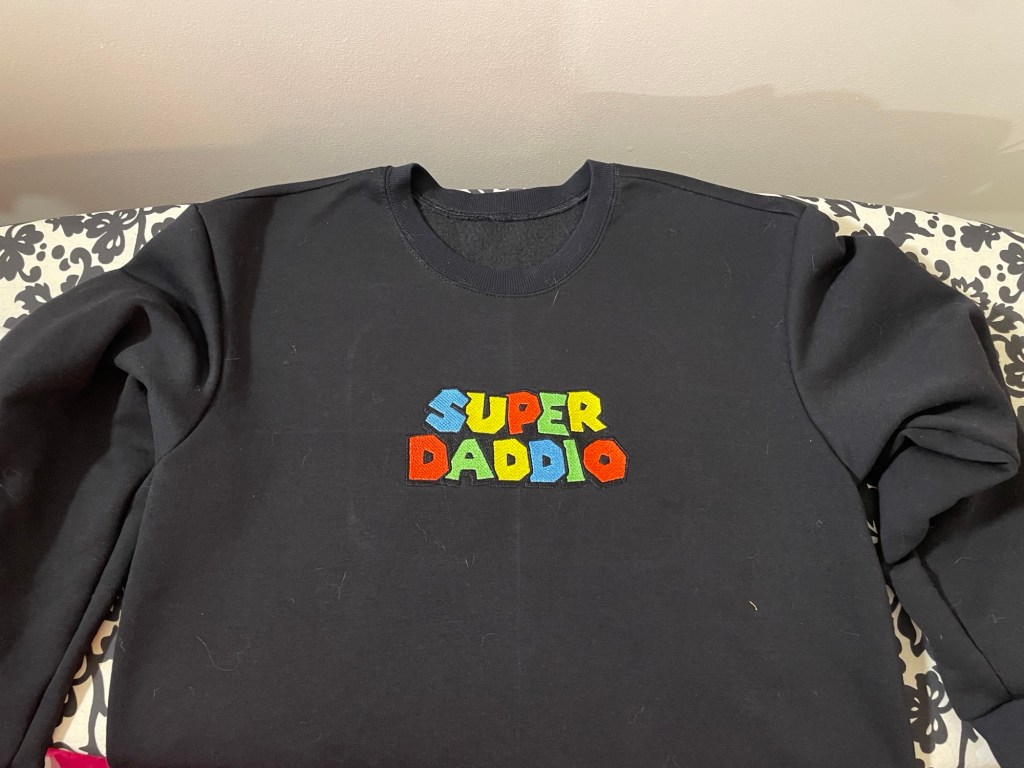
Another one I made for my husband, freshly embroidered! You can see how much nicer the neck looks.
Pattern Background
This pattern is for crewneck and hoodie sweatshirts as well as a tshirt. The size range goes from size 2T to 2X. Th suggested fabric is sweatshirt fleece with a minimum of 10% stretch and ribbing for the neck, cuffs, and waistband. You can also use self fabric if your fabric has at least 30% stretch.
Materials
I used a cotton/polyester sweatshirt fleece I found on Amazon. It is not great quality but for something like this which is worn only a few weeks it is fine.
The ribbing is a cotton/lycra rib knit from Nature’s Fabrics. I’m not really happy with it. It seems like the recovery isn’t great (which caused some gaping at the neckline) and the hand suggests there’s some polyester content hidden in it.
Fit and Alterations
For my husband I used size Y, which is on the larger side of Medium.
I found the collar ribbing rather wide and removed 3/8” from the width, bringing down the finished width to 3/4”.
He also found the collar was too tight. I added another couple of inches to the length.
My husband is 5’4” so I shortened the sleeves 3”. For the first version I shortened the length 3” but he found it too short, so I reverted back to the originally drafted length.
For my son, I just added a couple of inches around the hips because he still uses cloth diapers when out and about. I may have to take it in next year because he keeps getting taller and slimmer!
Construction
This is a super easy make. You can do it almost entirely on a serger. I did cut out the fronts and embroidered them before sewing it up because it’s just easier to hoop that way.
Conclusion
I use this all the time for sweatshirts for my “boys.” It is a classic style and one of the few knit Jalie patterns that doesn’t require a lot of stretch. Highly recommend!
Jalie 2111 is a classic men’s shirt pattern. It has a relaxed fit with a back box pleat, banded collar, and shaped hem. Both short and long sleeve pattern pieces included in the envelope. The cuffs have two buttons so you can wear them either tighter (like my son is in the photos) or looser, depending on your preference. The long sleeves have a shirt sleeve placket with a button. There’s also a chest pocket but I chose to leave that off this time.
Sizes go from 2T (22” chest) all the way to size XXL (47.25” chest). The wide size range, in addition to the timeless style, is what sold me on this pattern.
This is an older pattern, from 2001, so while it is no longer in print you can still buy it as a digital pattern. I ended up having it printed using the website PDFplotting.com. I used the higher quality paper available and found the service reasonably priced (if you do a bulk order like me) and quick to arrive. Highly recommend this service!
Alterations
I cut a size 3T. My son is on the verge of outgrowing European size 92 right now (2T) so I cut a size 3T just so he would have more time to wear it. I added a total of 2” around the hips because he still uses cloth diapers and needs the extra room.
Fabric and Notions
I used a 100% cotton shirting from Fabric Mart. The buttons were from WAWAK. I used a lightweight shirt crisp cotton interfacing from Fashion Sewing Supply for the collar band, collar, and cuffs.
Construction
I was happy I made time to work on this project, as it was my very first project using my new Juki TL-2010Q. This shirt was great for getting to try out my new presser feet as well as just get used to the feel of the machine. I was super happy with how the machine performed. I finally got used to using the machine threader and the feel of the presser foot (which has the auto thread cutter built in). And unlike my Janome 6500, the auto thread cutter works GREAT and doesn’t leave any ugly thread nests.
One of the nice things about this machine is that it can use regular industrial feet, which can be found for very cheap. For this project I used my new compensating foot set, topstitch guide set, and rolled hem foot set. I was particularly impressed by the performance of the rolled hem foot. It had no trouble at all going around the shaped hem and did a perfect job the first try. My Janome foot, by comparison, struggled to feed anything other than a perfectly straight edge.
I didn’t have the best of luck with the old Greist/Singer buttonholer for the buttonholes. For some reason the stitches kept skipping so rather than continue to fuss with it I just used my Janome 6500 and automatic buttonhole foot. For some reason I still had a bit of skipped stitches at the very start top of a few buttonholes, but a zigzag with the feed dogs dropped was able to save them.
The instructions included with the pattern are typical of the older Jalie patterns and not the best. In particular, the section for how to construct the front button band was rather confusing and I ended up redoing it before finally understanding what they meant. Another part of the instructions were wonky where the illustrations for the final steps are randomly thrown in the middle of the illustration for some middle steps. I might do a sew along and take a bunch of photos the next time I make this shirt.
Conclusion
My son loves how dapper he feels in his new shirt! He had no problem at all moving around in it to play outside today for 3.5 hours. It can be hard finding long sleeve button down shirt patterns for smaller sizes so I’m glad Jalie still offers this pattern.