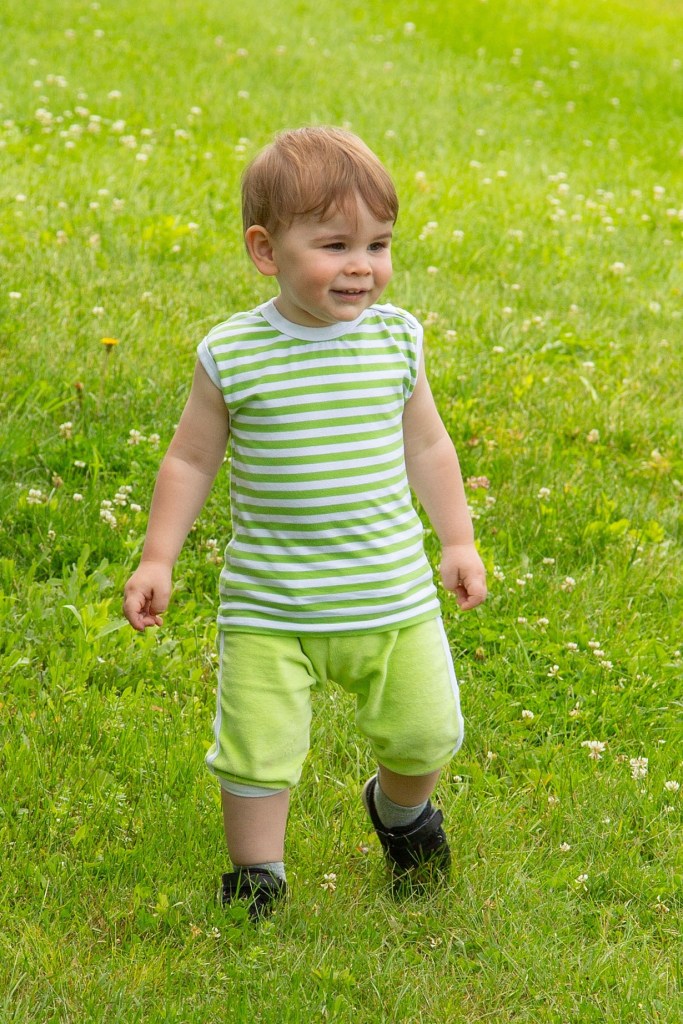
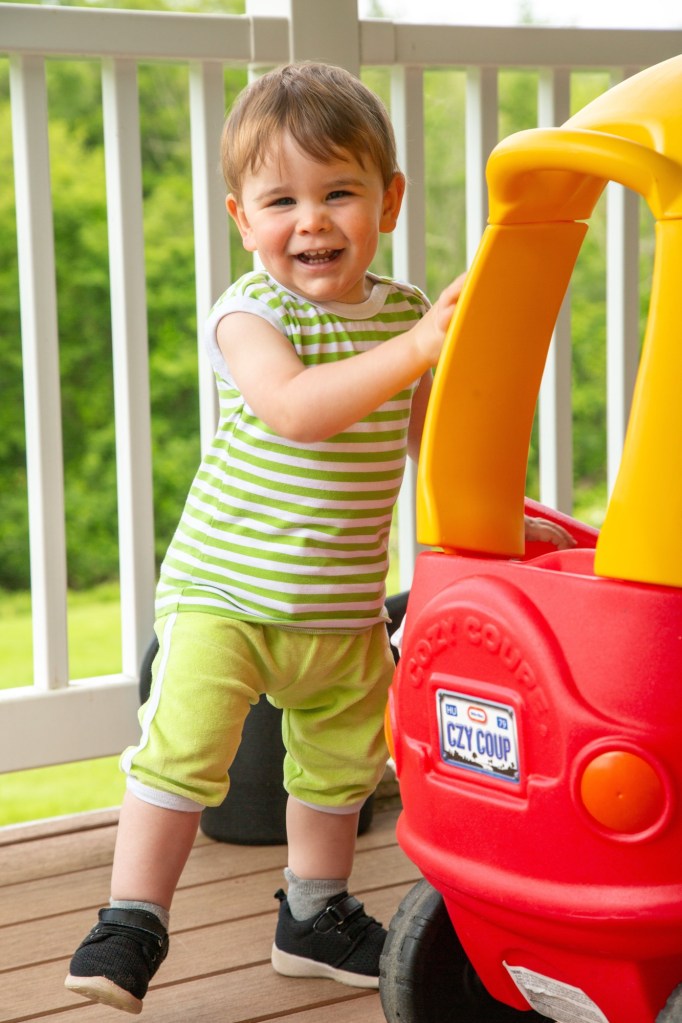
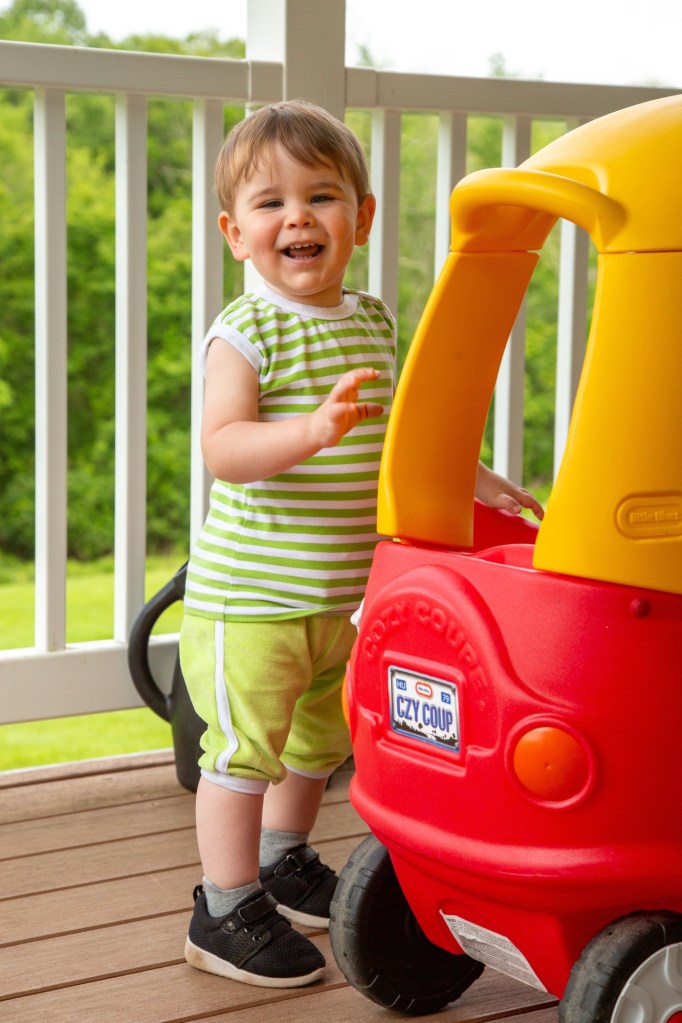
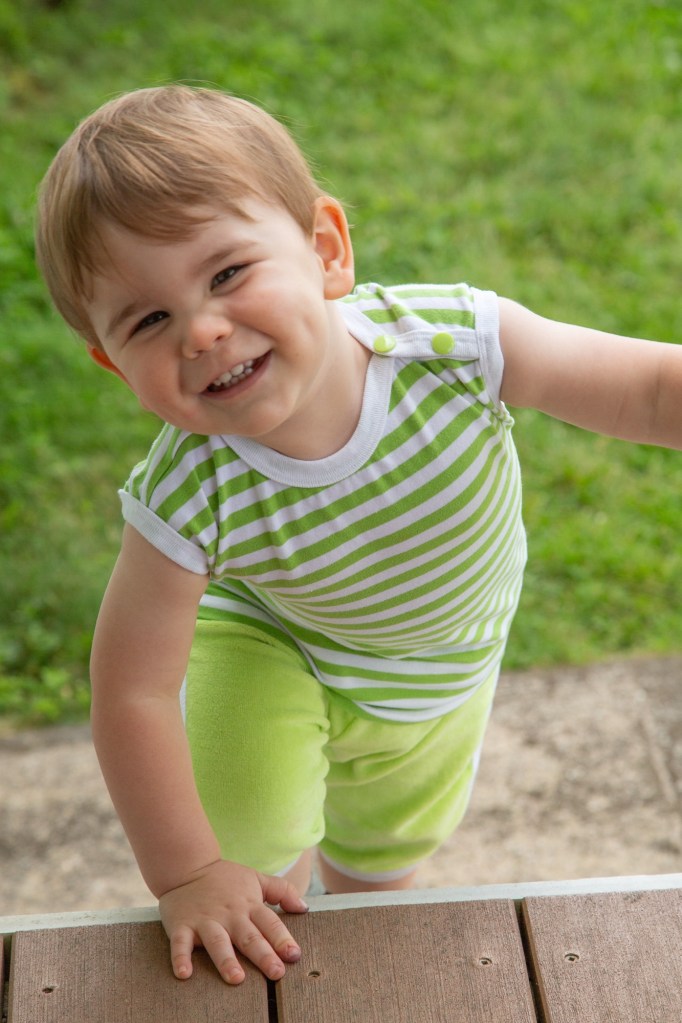
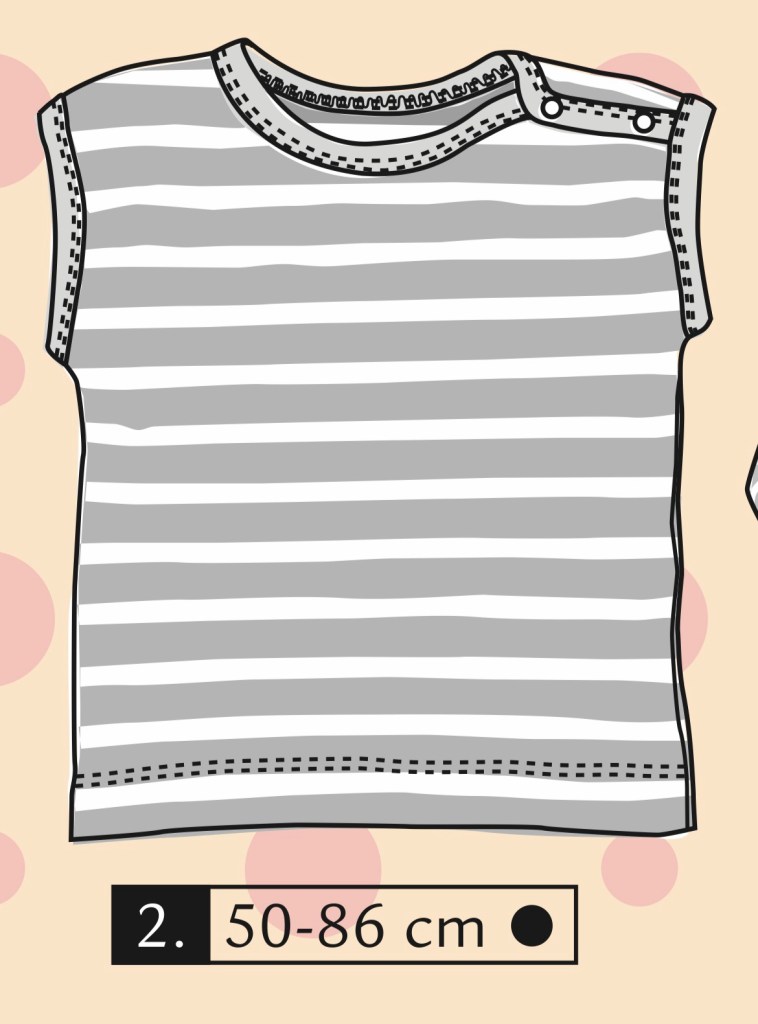
Ottobre 3/2012 #2 is a sleeveless knit shirt with a neckline and armholes finished with rib knit. Two snaps at the left shoulder help with dressing. It is drafted for sizes 50-86.
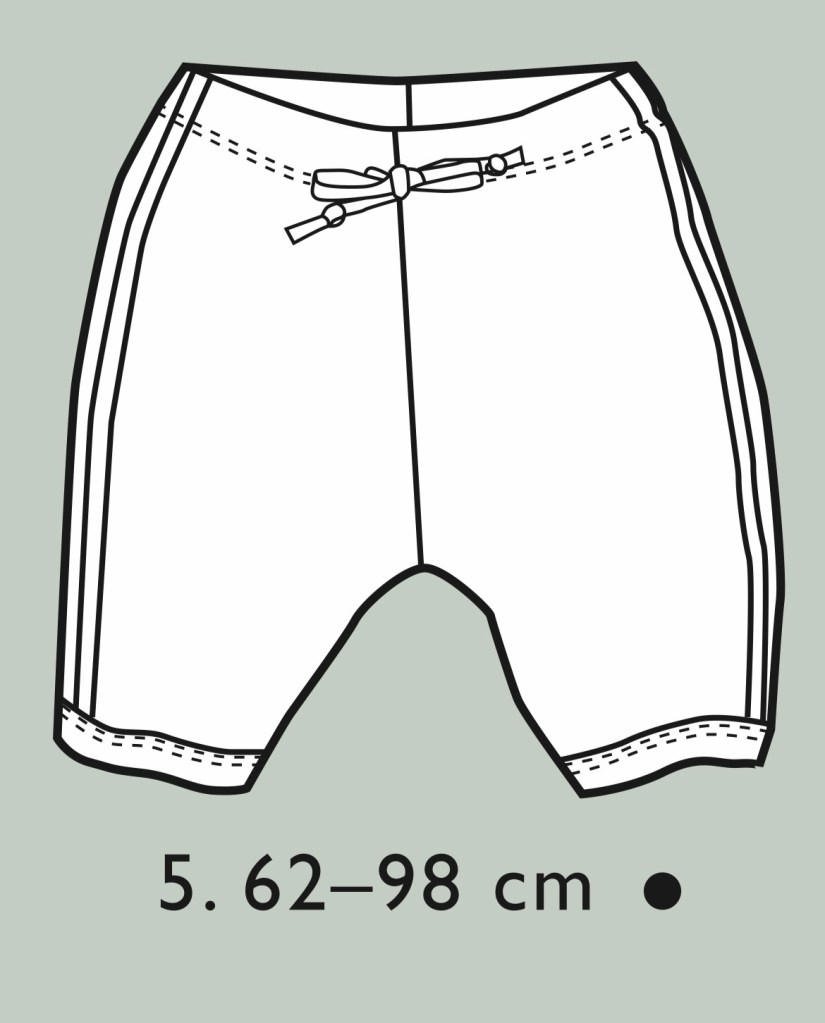
Ottobre 3/2023 #5 knit shorts are hemmed just below the knee, with a hem finished with rib knit. The side seam has a decorative stripe made out of rib knit. The waist is elastic, with a decorative drawstring at the center front. It is drafted for sizes 62-98.
Materials
For the top I used a cotton/lycra jersey from Nature’s Fabrics. I had it leftover from another project and it was just enough to squeeze this shirt out of it.
The shorts were made out of a cotton velour, also from Nature’s Fabrics. I really liked using this fabric for his shorts. It is durable, soft, and washes well.
The snaps are from KAM Snaps. The rib knit is from Fabric Mart. The grommets for the drawstring (not shown) are #00 metal grommets from WAWAK. The 3/8” wide cotton drawstring tape is from Amazon. The 1” elastic for the shorts waist is also from Amazon.
Fit
I used a size 86 for both shirt and pants.
For the shirt I added about 2” width to the hem at the hip. My son wears cloth diapers and I find that adding some width helps it not ride up as much over the bulk.
For the shorts I added 1/2” height to the center back seam.
Construction
I found I needed to mark where the binding went at the bottom of the armholes of the shirt, because otherwise it is hard to see exactly where the bottom of the armhole is when you’re binding it and you may end up halfway down the side seam! Otherwise it was a straightforward process constructing the shirt.
For the shorts, a Clover bias tape maker to make the binding for the side seams made the process go much easier. No having to manually turn under the edges, just run it through the tape maker and then sew it onto the front before stitching the side seams together.
For both projects I used a 5/8” finished width single fold binder for my cover stitch machine to attach the ribbing to the fabric. I found the velour was too fussy when it came time to stitch the elastic casing for the waist with my cover stitch machine (so many skipped stitches) so I ended up using a zigzag stitch on my regular sewing machine for that.
I have been using cloth diapers for over a year now. I wasn’t in a place to do any sewing when I first started (with having an infant and still trying to settle into our home and manage repairs and renovations after moving in a few months earlier) so I took the easy way out and bought a bunch of Alva Baby and Nora’s Nursery pocket diapers. They were working fine for a long time, with the help of changing out the included microfiber inserts for pad folded birdseye flats, then the flats placed on top of the microfiber inserts, followed by various combos of layering the flats over cotton/bamboo fleece and hemp/bamboo soaker inserts as he grew bigger. Lately he’s been soaking through even that. For nighttime I just put a lanolinized wool cover over a heavily boosted pocket diaper. It works fantastic and I haven’t had a single leak since using the wool cover. But since the wool is a bit bulky and can have that unpleasant wet wool smell if it gets a little wet I wanted something else for the daytime. I’ve heard that as babies grow and need more absorbency that pockets sometimes don’t work as well, so I was looking into using fitted diapers with a cover.
Disposables are certainly simpler, more convenient, and way less work. When my husband is in charge of changing him he uses disposables because despite my best efforts he still can’t manage the snaps. But the vast majority of the time I’m in charge and I hands down prefer cloth. No worrying about running out, or having to constantly dispose of dirty diapers. We don’t have curbside trash pickup in my town (unless you contract with a private hauler) so I need to drive our garbage to the local transfer station. (My mom used cloth diapers for all of us and has often commented about how many mountains of trash in the landfills must be from just disposable diapers.) I also felt like he was less prone to diaper rash with the cloth diapers. The PUL covers make them way cuter too!
Jalie 2907
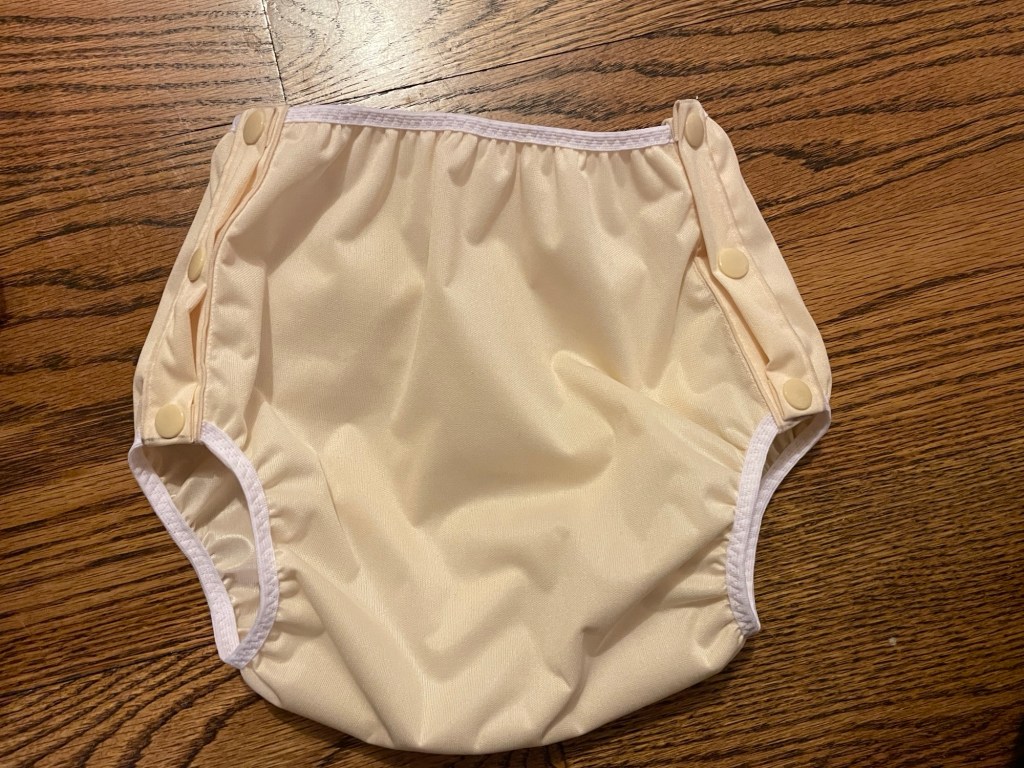
Fitted diaper inside cover. Notice how much higher the cover is than the diaper. About an inch for both front and back.
Pattern Background
This pattern includes a pocket and all in one version along with a fitted diaper and diaper cover.
I made the fitted diaper along with the cover.
Materials
You can use anything absorbent for this pattern – cotton velour, terry, flannel, etc. Jalie warns the fit will be slightly different for wovens vs knits (meaning a child will likely outgrow the woven version first). For the fitted diaper layers I cut up a few old cotton flannel shirts. For the built-in soaker I used an old towel for two layers and cotton flannel for the third.
For the cover standard diaper PUL is recommended and that’s what I used (also from Nature’s Fabrics). For those that aren’t familiar with PUL it is a thin laminated polyester with a tiny amount of stretch. I would consider it more water resistant than waterproof, because if your absorbent layers get saturated enough it will soak through.
Alterations and Fit
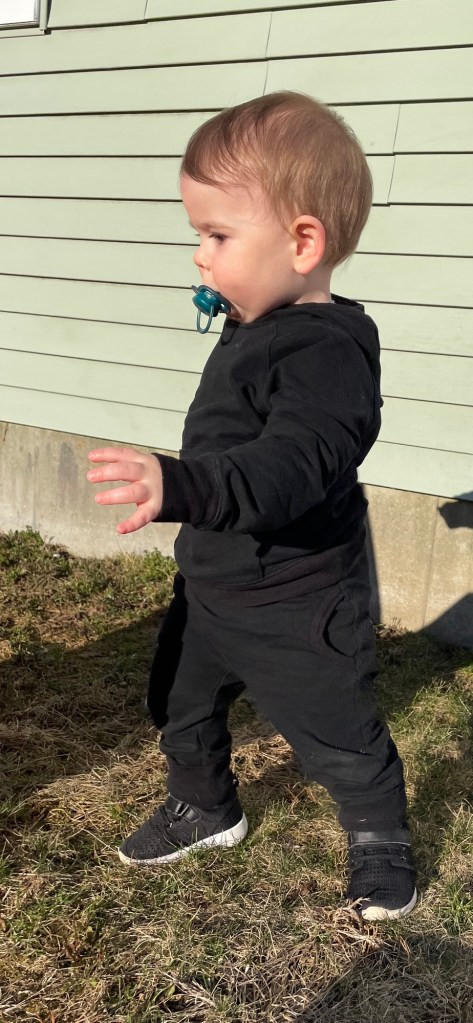
My son is currently almost 20 months and around 26-27 pounds. He has a very muscular, wiry build and is longer in the torso and shorter in the legs so I’ve always had to size up in disposables sooner rather than later. For this reason I chose size 24 months.
For the diaper cover I used fold over elastic instead of the recommended 1/4” braided elastic for one of my attempts.
Construction
The Jalie sewing instructions as usual are great. I did find they were not as good quality for the cover. However this pattern goes right easily and quickly.
Issues
While the instructions are great, the fit and design of this pattern was…not good. Jalie is usually a winner so this was a big disappointment. I really don’t recommend this pattern. If you do try it, do a muslin. Do not use your good diaper fabrics for the first run!
First of all, you have three layers of the diaper plus four layers of soaker fabric. They’re all sewn together. It is very bulky and makes sewing a royal pain, especially around the legs. I use a sprayer that attaches to the toilet for rinsing off soiled diapers, and with all these layers it is more unwieldy. The bigger issue is that all these layers make for a diaper that takes forever to dry, especially if you use bamboo or hemp in some of the soaker layers. Seriously, I had to run it in the dryer in high heat for 1.5 hours and then let it air dry overnight in order to get it completely dry. My normal preference is air drying, with a normal dryer cycle on damp days. For the times I air dry I sometimes use a 15 minute quick cycle to soften them up.
Both the cover and fitted diaper waist and especially leg openings are too tightly drafted. Jalie has you do the elastic length 50% of the measurement of the leg openings and waist respectively. The fitted diaper was passable because the heft of the flannel kept it from being too binding, but the leg openings of the cover are absolutely tiny. I couldn’t even snap it shut on the first column of snaps, and my son has very average size legs. Muscular, but neither skinny nor chunky. I tried again a few times playing with the elastic length of the cover. I found 65% was a more reasonable length.
The cover is very oddly drafted. It is like the wings of the diaper cover are way too short and the legs are cut too low and small. This causes it to be too long at the sides, and then bunches up when he moves around. At this point I decided to just give up on the pattern. I had wasted a few pieces of PUL and flannel and soaker fabrics and I was done trying to make it work. I really wanted to make this pattern work because the cover is so simple and easy to make, but I decided after a few tries to cut my losses.
The one thing I did really like is Jalie had an extra piece included for creating a “laundry tab” for the fitted diaper. It is just a small piece cut from the loop part of the Velcro and sewn next to the hook part so the hook part of the Velcro can be folded over and not catch anything in the laundry.
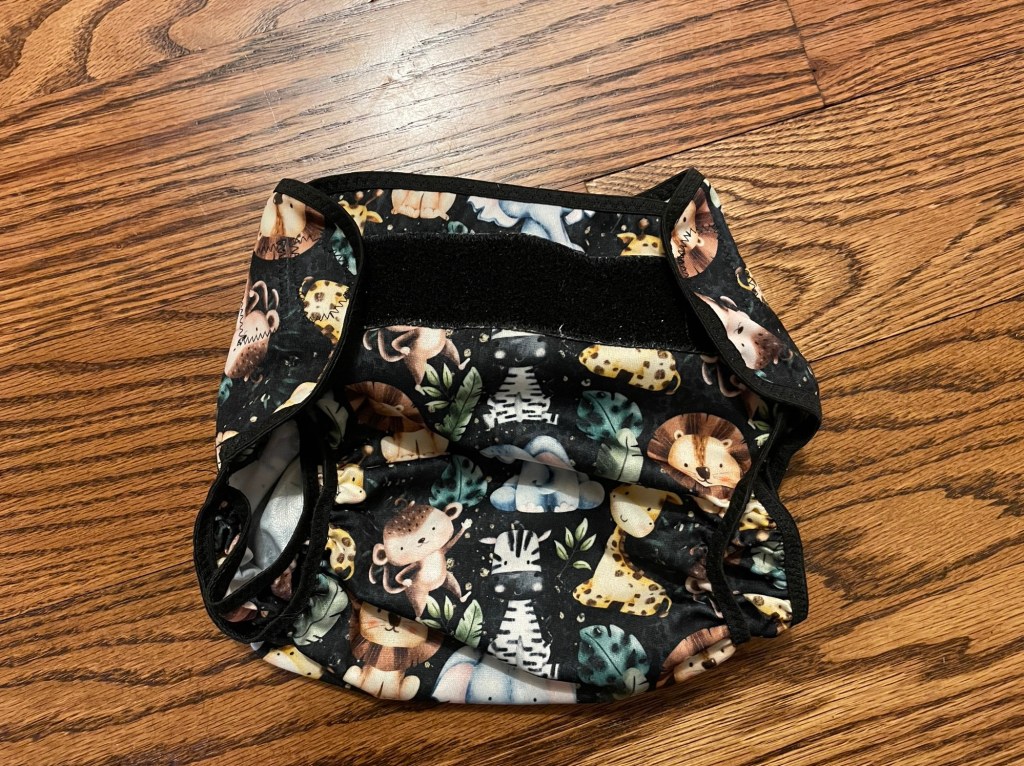
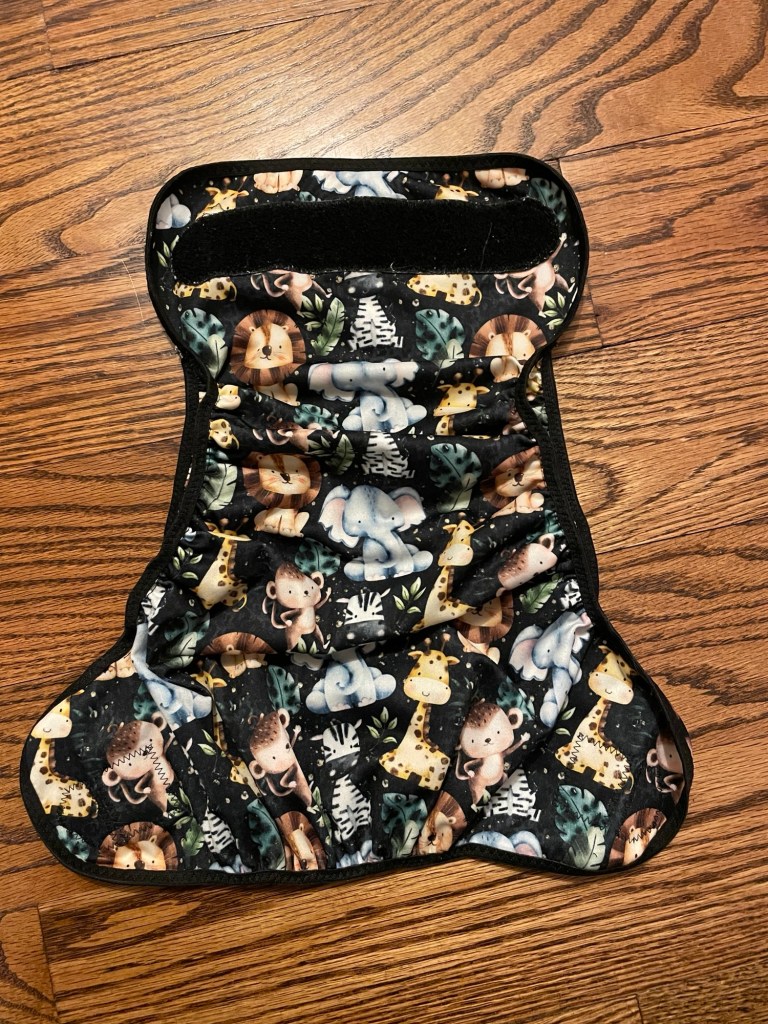
Rocket Bottoms One Size Fitted and In A Snap Cover
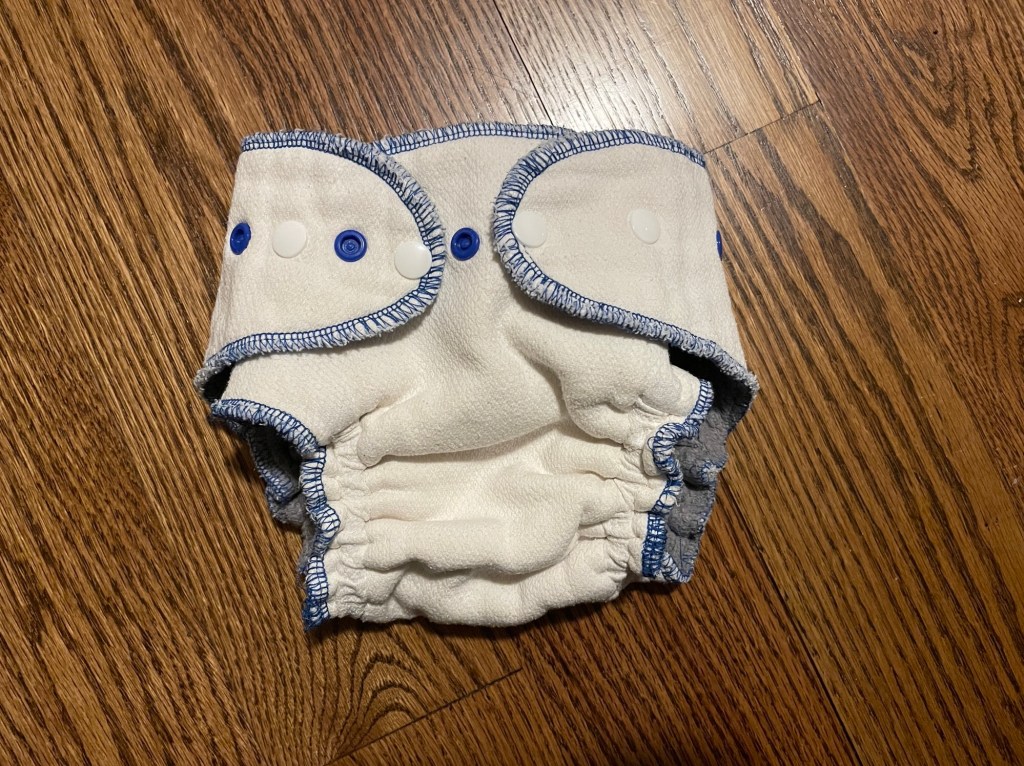
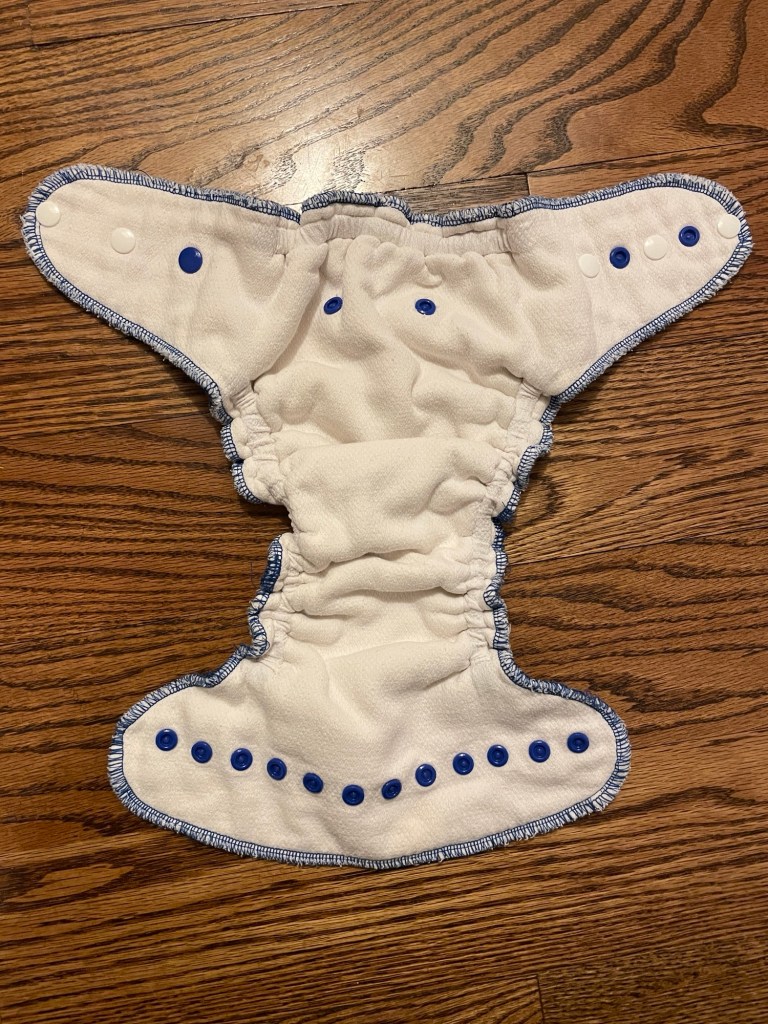
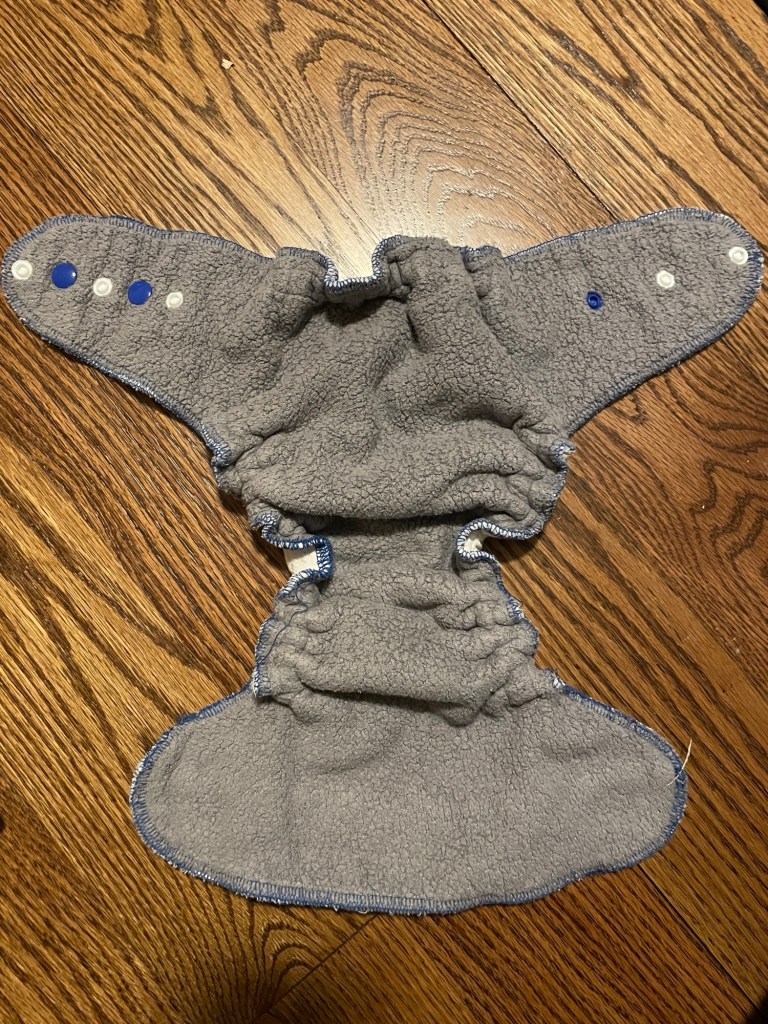
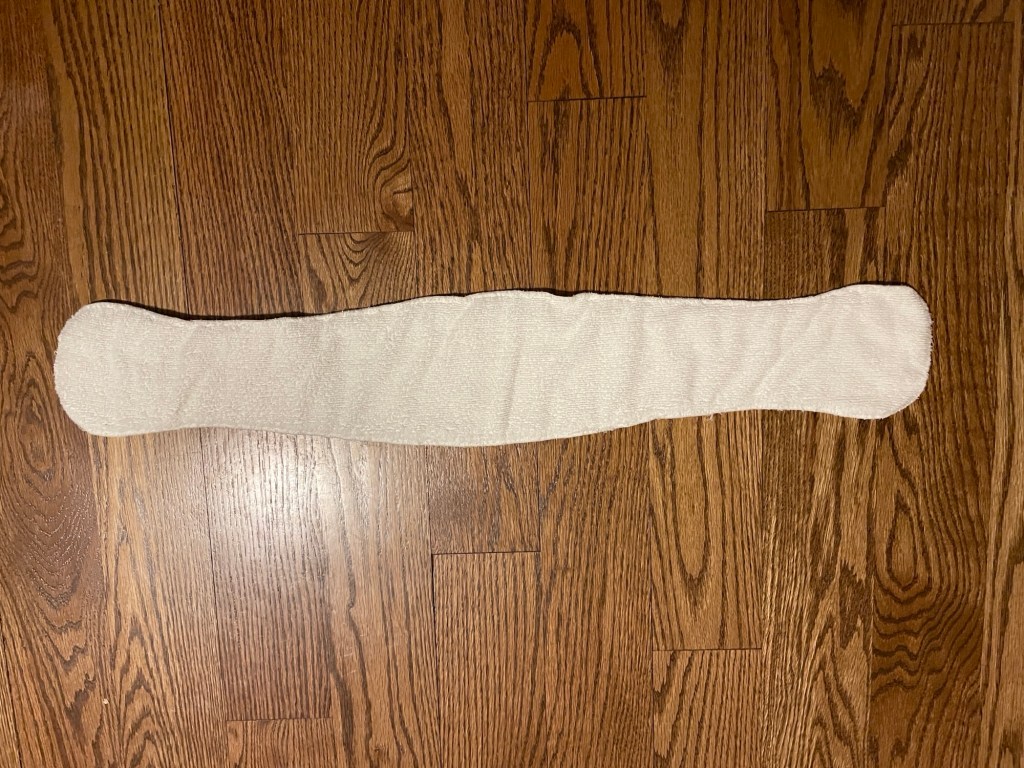
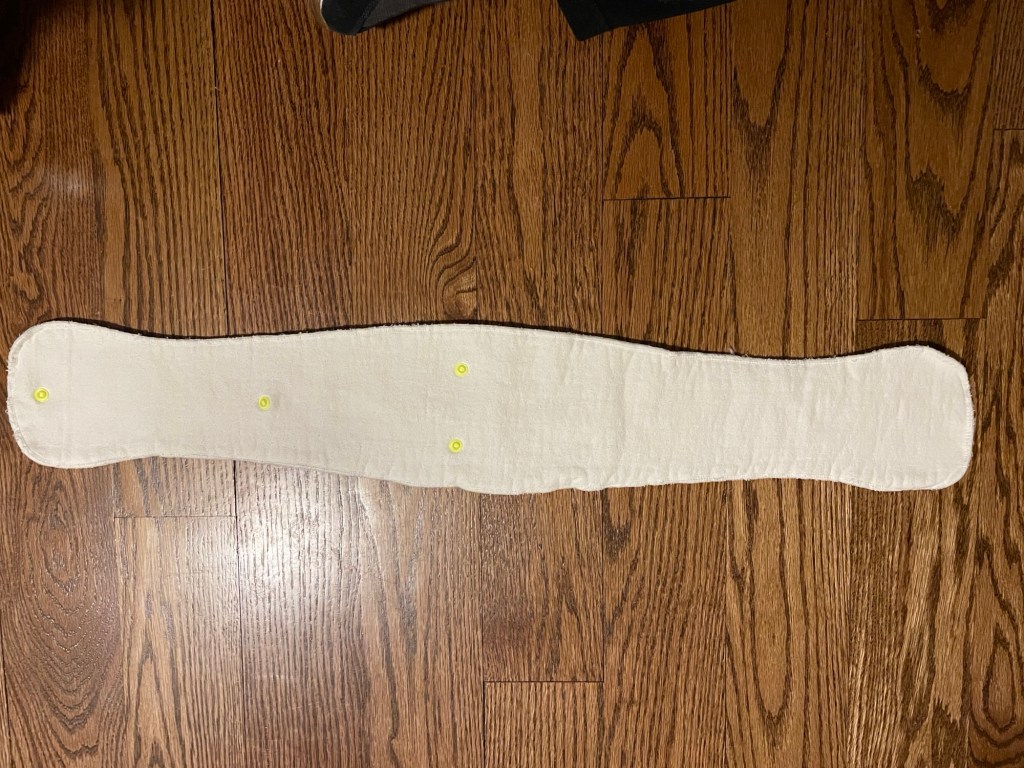
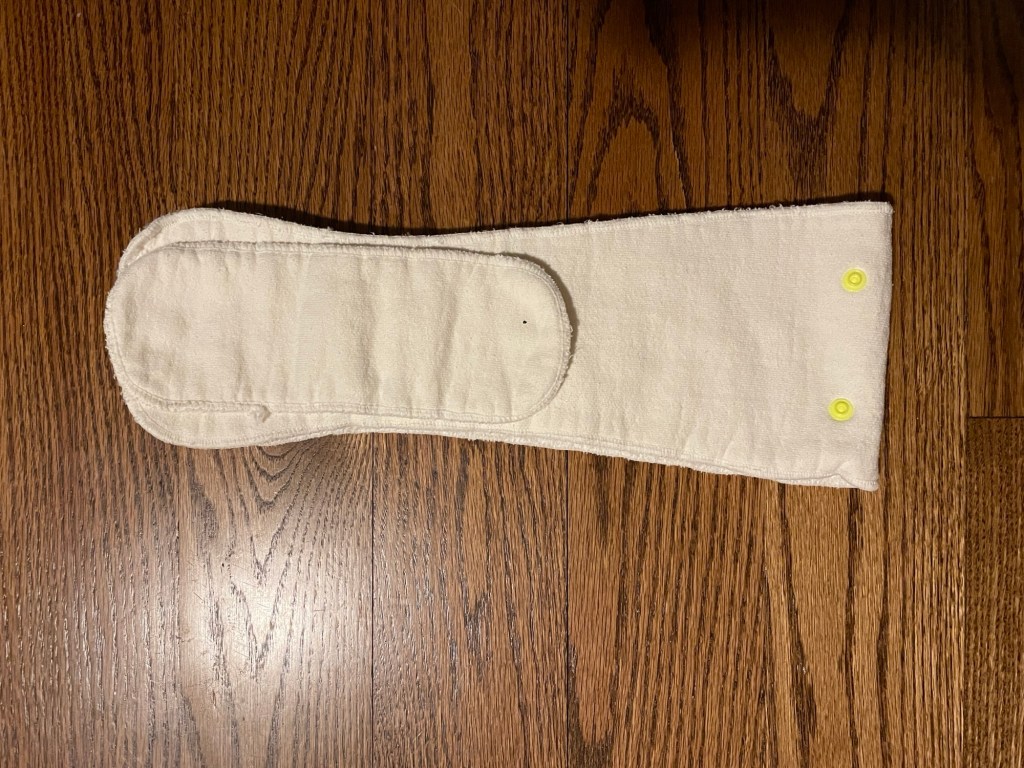
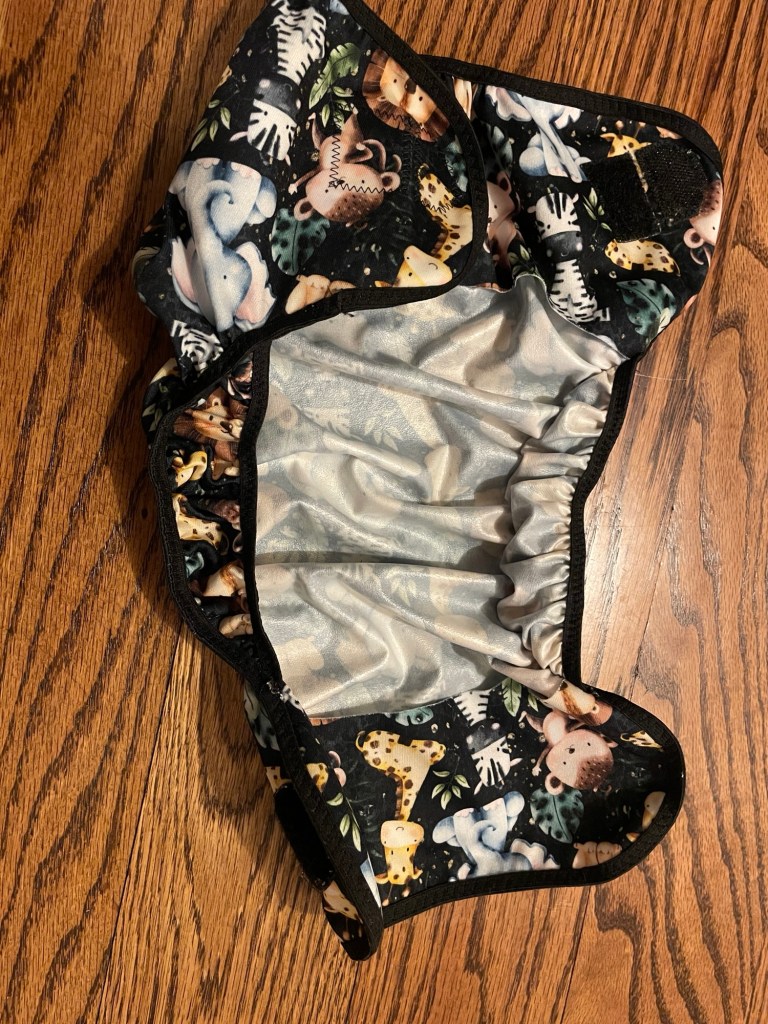
One size fitted diaperOutsideInside fleece layerSandwich soaker, unfolded (bamboo terry side)Other side of sandwich soaker (hemp/cotton fleece)Booster next to sandwich soaker. See how the booster is designed to snap into place. Sandwich soaker folded in half, with booster added. The snaps can snap into a cover or against the outer layer of the fitted diaper. In A Snap cover outside“Tuck it in” bottom and front facings Gussets
Pattern Background
The fitted diaper consists of three layers, an inner, outer, and inside layer. There’s tons of snaps for both rise and width adjustments. There’s fitted diaper includes pattern pieces for a soaker, booster, and sandwich style soaker. It is designed for infants and toddlers in the 10-35+ pound range. There’s just one size, with the rise snaps allowing for adjustment as they grow. The diaper can be constructed with serged edges, bound edges, or turned and topstitched.
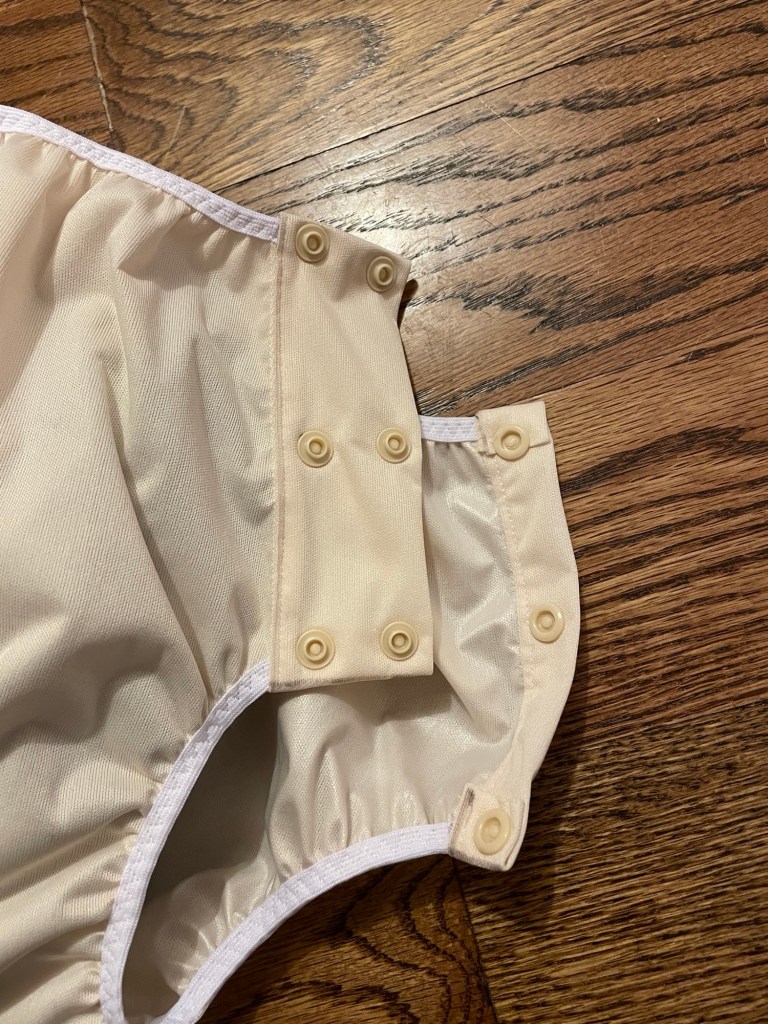
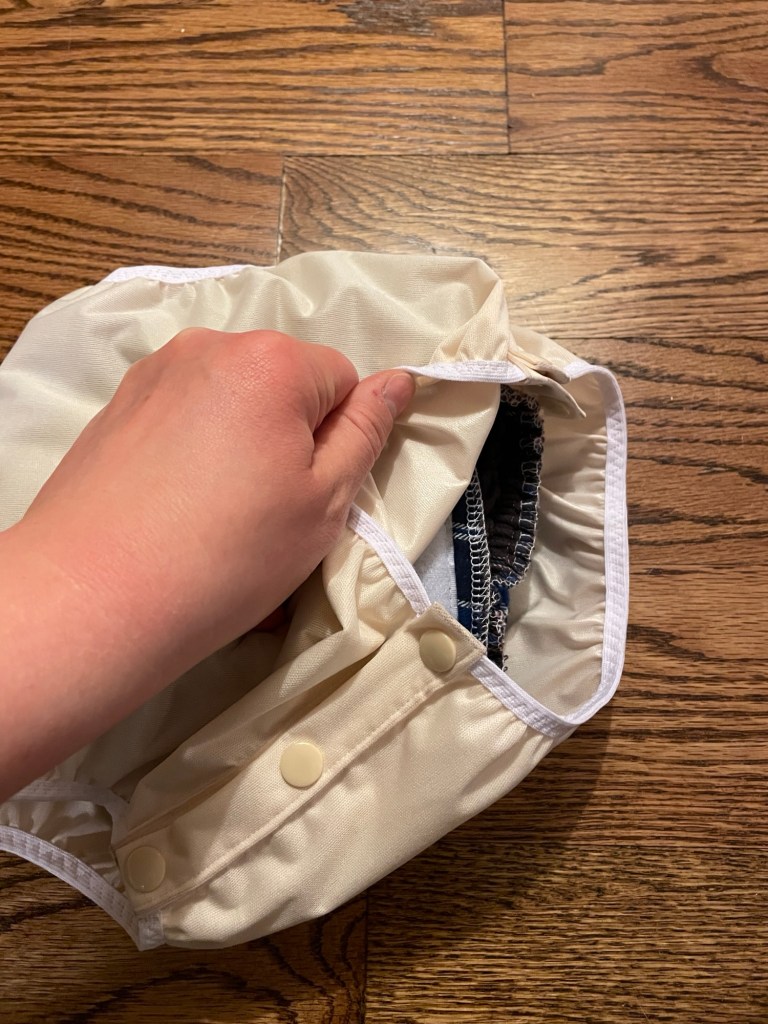
The In A Snap cover is also designed for infants and toddlers in the 8-35 pound range. Theres actually newborn through large and then a one size pattern. The one size is slightly larger than the large size. What attracted me to this cover is it includes side gussets as well as “tuck it in” facings at the front and back. This is designed for being able to just throw in an insert and be on your way! (IMO this works better with younger babies.) The pattern includes markings for snaps, but you can also use Velcro.
Materials
For my first version of the fitted diaper (not pictured) I used three layers of thick, double napped cotton flannel I had leftover from making my husband and myself matching pajama pants.
For my second version I repurposed some birdseye cotton flats (two layers for the outside, two layers for the inner). The lining/inside layer is a cotton/modal sweatshirt fleece from Fabric Matt I had leftover from making my husband sweatpants this winter. The snaps are size 20 KAM snaps. I had an issue with some of the snaps coming apart due to the thickness of the fleece layer, so I repaired them with the long length size 20 snaps. (This is why some are blue and some are white.)
The elastic for both is 1/4” StretchRite elastic. It has good strength and recovery for this application.
The booster is two layers of the hemp/cotton fleece from Nature’s Fabrics.
The cover is a PUL print from Nature’s Fabrics. I used Velcro from an Amazon seller. The fold over elastic is 5/8” matte fold over elastic from WAWAK.
Fit and Alterations
For both of these I made the one size version.
After making them I think the fitted diaper wings are too long. For his Nora’s Nursery pocket diapers he starts at the third snap from each side. For this diaper I am close to having the wings touch in the middle. Now, the snaps are designed so that you can overlap if necessary but considering he’s at the upper end of the size range I think they would be way too long for an infant. I do like the rise though, they are a bit longer than the pocket diapers and fit his longer torso well.
I found the opposite issue with the cover. IMO the wings are too short. I also found that adding a little bit of height (1/2” at the front and back) ensured an easier time getting the cover completely over the diaper.
I left off the rise snaps because he’s already fitting into the full rise.
For the cover I added a piece of the loop side of the Velcro next to the hook side when attaching Velcro to the back wings. When I’m about to throw it into the laundry I attach the hook piece to the loop piece next to it to prevent the Velcro from sticking to everything. It works really well as a laundry tab. I took this idea from the Jalie pattern.
Construction
The instructions and pattern markings are where IMO Rocket Bottoms is really weak, especially for the fitted diaper.
There’s no technical drawings or illustrations, just some poor quality low res photos to go along with the written instructions. I found them workable but poorly organized and not clear and concise. They’re very vague about the design and usage of the diaper. No technical drawings of the overall diaper design either, nor explanations of how the diaper is supposed to work. There’s vague terms like fold down rise vs snap down rise, and fold over flap, along with hybrid diaper version. It would have been helpful to have technical drawings or even just a clear photo of each one, but instead you get an artistic photo of a toddler from the side in a diaper holding an umbrella. One of the fabrics listed is “MFT” and I still have no idea what that is. I’m a pretty experienced sewer – I’ve made Marfy patterns which include no instructions at all – but this one left me scratching my head.
The Jalie pattern instructions are written for people that sew that happen to be building a stash of cloth diapers; Rocket Bottoms seems to be more for people who are experts in cloth diapers that just so happen to want to sew some. For example, I know I messed up the sandwich soaker because some of the snaps go on one layer and some on the other. The pattern offers very little guidance. It would have made sense for example to have two separate pattern pieces for the sandwich soaker instead of telling you to print the same piece twice and tape it together in the middle. Same thing with the diaper, some of the snaps need to be placed facing down or facing up and there’s no guidance. The way they are marked sucks; I used a hole punch to cut out the holes to make it easier to mark the snap placement (I like using Frixon markers for this sort of thing). Problem is that the pattern uses either small open or shaded in circles to indicate stud vs socket, so by using a hole punch I lost that indicator. So I had to print off another pattern and use that as a key. All in all, you’re best off referencing either an already made diaper in person or diaper photos online from different brands to see how it is supposed to go together. I think next time I will make it even easier and just use Velcro for the closure. (You can also not put any closure and use pins or a Snappi.)
I found the cover a little more organized – at least there’s a clear photo – but again, a technical drawing showing front and back would have made things easier. There’s a reference to a facing for the front, but no indication of what that means in the instructions. Is it another PUL layer?
I think a large part of the problem is that the creator originally had a website and facebook group to help support the patterns, but she gave up the pattern business about a decade ago so those are now long gone.
Overall I found the Rocket Bottoms fit and design very well done. It’s just that the pattern markings and instructions suck. There’s far more detail for how to print the PDF than there is for actually sewing and understanding what each version looks like and does.
Performance
The Rocket Bottoms set is my go-to for when we are out and about. I did have an issue once with leakage at the waist because I didn’t have the cover pulled high enough one time and he completely saturated the diaper, but otherwise there’s been zero issues with the legs leaking (which was my bigger problem). The gussets really work! With fitted diapers you have way more absorbent fabric all around (especially with the leg ruffles) so it gets quickly absorbed instead of leaking out the side like a pocket.
I’m not a fan of the sandwich soaker and will likely use the regular doubler insert with a booster snapped in instead in the future. it’s a great design for quicker drying laundry but I find it cumbersome to keep it folded together when I’m maneuvering a diaper change with a very active toddler.
I have found that I prefer to snap the soaker to the cover vs to the diaper. Future covers will include snaps at the back for this purpose. It just gets too unwieldy with trying to place the diaper and get it closed with a floppy folded soaker in the way. Way easier to prep the cover with the soaker tucked into the facings and put the fitted on as a completely separate layer. Plus if there’s a poop diaper I find it easier to get the cover and soaker out of the way then deal with the fitted vs having to remove a fitted with a soaker attached while trying to make sure I don’t accidentally drop the poop out of it!
As for laundry, I find the Rocket Bottoms diaper is fantastic. The diaper itself is only three flat layers so it is easy to rinse off any solids, and drying won’t take forever. The sandwich soaker unfolds so you’re only drying 2-3 layers at once instead of 4-6. Same for the booster. I love using cotton for diapers because it doesn’t hold smells unlike some synthetics, and it can take the abuse of bleach, high dryer heat, etc. With a separate cover you can wash the cover more gently and be way more aggressive with the fitted and soaker layers. My subsequent versions of this diaper will be three layers of cotton flannel, or two layers of cotton flannel with a cotton or bamboo fleece/terry inside.
I find the hemp/cotton fleece is super absorbent so will likely make the soakers and boosters out of that. Since the booster is so small I can get away with remaking some of his current pocket inserts into boosters.
Diapers aren’t my favorite thing to sew, and I’m finding it daunting thinking of just how many I still need to make. (Plus covers, but you can generally get away with way less of those since they are easy to wipe down between changes.) But I really like how I can use higher quality fabrics than what is offered in a lot of store bought diaper systems and customize them to whatever I need them to be for my son’s needs.
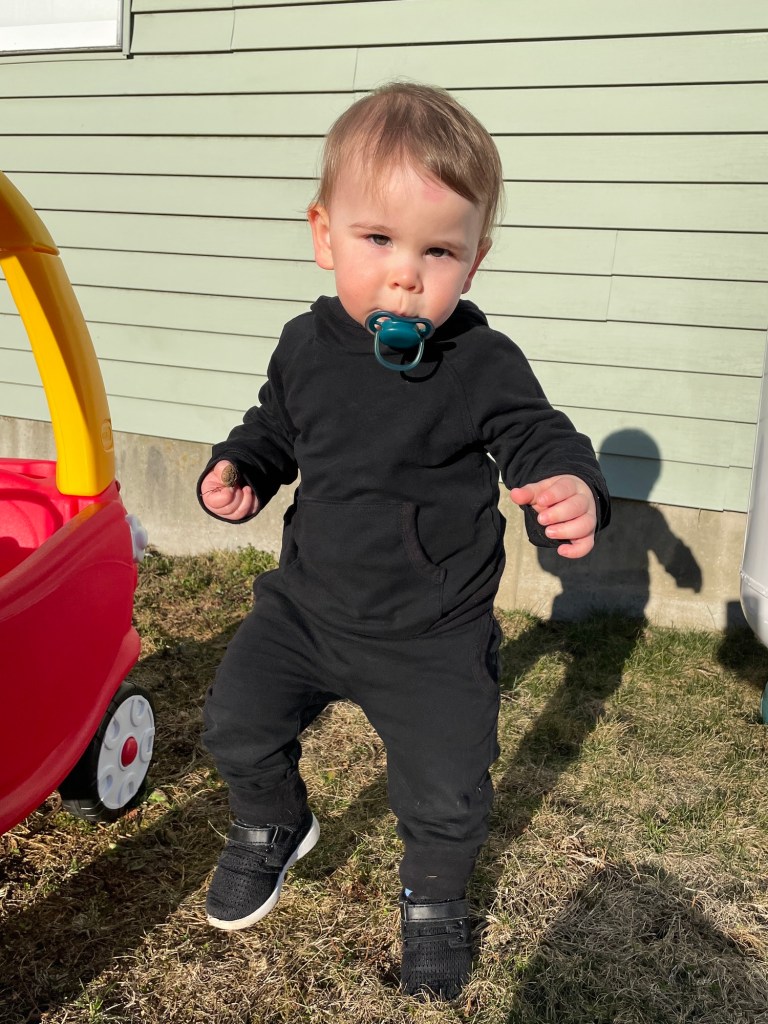
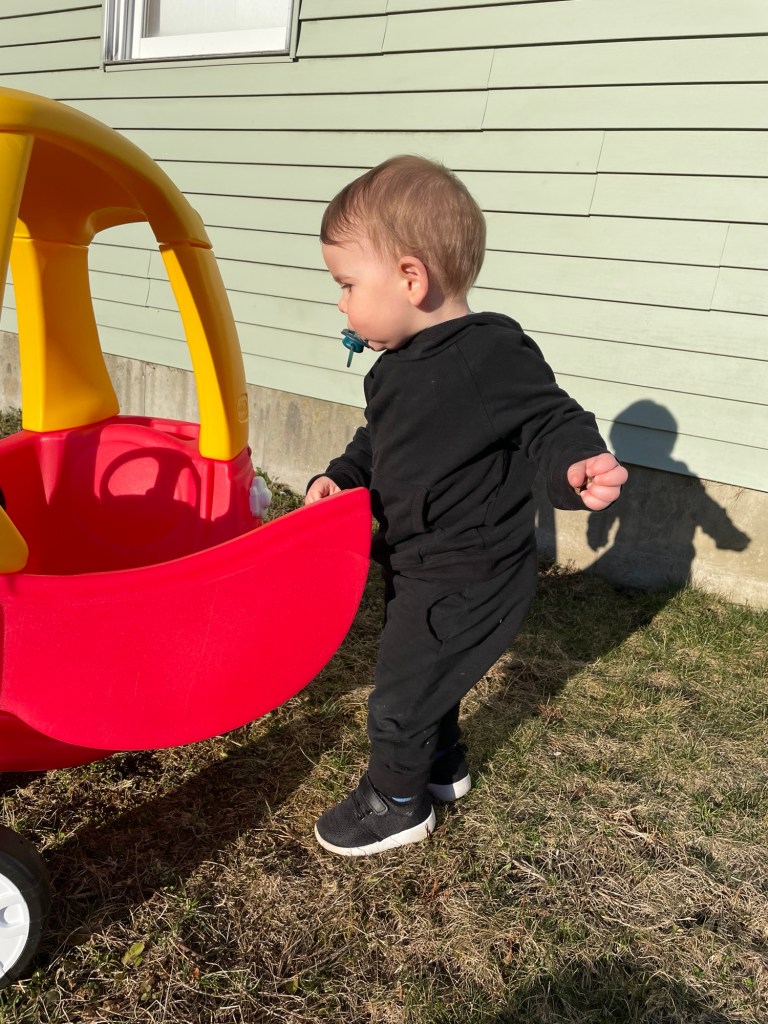
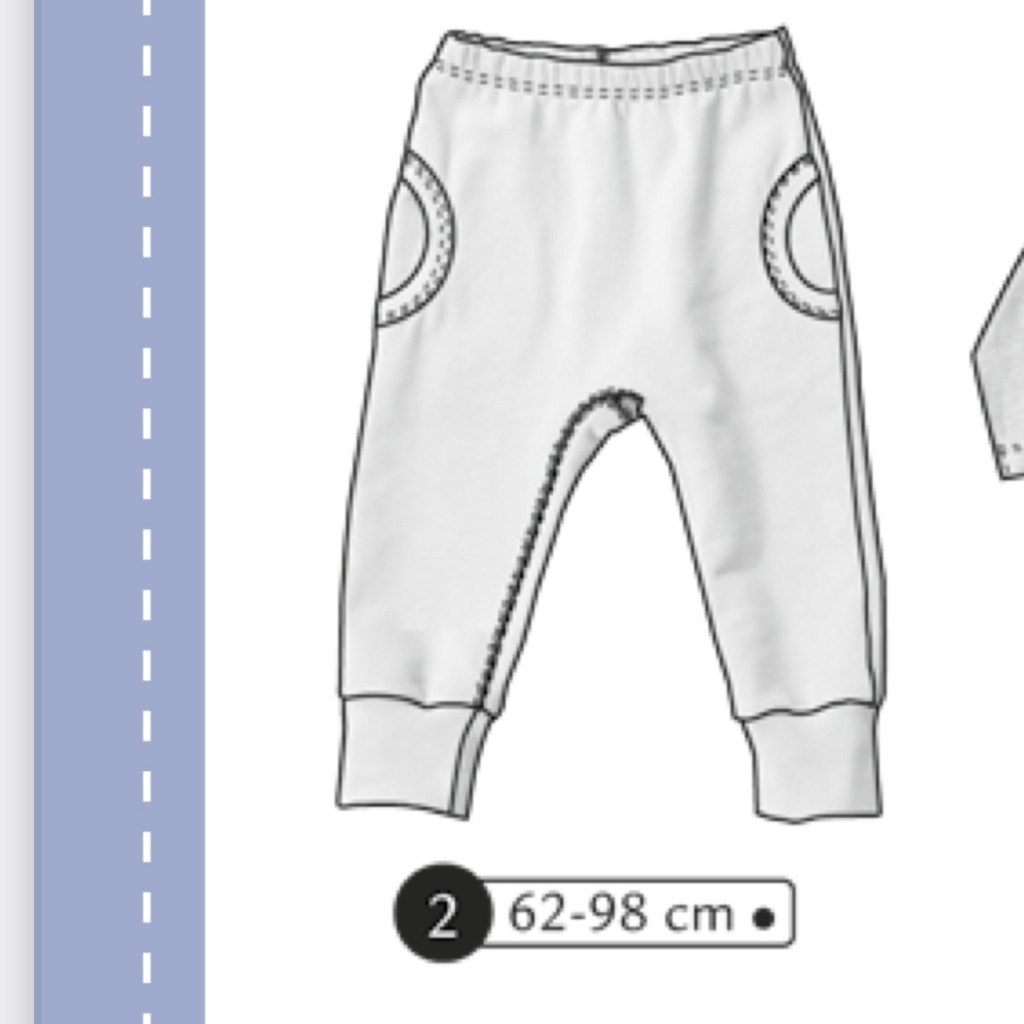
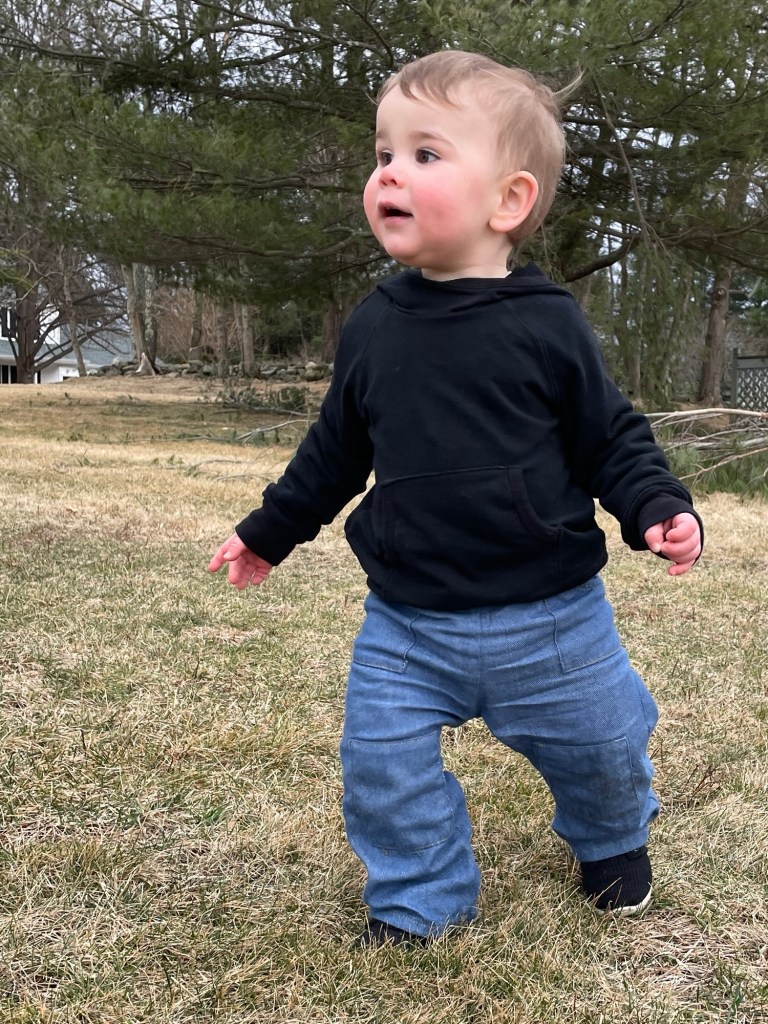
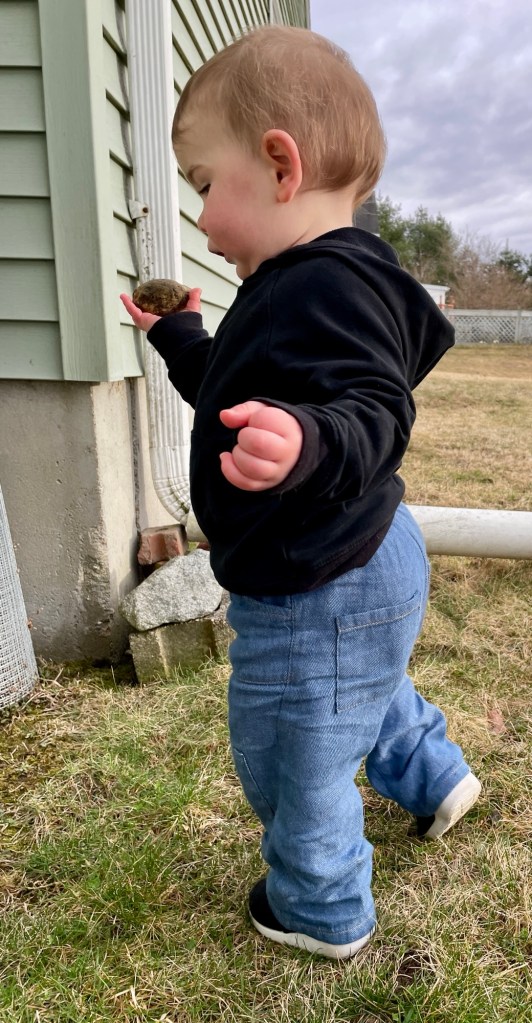
These are the coordinating pants for the Ottobre 4/2022 #1 hoodie. The main design feature are the curved front pockets finished with ribbing.
Materials
I used the same cotton rub knit and rayon/lycra French terry I used for the coordinating hoodie.
Fit, Alterations, and Construction
I made a size 86. He fits perfectly into size 80 right now but I want to reuse them in the fall.
I made no alterations. They are really long right now and I rolled up the leg cuffs all the way. My son has short legs to begin with so I’m not surprised they ended up too long!
These pants ended up being really quick and easy to construct. The ribbing makes quick work of the curved pocket edge. When I added the elastic I just serged it to the edge of the waist then turned it over and topstitched with a wide coverstitch.
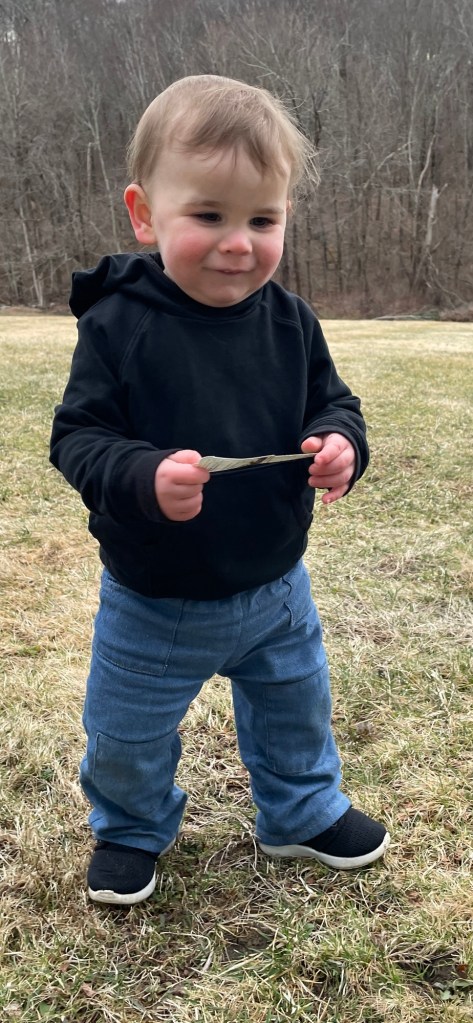
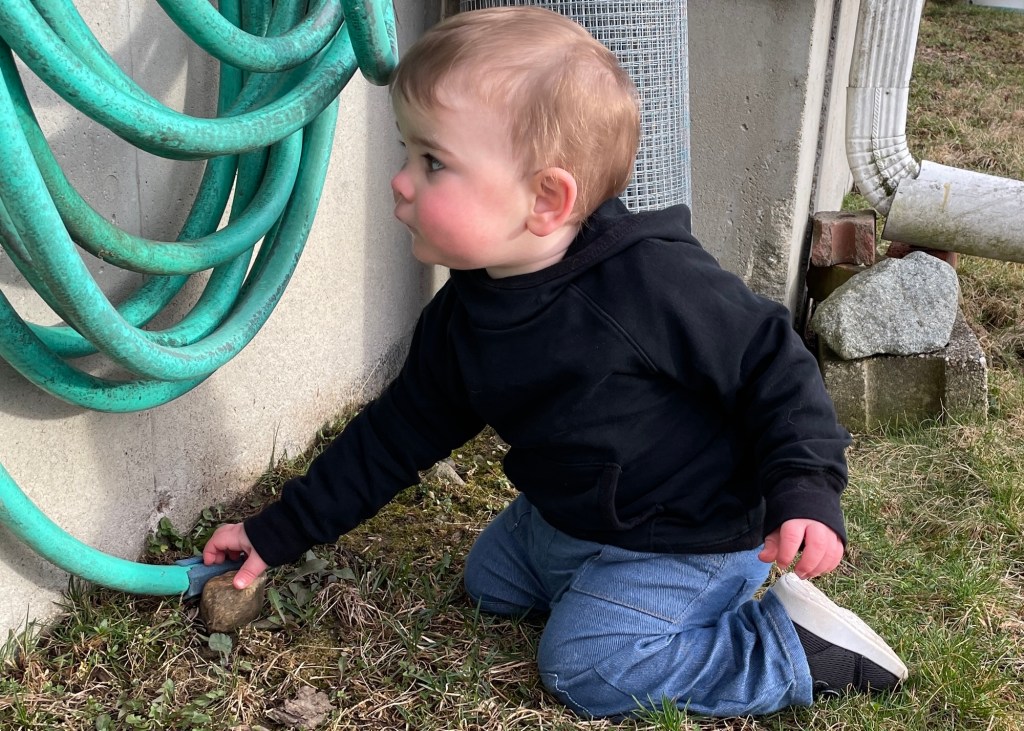
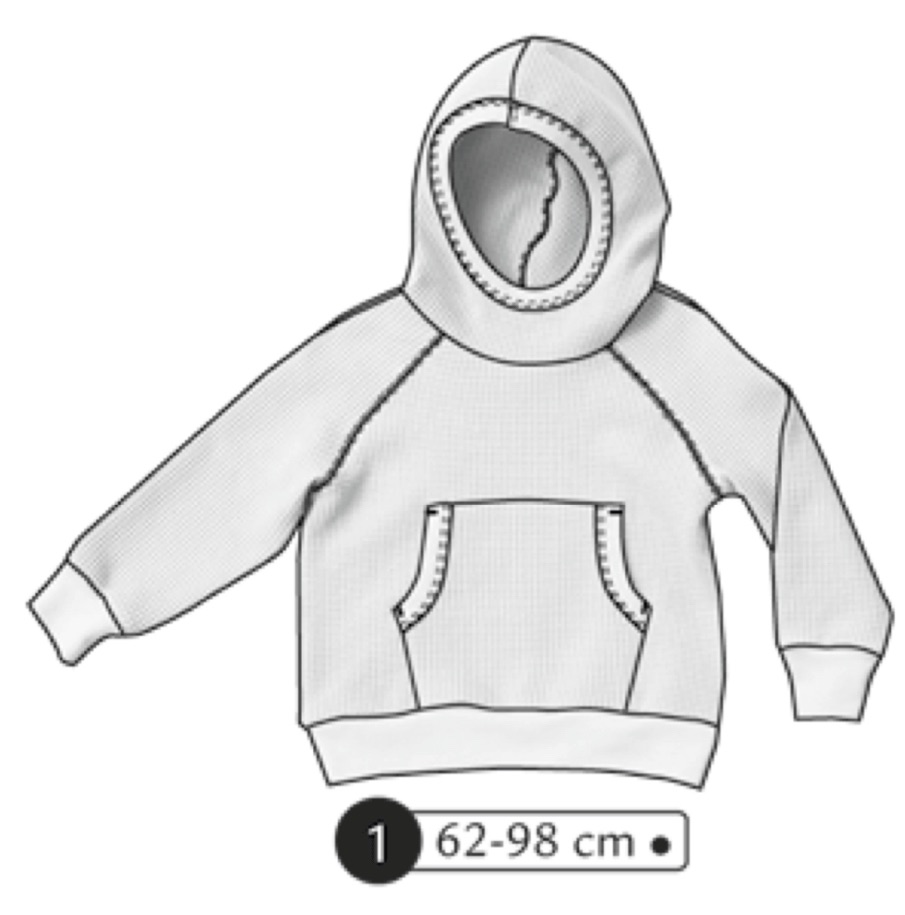
Ottobre 4/2022 #1 is a hoodie with raglan sleeves with darts, a front kangaroo pocket, and a close fitting hood with darts. The edge of the hood is finished with ribbing. Ribbing is also used for the cuffs and hem band.
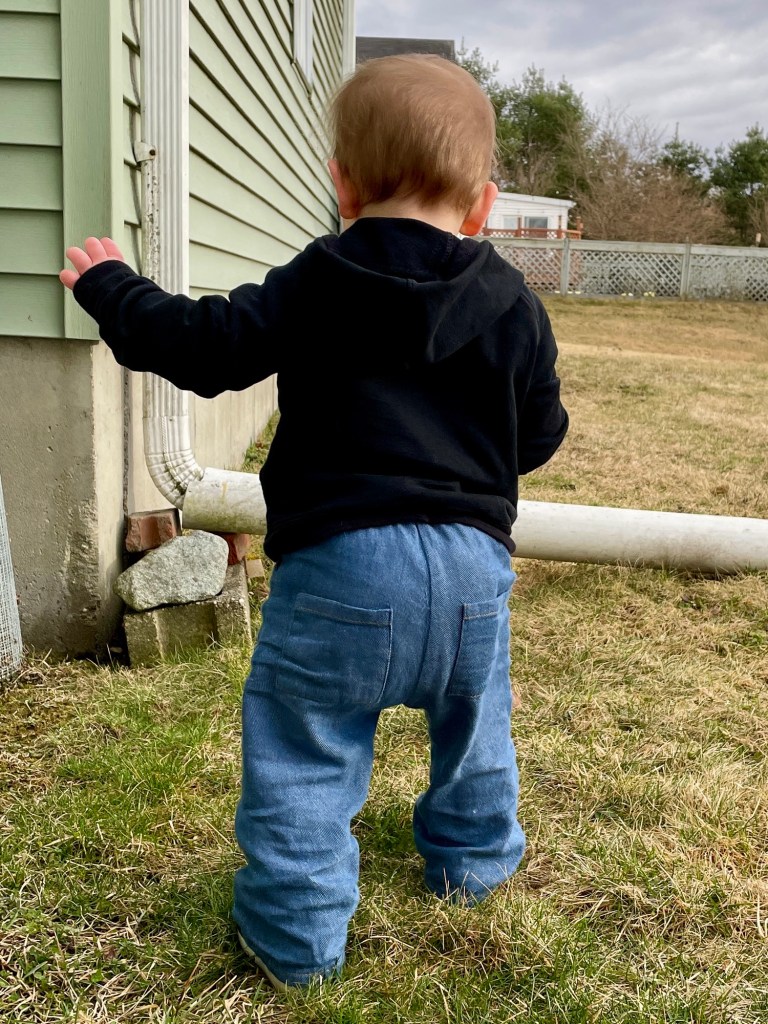
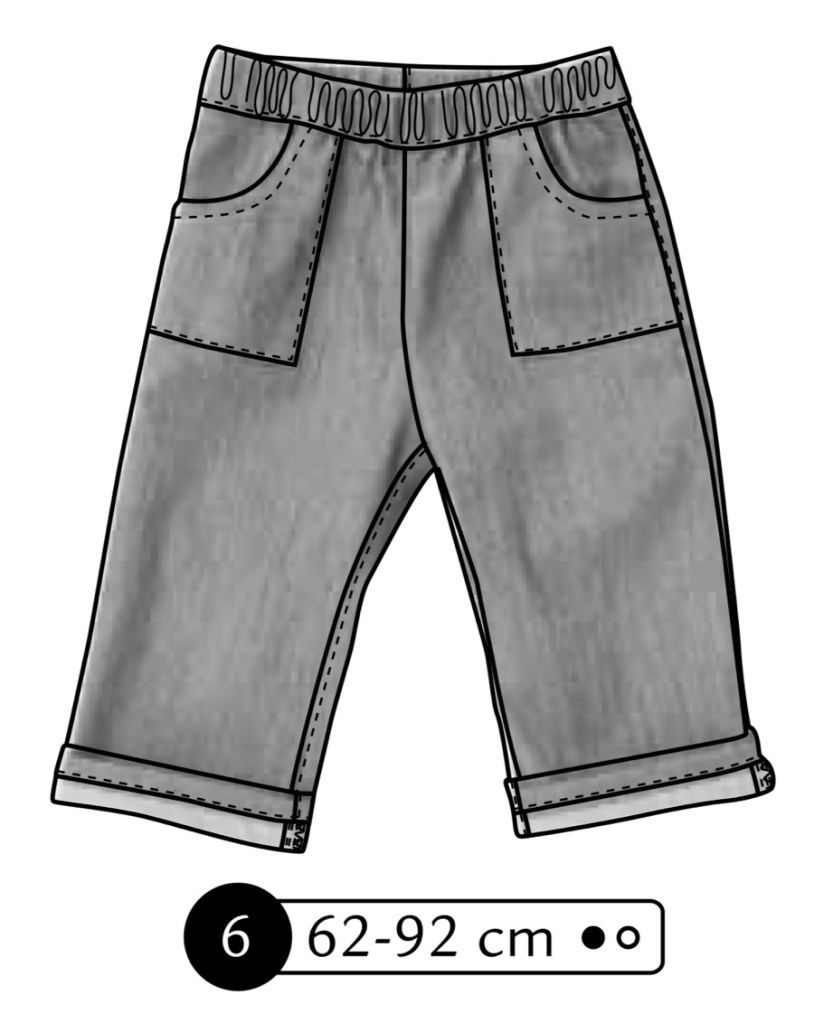
Ottobre 1/2020 #6 is a baby jeans pattern. The edges of the front patch pockets are finished with self fabric bias binding. The waist is encased elastic, so these just pull on.
Fit and Alterations
I made both of these in size 86. When I measured him last month he was 32” tall and 25 pounds. Size 80 is perfect on him right now, but since I’m hoping to use them again in the fall I decided to size up.
I kept the hoodie as is; for the jeans I added knee patches. Up until recently he was a knee walker (and he would ONLY walk on his knees) and as a result half of the pants I made him last fall have holes in the knees now. Now he walks great (on his feet!) but he still does some knee walking and is often on his knees when playing outside, so I’m hoping the patches will help prolong the life of these jeans.
Materials
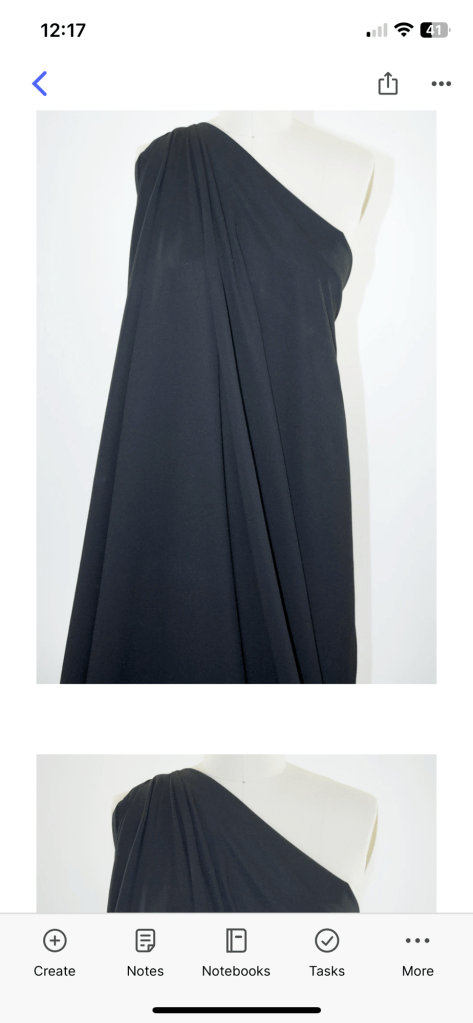
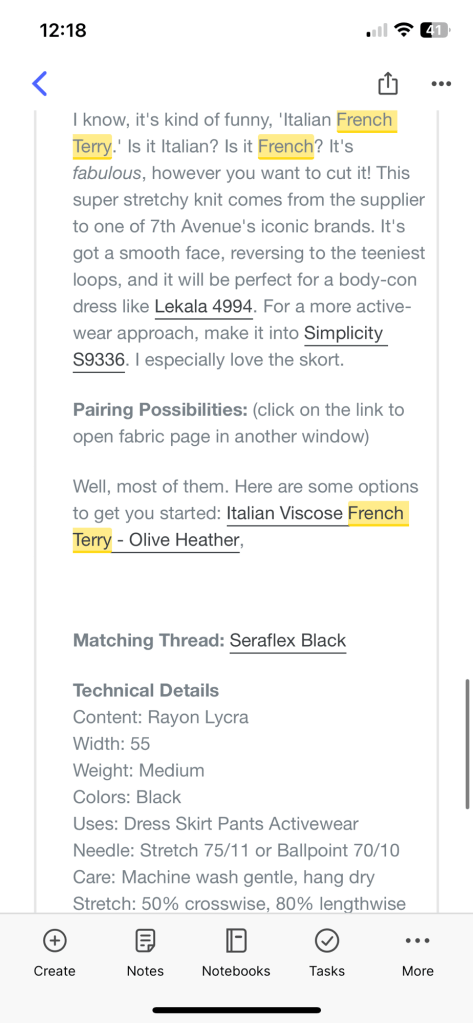
For the hoodie I used a rayon/lycra French terry purchased years ago from Gorgeous Fabrics. I had originally used this for my first version of my Jalie yoga pants, but unfortunately they haven’t held up well. The fabric is coming apart at some of the seams. I am not sure what’s wrong with it, maybe it’s just old and can’t handle the stress of tightly fitted yoga pants! But it’s perfect for this hoodie since it is so soft and won’t be stretched all the time.
For the hood binding, cuffs, and hem band I used a cotton rib knit from Nature’s Fabrics.
For the jeans I used a lightweight denim from my stash. I have no idea where or when I acquired it. It has a soft, lightweight drape (actually would make a great shirt fabric). The only downside is that the fabric is too soft to hold a rolled up cuff.
Construction
Both of these were pretty straightforward and went together quickly. I will say that for the jeans they have you sew the waistband to the inside first, run the elastic through, then fold the seam allowances over and topstitch in place from the outside. It sounds simple but the elastic makes it fiddly and it was by far the most consuming part of the jeans construction. I would consider just attaching it to the outside first, then topstitch in place from the outside, without folding under the inside seam allowances.
Conclusion
This is a great play outfit for active toddlers!
I use the hoodie all the time now for when we are going out and it’s too warm for his coat but he still needs an additional layer. It fits well over a shirt. I do plan on making him a regular zip hoodie soon but for now this works.
The jeans are working out well too. They’re more durable than his usual sweatpants for playing outside on the ground and being jeans, they go with any shirt in his wardrobe. I would absolutely make the jeans again, but in a stiffer fabric so the rolled up cuff holds better.
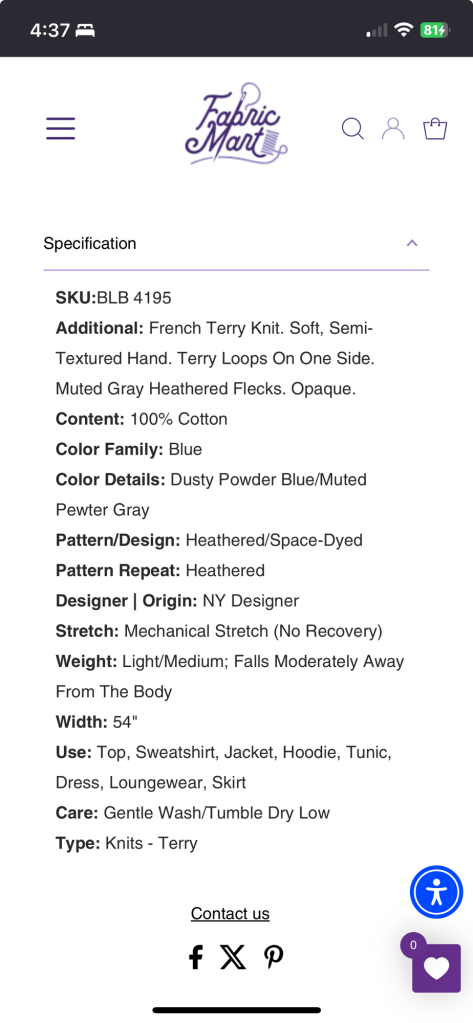
For the first version I used a heathered powder blue cotton French terry from Fabric Mart for the main fabric, and a baby rib knit from Nature’s Fabrics for the ribbing.
I really disliked working with this French terry. It was stiff and bulky and tightly woven, and at some point during the project my Janome 1100D serger got knocked out of time and required a trip to the dealer. Fortunately I have an old Janome MyLock 204D serger my parents gave to me way back when I was still in college and just learning to sew. I hadn’t used it in years, but after giving it a thorough cleaning, a couple of squirts of WD-40 in some strategic areas, and then more cleaning and a good oiling it was up and running. Even though it’s more difficult to thread and more work getting the tension correct, it did a better job handling this fabric than the 1100D.
Despite my dislike for working with this fabric my son has no issues wearing it! I can tell it will wear like iron too. He’s still not walking yet and the drier fall air is making the skin on his knees more sensitive, so I like him to wear pants out of sturdy fabrics.
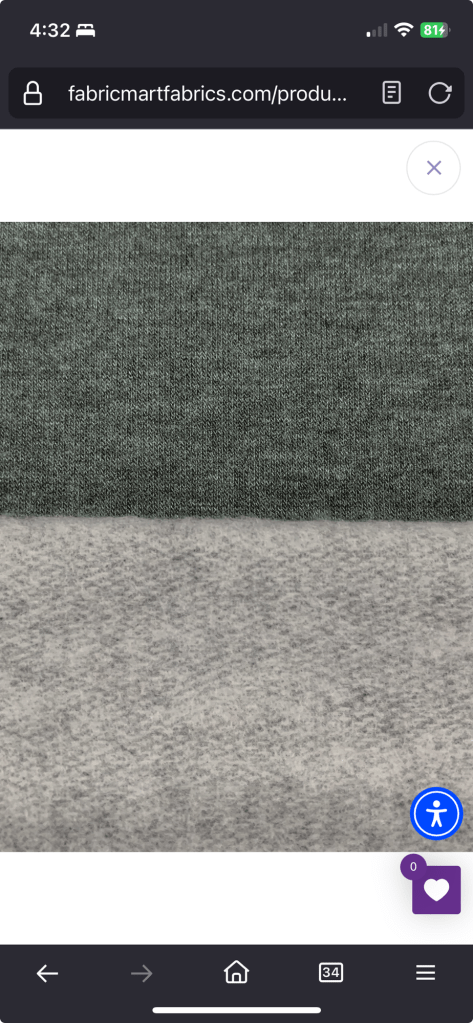
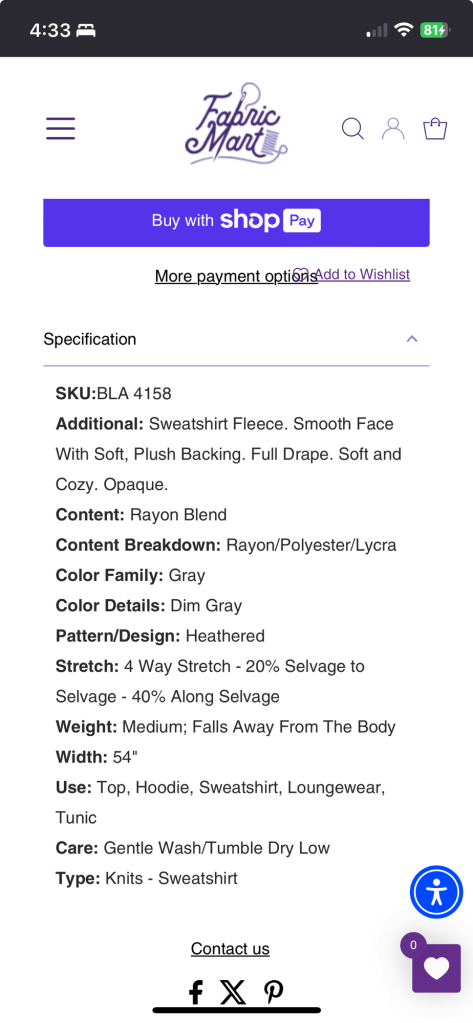
For my second version I used a much softer and flexible rayon/poly/lycra sweatshirt fleece from Fabric Mart for the main fabric. For the rib trim I used a cotton rib knit purchased years ago, likely from Fabric Mart. Since the stretch was greater along the selvage I cut it cross grain. I used the reverse side for the cat appliqué.
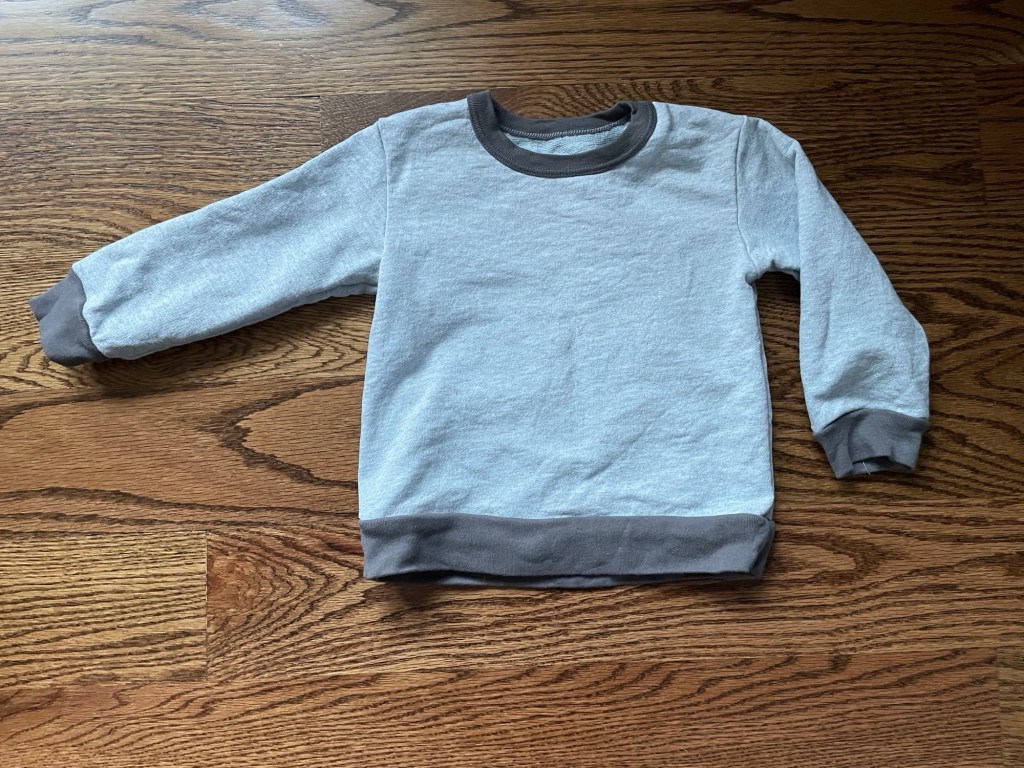
#4: Sweatshirt
This pattern is a simple crewneck sweatshirt pattern, with set-in sleeves and ribbing finishing off the cuffs and bottom band as well as the neckline. the pattern has placement markings for if you want to add a ribbon trim going down the sleeve.
I didn’t make any alterations. I was able to construct this entirely on the serger aside from cover stitching the neck band in place and securing the end of the ribbing once the right shoulder seam had been sewn. Ottobre has you usually attach bindings flat vs in the round and I much prefer it this way. I can adjust on the fly vs trying to guess how long the binding strip should be before attaching it. Once you sew the other shoulder seam you tack the binding/seam allowance in place with a small straight stitch.
After attaching the neckline ribbing to the gray version I felt like it would be nice to do something extra, so I decided to do my first ever appliqué. I chose a cat because my son likes cats and the design was simple. I first copied the cat from Kwik Sew’s Sewing for Baby book. I then cut out the piece of paper, traced it onto a scrap piece of fabric interfaced with Pro-Sheer Elegance with a Frixon marker, then traced the outline of the pattern again onto Sulky Solvy. I didn’t have any fusible web so I attached it to the fabric with a glue stick. Then I put another piece of Solvy on top of the one I glued in place to prevent it from sticking to my presser foot. I used some Magnifico thread from Superior Threads I had in my stash for the outline. For most of the appliqué I used a 4mm wide and 0.75 length zigzag stitch. For the smaller details, like the tip of ear, eyes, and mouth I changed to a 1.5mm width. The nose was tricky, I ended up starting with a 4mm width stitch and kept decreasing as I went further down towards the mouth. The workmanship isn’t as fine as I would have liked and I should have used a dark gray or black for the eyes and mouth, but I do think it helps add more visual appeal without requiring an embroidery machine.
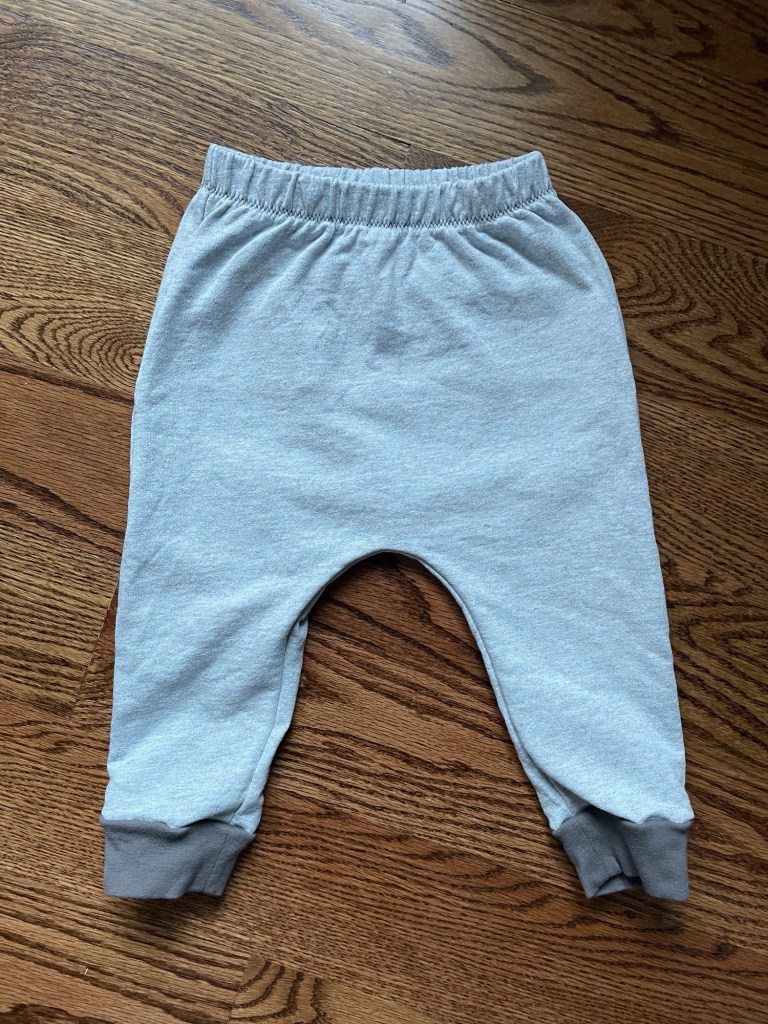
#5: Sweatpants
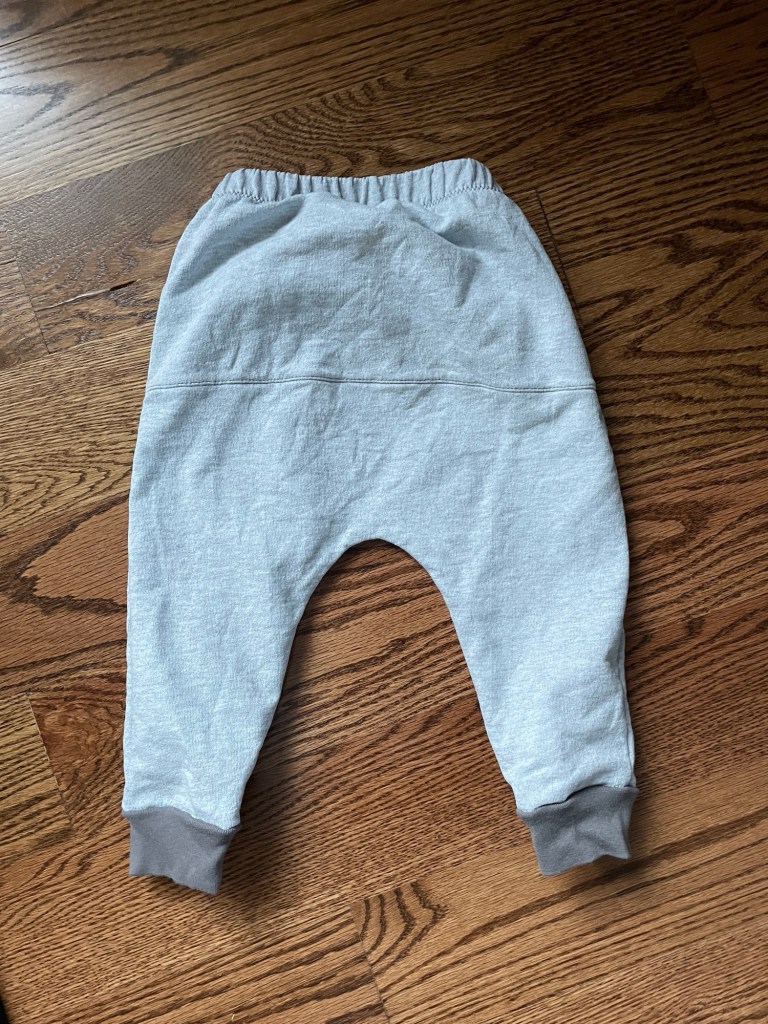
The sweatpants pattern has a two panel back with a horizontal seam and a drawstring at the elastic waist. There’s no crotch seam, instead all the shaping is done using that back horizontal seam. The back horizontal seam and the side seams are topstitched with a double sided cover stitch.
I chose to omit the drawstring because it was more materials to procure with little benefit, IMO.
For fit I did my usual alteration of adding 3/8” height at the center back. I find it makes pants fit better when he’s wearing cloth diapers.
For my first version I topstitched the center back seam with an ordinary straight stitch close to the edge. For my second version I skipped on topstitching the horizontal back seam entirely. I own the Janome Coverpro 2000CPX, which just does normal two and three thread cover stitches, not the double-sided cover stitch Ottobre recommends. I tried experimenting with the honeycomb stitch on my Janome 6500P and wasn’t impressed with the look, so I chose to just press it in place. It seems fine this way. Same for the side seams.
After making the Green Bean Baby pants and now these, I much prefer the Ottobre version. The back horizontal seam gives a lot of shaping over the butt area and the fact that the elastic is sewn in directly to the pants then folded over and topstitched instead of being inserted into a casing makes it much more secure (no rolling!) and easier to construct. The back seam also makes it more husband-friendly, as he struggles knowing the back from the front in home sewn clothes. The Green Bean Baby required more effort to fit and even so I feel like it still doesn’t fit as well as the Ottobre one does. The Green Bean Baby pattern seems short in the torso, long in the legs, and, if you’re making the full length pajamas, also seemed to run large in the neck. It often falls down over my son’s shoulder when he’s crawling around on the rug. Meanwhile the Ottobre patterns seemed to fit more consistently all over. I know Ottobre has a clothing industry background and even designed their own children’s collection at one point, so maybe that’s part of why the drafting seems to be better quality than the Green Bean Baby.